Dress pattern with a classic yoke. Dress for a doll with a round yoke, pattern
Let's take a look at our dresses with yokes...
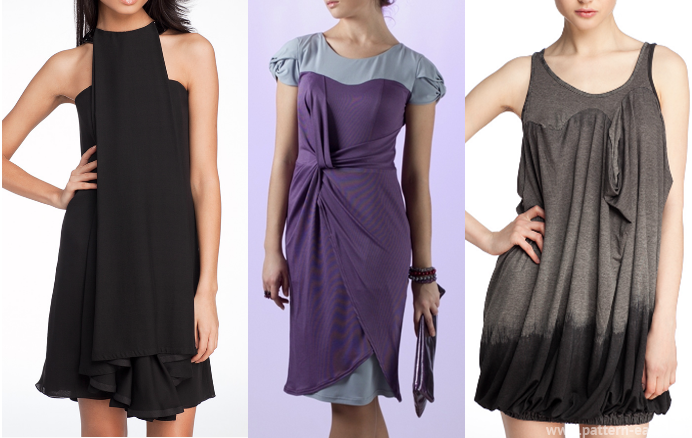
The most common yoke on dresses has the classic outline of the basic pattern. That's what we'll call her - a classic coquette. To model it, all you need to do is cut the basic pattern, stepping a few centimeters down from the chest line. The top half of the base pattern will be called a bodice yoke. And the bottom half of the cut pattern will be called the hem. The hem can be left unchanged (as on the gray dress below). Or you can widen the hem under the yoke and sew on a gather (like on a blue dress). Or you can come up with other cut elements in the hem at your discretion.
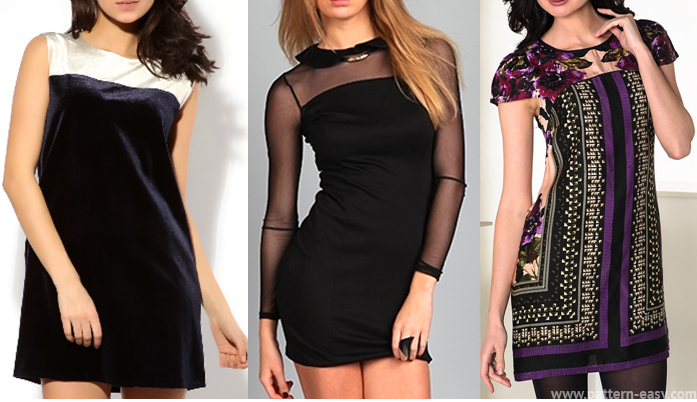
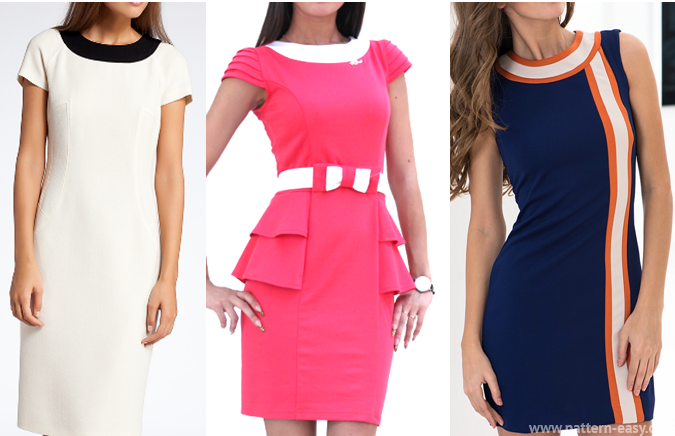
Yoke to the middle of the armhole - this yoke is similar to the previous yoke, with the only difference being that the pattern is cut along a line that is several centimeters above the chest line. The cut line can be strictly horizontal or slightly curved upward in a slight arc. Moreover, such a yoke looks beautiful if it is made of fabric of a contrasting color (as in black and white dress below). Or make a yoke from transparent fabric and decorate it with a collar (like the black dress in the middle). Or (as in the third dress from the photo) you can make a yoke in the same color as the hem, but with a different print.
Here are examples of a curly yoke. As I already said, the cut line of the pattern (dividing it into the yoke and hem) does not have to be even. This can be a line with broken corners or smooth circles. You can decide for yourself what shape of yoke you want to see on your dress.
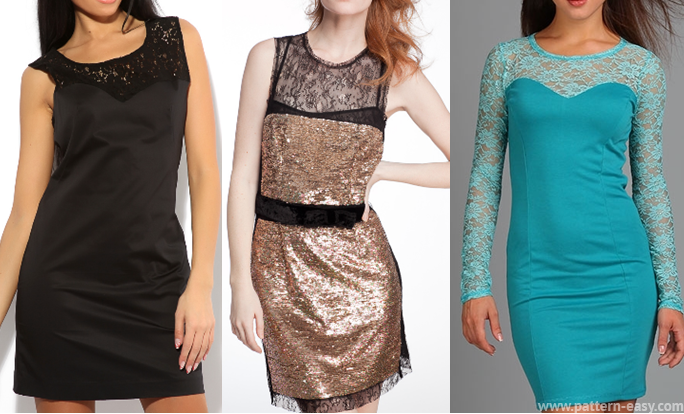
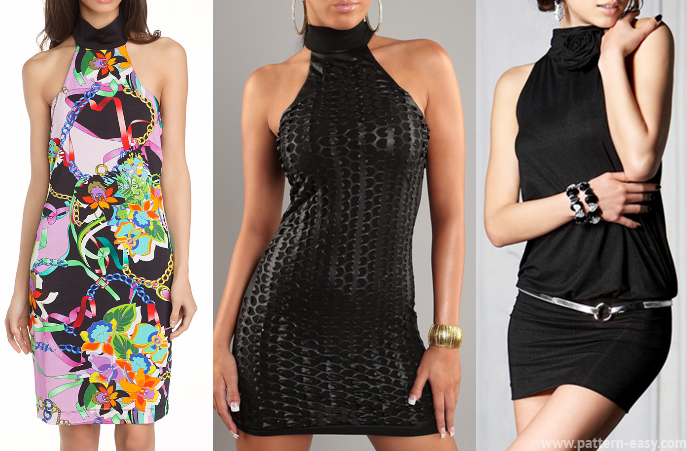
A transparent lace yoke looks especially beautiful and delicate. It can be curly (like the black dress below). It can come with a slight overlap at the hem (like the golden dress in the photo). It’s beautiful when the sleeves of the dress are made of the same lace fabric as the yoke.
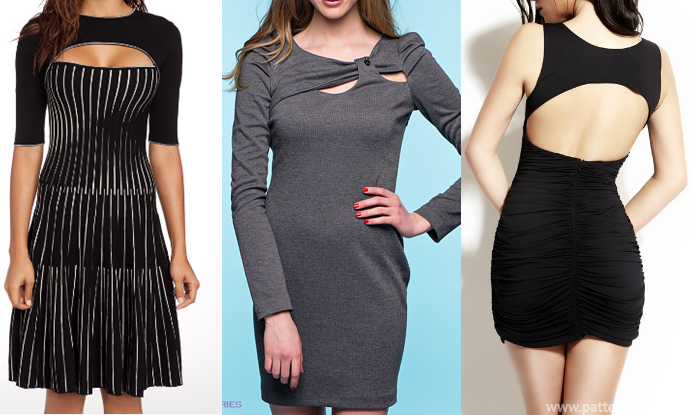
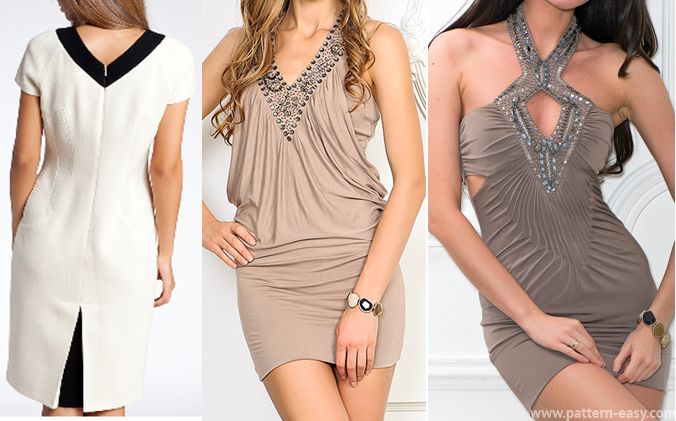
A very unexpected and bold style is created by a yoke with a neckline. Such a neckline can always be played out in an interesting way. For example, add it with a strap and clasp (like on a gray dress). Or make a yoke like this with a cutout on the back. Or fill the cutout hole with thin transparent lace, hemming it to the wrong side along the edges of the yoke and hem.
But here we see a triangular yoke. It may not necessarily be located in the front - in the first photo below it is on the back. It is often found in tunic dresses, where a spacious hem made of thin fabrics is sewn onto it in a light gather. A triangular yoke can have a complicated shape, and is often decorated with a scattering of sequins, rhinestones and beads.
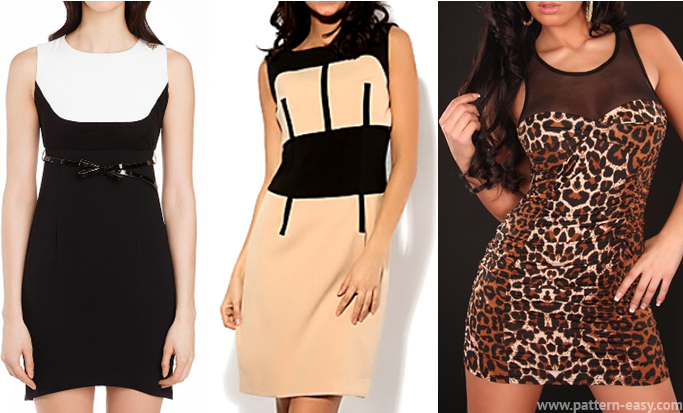
Classic round yoke - most often found in sleeveless summer dresses. In such cases, it is the round yoke that takes on the role of shoulder straps and holds the entire dress on its shoulders. This yoke can be combined with an American armhole (as on the white dress in the photo below). It can be decorated with rivets ( black dress in the center). Or sprinkle it thickly with pearl beads (black and white lace dress with photo).

A round yoke built into the neck - unlike the previous yoke, it no longer serves as shoulder straps. It rather acts as a beautiful neck trim. It is usually made of fabric in a contrasting color. Or it is cut out of fabric of the same color, but different in texture - for example, a lace yoke against the background of a plain dense fabric, a shiny satin yoke against the background of the matte fabric of the rest of the dress.
But this type of yoke can be called a yoke-collar. The side of the yoke where it adjoins the dress has a rounded shape. But the yoke itself, when cut, no longer looks like a crescent or half a donut. It is straighter and somewhat similar to a cowl collar, because, like it, it fits around the neck in loose soft folds.
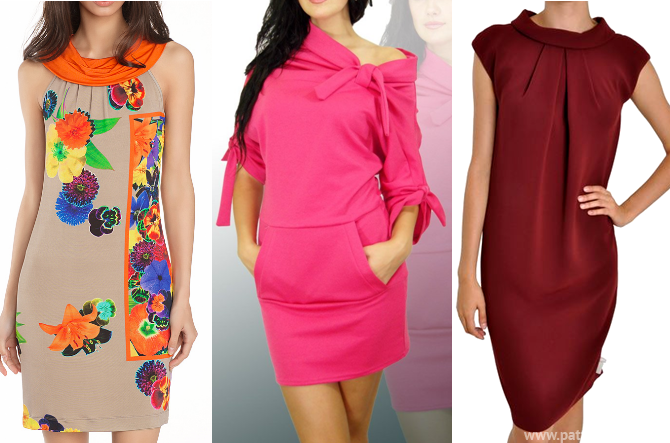
A collar yoke is the same round yoke that fits snugly to the lower part of the neck, clasping it like a collar. When cut, such a yoke looks like a stand-up collar, and is modeled exactly like it.
It is better to start working with a yoke with simple dress styles - first make a dress with a classic yoke under the chest line or above the chest line (the first two types of yoke from our article). Then you can make a summer dress with a classic round yoke. And only then, when you get better at it, gain experience and creative courage, then you can conceive and implement something more daring and interestingly unusual, such as these dresses that combine 2 elements of cut - a yoke + drapery.
And now we will model a yoke using the example of one of the dresses presented in this article. I chose this Nice dress with a floral print and a slightly unusual yoke.
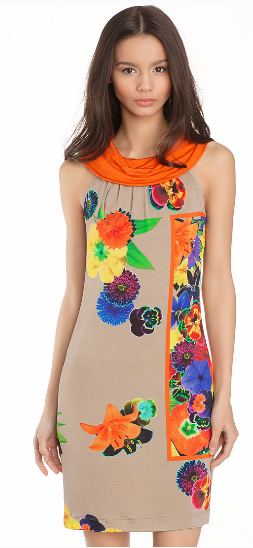
The fact is that the yoke here is made in the form of a collar. That is, it seems to be round, but in fact it is not cut in a circle. Now we will start sewing this dress and you will see and understand everything for yourself.
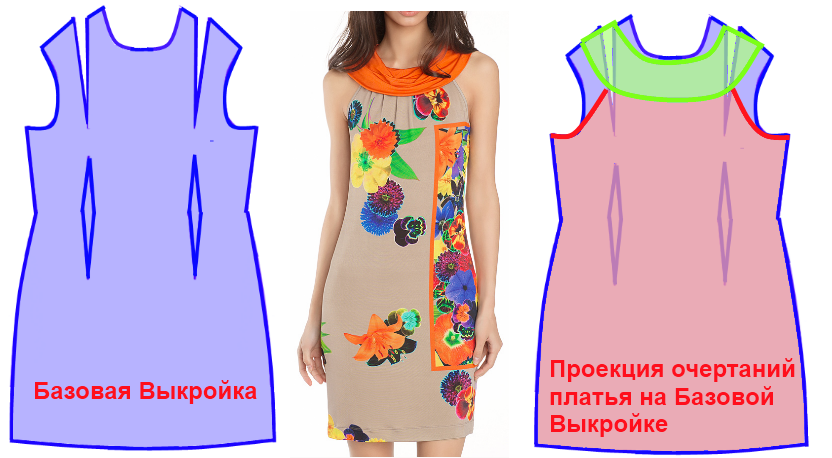
1 Let's project the details of our dress onto the base pattern.
That is, we will now compare our dress with the base pattern - and find the location zones of each detail of our dress on the base pattern.
This projection helps us better understand how exactly this dress is cut. And also take a close look at the dress itself. How do the details of the dress differ from its projection?
Firstly, the projection of the round yoke onto the patterns looks like a flat crescent. But in the photo we see that the yoke-collar has voluminous folds.
Secondly, the projection of the hem on the pattern looks like a tight-fitting silhouette pattern. And in the photo we see the tucks of the hem in the area where it is sewn to the yoke..
This means that the pattern of this dress will not coincide with its projection onto the Basic Pattern. Projection is not enough. The projection will only help us model the correct pattern details for this model. This is what we will now begin to do.
Let's analyze our dress
The round yoke is made in the shape of a collar.
The longitudinal part has small tucks where it is sewn to the yoke.
Let's sketch the outline of the dress (its projection) on the base pattern.
2 Create the correct projection of the yoke.
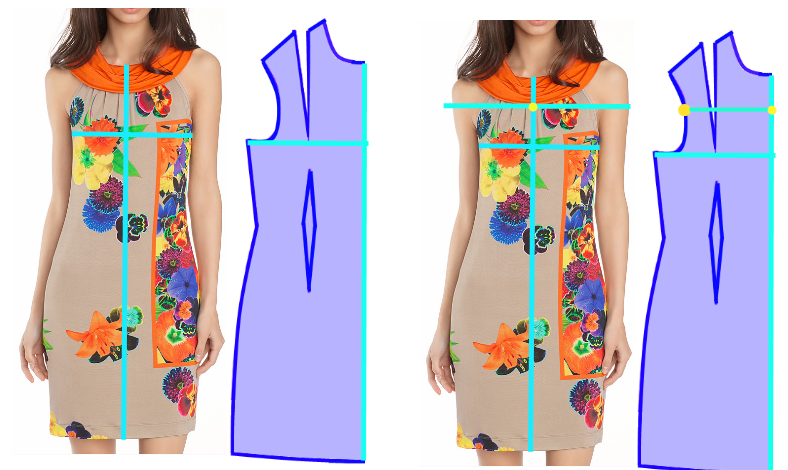
We find the chest line on our dress - and pay attention to the fact that the lower edge of the yoke is exactly in the middle of the distance between the chest line and the base of the neck - we easily find the same middle on our basic pattern - and put a yellow dot exactly in the middle between the chest line and the bottom edge of the neck. This point marks the bottom edge of the yoke.
In the photo of the dress, find the center line and chest line.
We will find the same lines on our basic pattern.
We see that the bottom edge of our yoke runs exactly halfway from the chest line to the neckline of the base pattern (yellow dot).
Now we want to draw our yoke - and it should be equal in width along its entire length. To find out the width, we just need to measure the distance between the yellow dot and the neckline on the base pattern with a centimeter - AND MEASURE THE SAME DISTANCE ON THE SHOULDER LINE. We measure not next to the edge of the shoulder - but somewhere in the middle of this shoulder line in an arbitrary place (as shown in my first picture below).
Next, we connect the marked lines on the shoulder and in the center with smooth rounded lines - and we get the silhouette of a round yoke. Everything is a silhouette of a yoke, i.e. its projection onto the base pattern is ready. It is exactly where it is needed, just like in the photo of our dress.
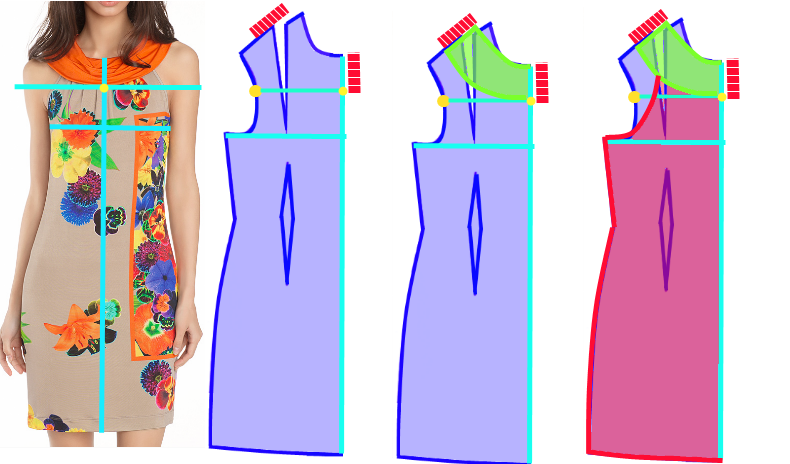
Using a centimeter, measure the distance from the bottom edge of the yoke (yellow dot) to the edge of the neckline on the base pattern
We measure the same distance on the shoulder line, slightly retreating from the side edge of the neckline on the base pattern.
We draw half of a round yoke by hand.
Draw the outline of the hemline under it.
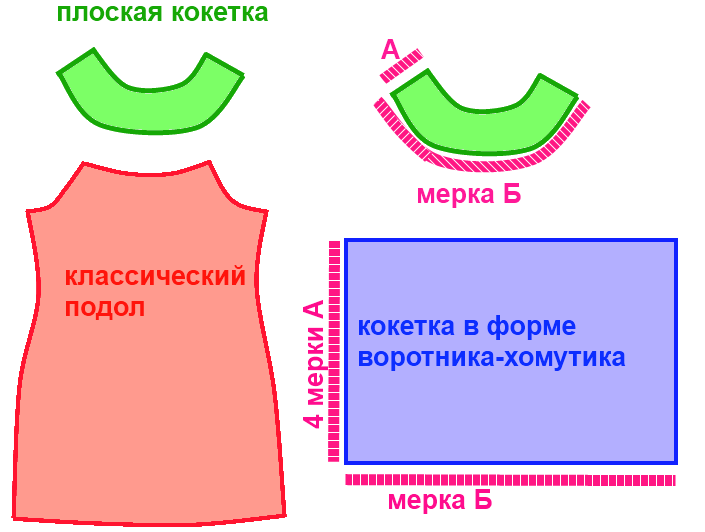
As a result, we get these details - a flat yoke and a classic hem.
To be honest, we already have a pattern with you - according to which you can quite easily sew a beautiful dress on round yoke- so don’t throw away these parts - they are suitable for sewing a regular dress with a round yoke. But our dress is not ordinary - it has tucks along the sewing line of the hem. And it has a yoke with voluminous folds like a cowl collar. Therefore, we continue to model further.
3 Turn a flat round yoke into a cowl collar.
Any cowl collar looks like a rectangular piece of fabric of a certain length and width. And our round flat yoke will help us figure out exactly what length and width this clamp should be. We will now measure it with a centimeter and find out the dimensions for creating the collar of the collar.
The cowl collar on this dress is quite high - look at the photo - if you mentally take the edge of the cowl and pull it up - it will reach our beauty’s chin. And also the collar collar has two folds. This means it should be 4 times wider than our flat round yoke.
We find out the height of the collar this way: measure the width of the round yoke (measurement A) - multiply it by 4 - we get the height of the rectangular collar.
The length of the collar coincides with the length of our yoke - apply a centimeter to the lower edge of the yoke - and measure its rounded lower edge (measurement B) - this measurement will be equal to length our rectangular clamp.
Now all we have to do is draw a rectangle-collar - according to the found width and length.
We model a yoke in the form of a collar-collar from a regular yoke.
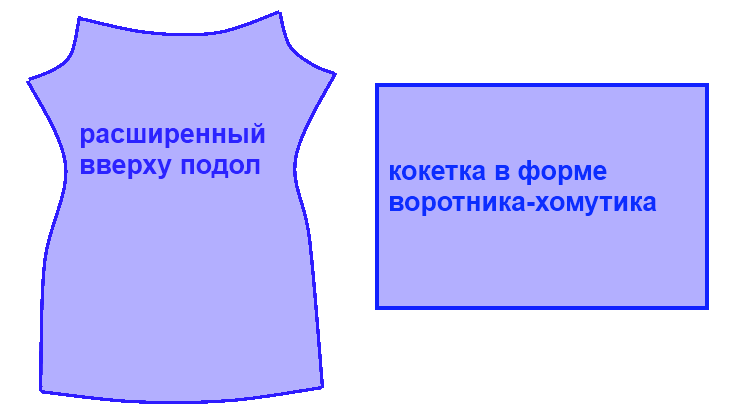
4 Expand the hem.
Now we need to provide an extension at the hem - which will then go into beautiful tucks along the upper edge of the hem (where it is sewn to the yoke). This extension is easy to do. Let's dissect top part hem in the spirit places. We place the cut hem on a new sheet of paper - we move our cuts apart - and trace the expanded silhouette of the hem with a pencil. The resulting figure will be our READY HELM PATTERN.
We widen the hem at the top.

5 We cut out the details of our dress - two of each.
That is - a hem for the back and a hem for the front - a collar for the back and a collar for the front. You can cut out not two collars - but one long - so that it goes straight to the front and straight to the back - then it will have only one seam - at the back in the center of the neck.
But here, for ease of drawing and clarity of explanation, I will talk about two separate pieces of the clamp - front and rear.
We get these details of the dress.
6 We sew a dress.
The hem parts - both front and back - need to be pulled into folds. To do this, we sew the upper edge of the hem with large stitches (on a machine or by hand) - and by pulling the thread, we tighten this upper edge until it becomes the same length as it was before the extension (you can attach it to the projection and see if you have already tightened or needs further tightening).
And we fold the clamp (both front and rear) in half lengthwise. Between these folded collar flaps we will now sew our hem. Or you can not between the sashes - but simply first sew the flaps of the collar with a seam - and then under this, sew the seam from the wrong side and the edge of the hem - it doesn’t matter how you sew - the main thing is that the hem is sewn strictly in the center to the collar folded in half.
Tighten the top edge of the hem.
![]()
As a result, you will get these identical halves of the dress - the front half with a collar and the back half with a collar.
We connect the hem and the collar folded in half.
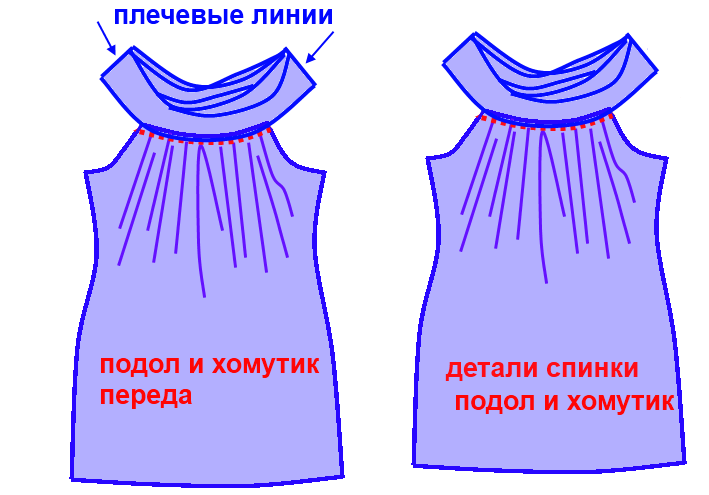
All that remains for you is to sew the shoulder sides of the back and front collar - and sew the sides of the back and front hems. Then process the armhole lines and the bottom of the hem. And our whole dress is ready. Exactly the same as in the picture.
As we can see, modeling a yoke allows us to come up with new styles of dresses ourselves. Experimenting with in different forms yokes, we can get a new interesting dress model every time. And now creating a pattern for this dress ourselves will not be difficult for us.
The principle of constructing a pattern for any small baby doll or baby doll, using the example of Paola Reina, a 21 cm straight-legged baby doll.
In other words, I’m telling you how to do this:
You need a COMPASS, a ruler, a pencil, and a checkered sheet of paper.
We measured the width of the neck. 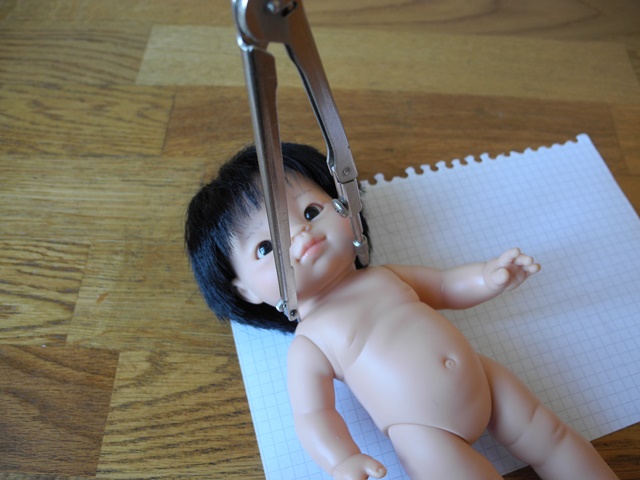
Transfer the measurement onto the sheet. We found the middle of the segment. This is the radius of the first circle, the neck of the future dress. 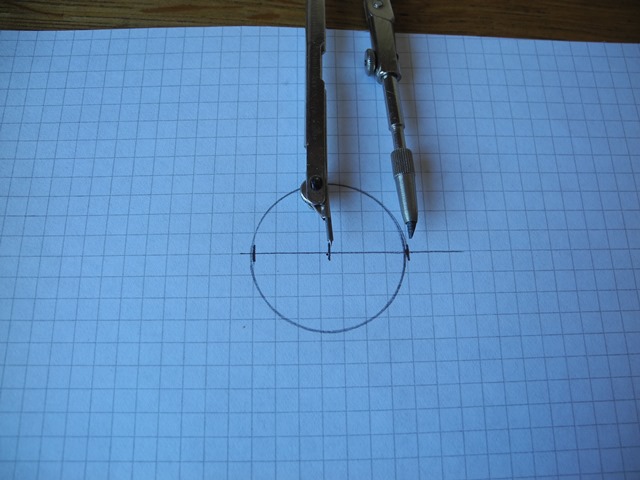
Using a ruler, we measured the width of the future yoke on the doll, from the neck to the shoulder. The shoulder should be covered with a “wing”, but not up to the armpit. 2 cm for this doll. Open the compass 2 cm wider and draw a second circle. 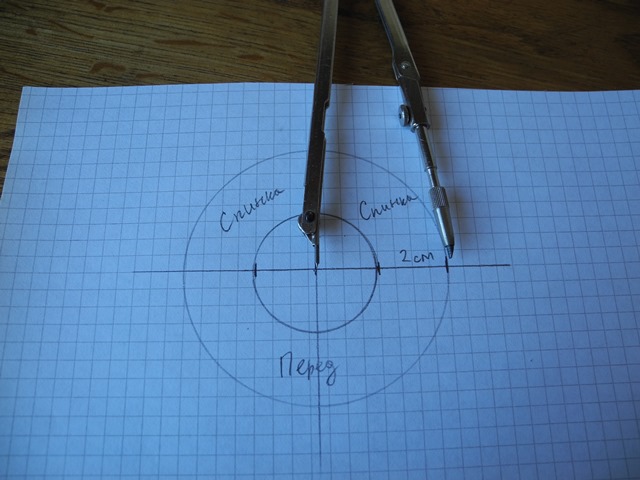
We take into account the shoulder bevel - we make a bevel on the folded half of the pattern, on both sides, 5 mm. 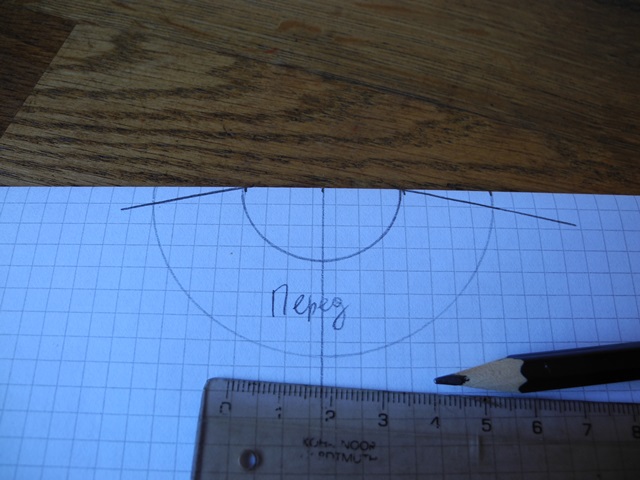
Cut off excess from all sides. A sheet folded in half produces two slices. 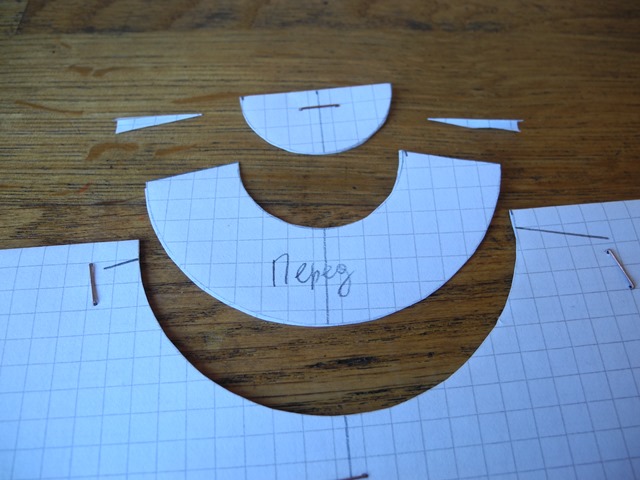
We cut the back part in half and glue it end-to-end on the sides to the front part. 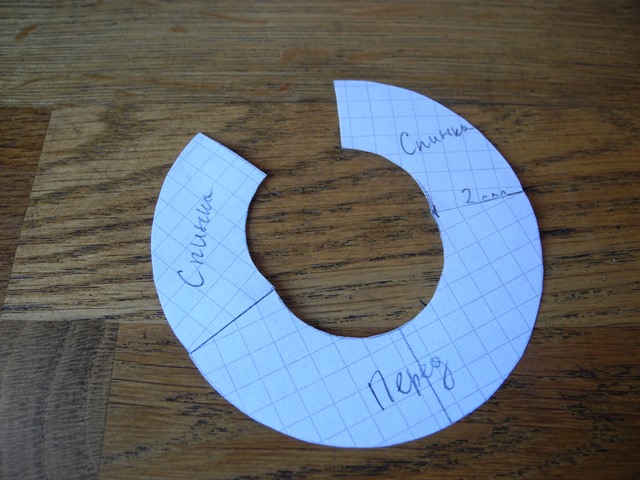
We take into account the overlap of the parts on the back. While the back is simply cut, it fits end to end. But it needs to be overlapped. We glued a piece of paper on both sides and added 5 mm to each side of the back. 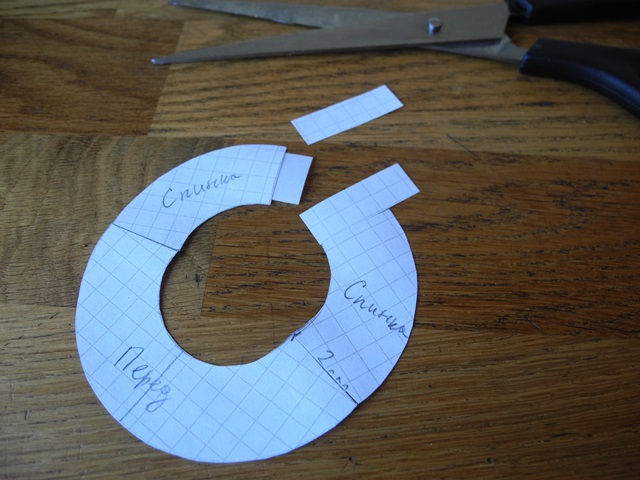
Ready. This is what it looks like from the face. 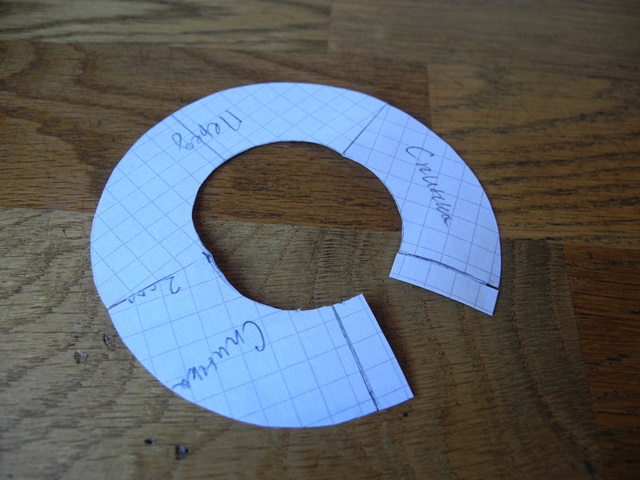
And like this from the inside out. 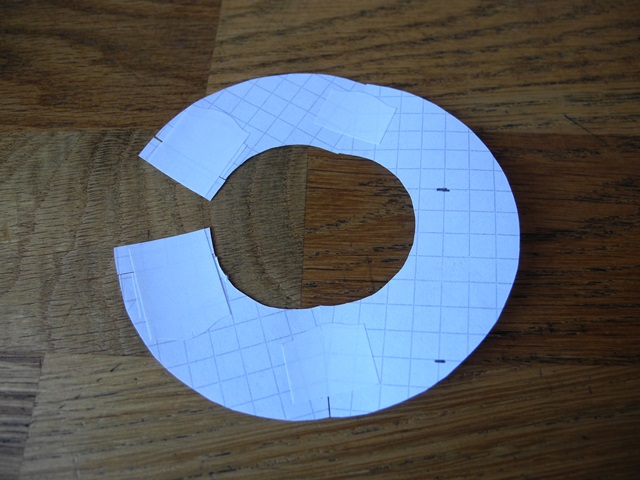
The resulting clamp was tried on the doll. Marked where the boundaries of the armhole will be in front and back on one arm. 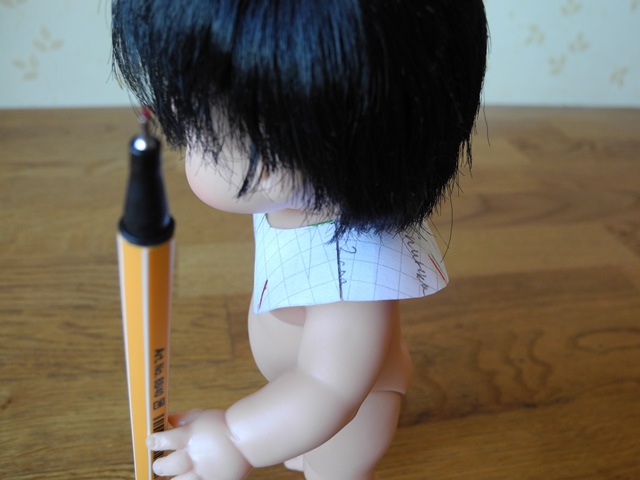
We mirrored it onto the second side of the pattern (marks in red). 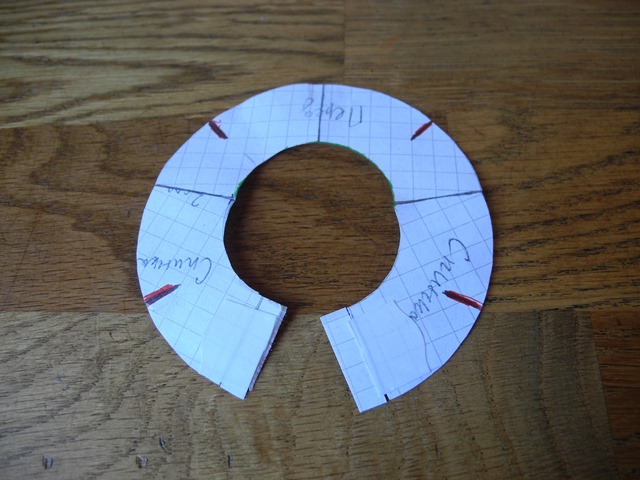
We folded two rags face to face - the fabric of the top and the lining. The pattern has been translated. RED areas DO NOT need to be stitched! 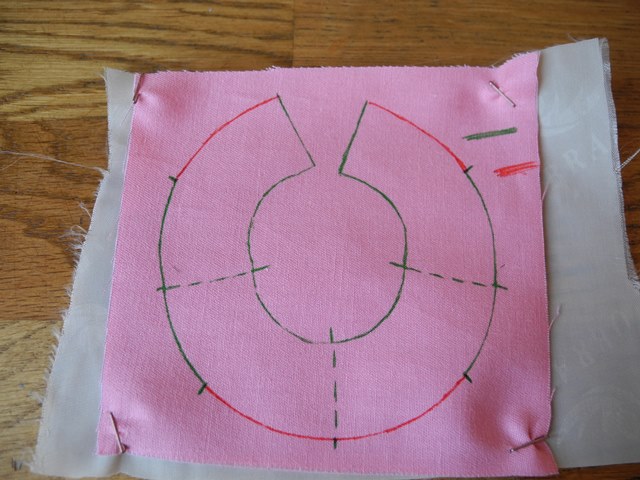
Sew along the green lines. NO NEED for red ones. 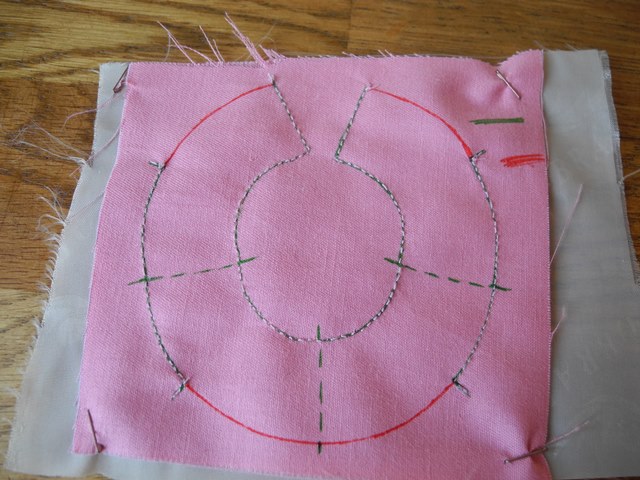
On the other hand it looks like this. 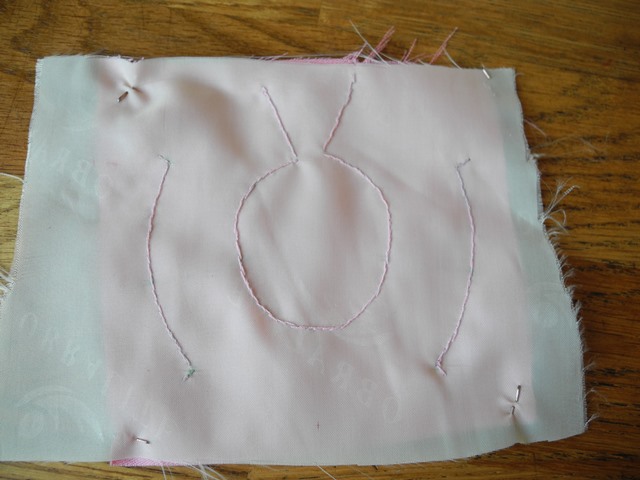
We cut off the excess, leaving an allowance of 5 mm. Notches were made inside the neck circle. 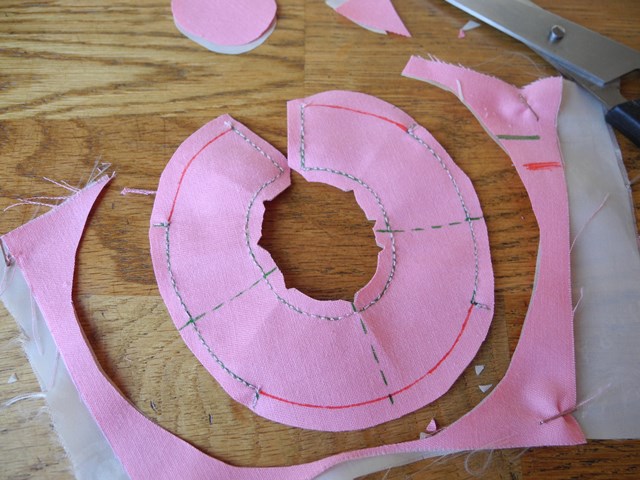
We turned it inside out through the unstitched front and pressed it with an iron. From the face: 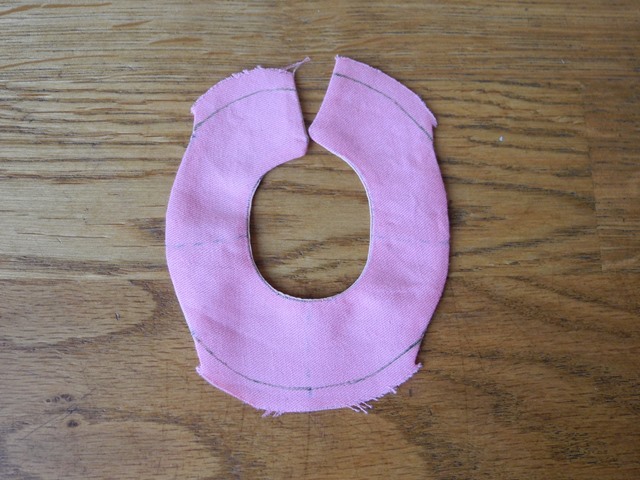
From the inside: 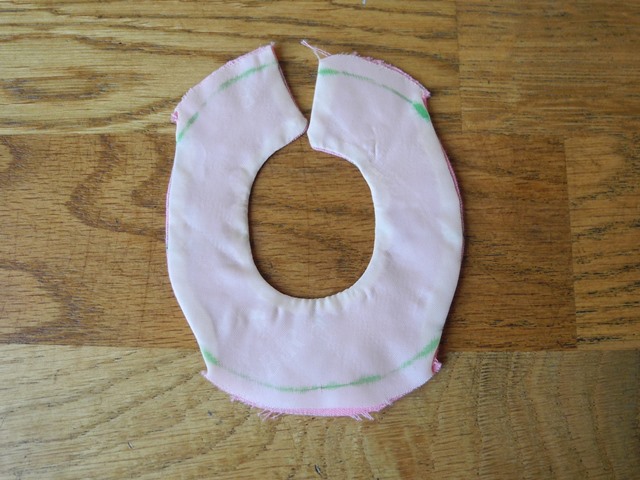
We decide on the length of the hem. I think little children dolls don’t need floor-length dresses. It needs to cover the panties a little - so long body It looks more harmonious on short legs. I put the yoke on the doll, measure from the edge of the yoke to “so that the panties are covered” - it comes out to 6 cm.
We decide on the length of the strip of fabric. It needs to be long. 2 - 2.5 times longer than it would simply be sewn under a yoke without folds. We will spoil the handkerchief; its edge is already hemmed. We cut off strips of 6.5 cm on both sides of the scarf - the length of the hem plus the allowance. 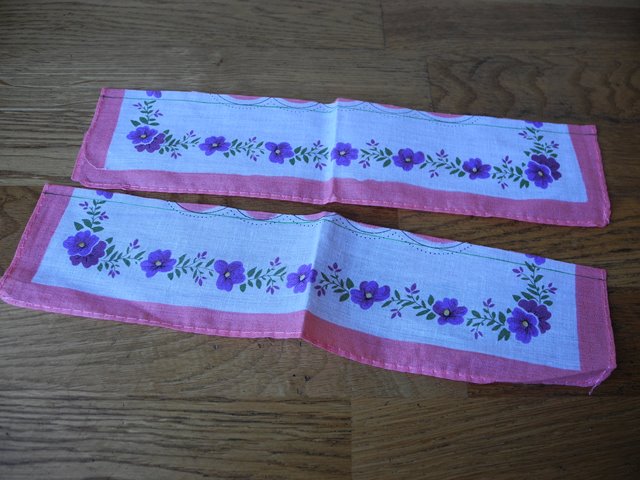
The borders on the sides were cut off at the front. The back was cut in half, we don’t touch the side borders - they will be a fastener. 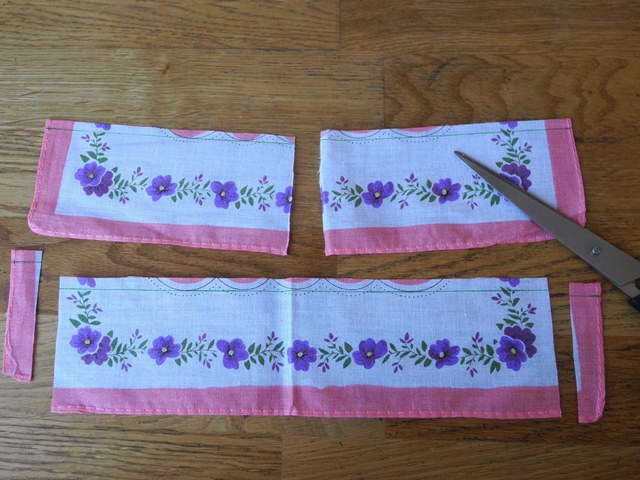
We sew the pieces into one strip. Armholes: simply cut out two 1x2 cm segments (shaded in the picture) and overcast the edges. You can sew right away from one strip of fabric, not from pieces, if you have a long enough strip. 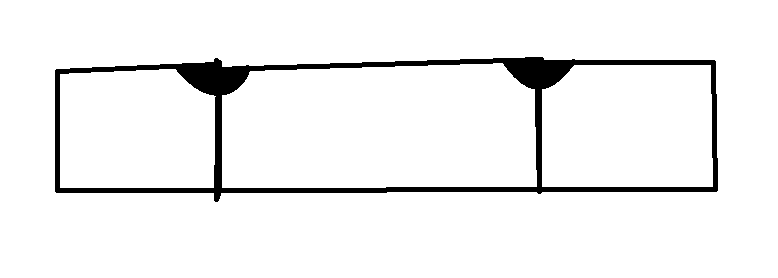
For a larger doll, you can bother with hemming, for small ones, overcasting the edge is enough. 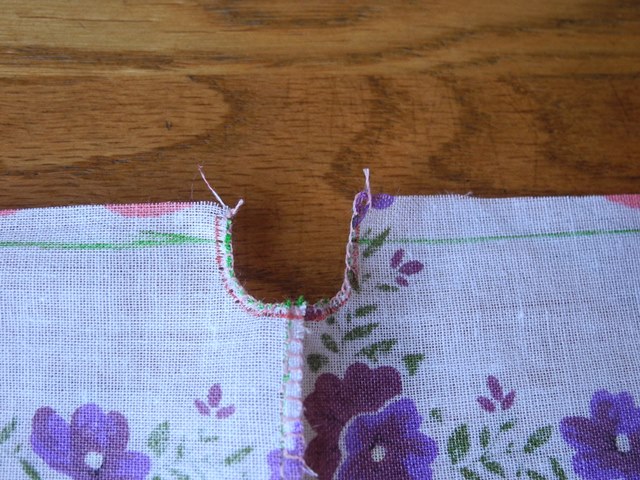
Now we sew the yoke to the hem, simultaneously making folds on the hem. Place the pieces face to face. We start from the back, the front is sewn last. You need to be VERY careful that the seam does not move out of the markings - one part is rectangular, and the second is rounded. I flash it three times. “There”, watching the position of each stitch. Then I cut the allowance to a minimum and sew it “back” - overcast it. And the third time “there” - I lift the cut to the yoke and grab it so as not to change the position. It's clear? This has already been stitched three times: 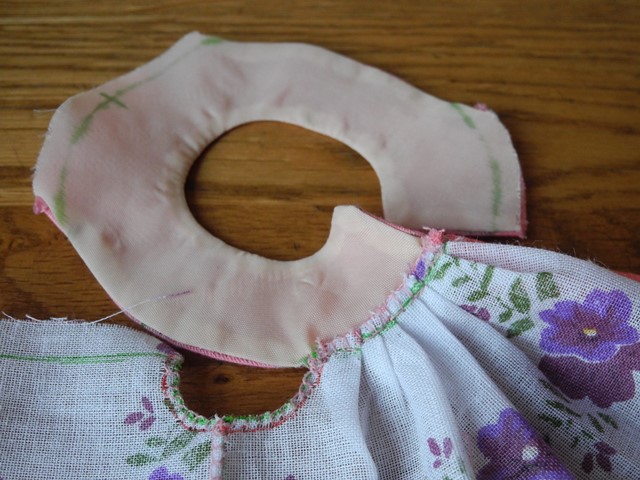
And here I sew on the last part, in front, and so far only once. You will also need to cut off the excess, sweep it and lift it up and grab it. 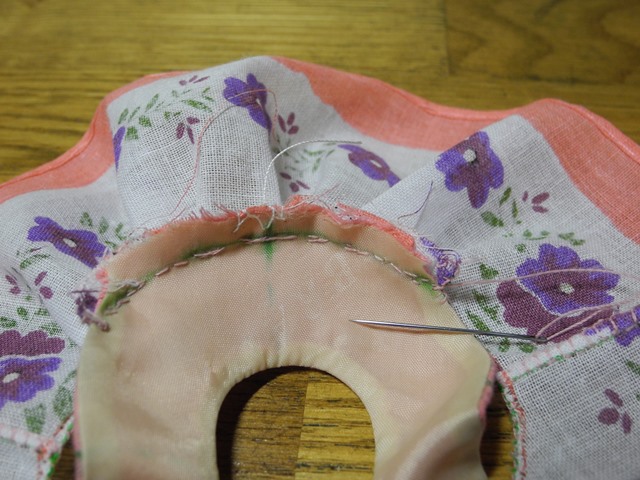
Ready. 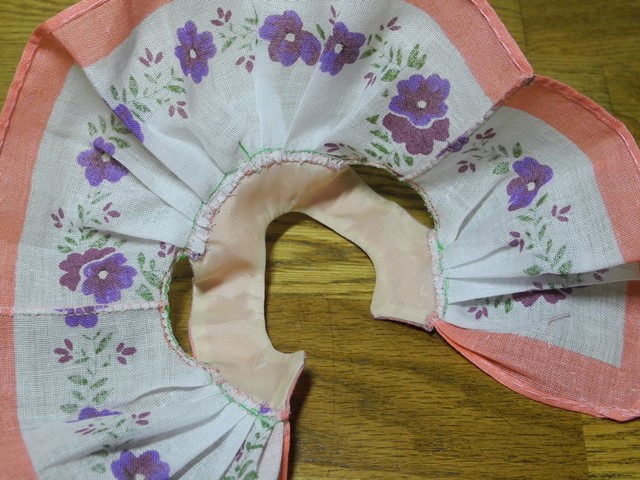
Fastening with thread loops and buttons. You can use buttons, Velcro, hooks - it doesn’t matter. 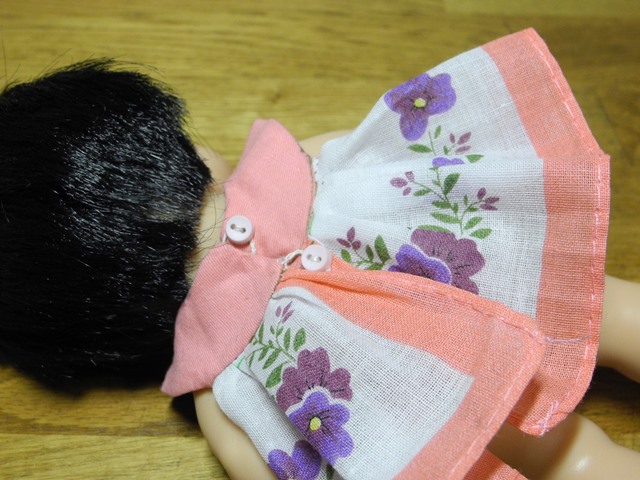
Last step: erasing the markings. The kettle was boiled. A spoonful of washing powder was poured into a ladle with boiling water. Liners and felt-tip pens come off almost instantly. All that remains is to rinse without squeezing and straighten terry towel. Maybe I’ll stroke it some more later, or maybe I don’t need to. Depends on the fabric.
You can put it on and enjoy :)
All my dolls wear dresses built and sewn like this: 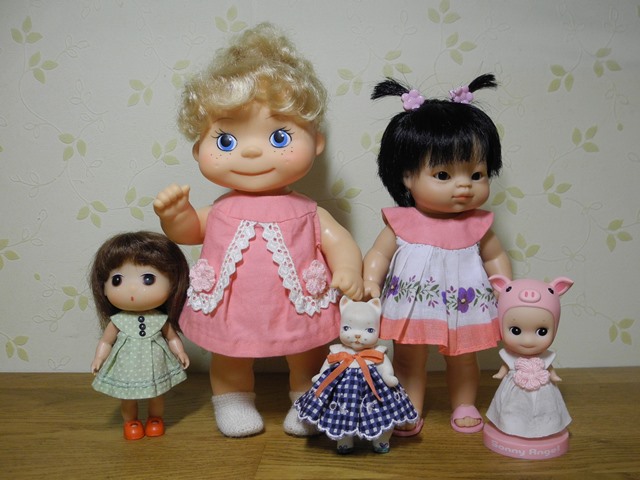
Today, designers very often use a model with a yoke in fashion collections. After all, such dresses are very popular among modern fashionistas. However, not all styles are the same. And it’s worth knowing what types of dresses with a yoke there are.
Dress with round yoke. The original solution is considered to be a model with a rounded top. Such dresses are most often represented by knitted items, where the line between the yoke and the skirt is not highlighted. In this case, the top is made without seams and has a knitted or jacquard pattern, which emphasizes the round shape. Also similar option yokes are found in evening models, where the upper part is made of a sewn necklace or a wide braid.
Dress with lace yoke. Products that combine a monotonous skirt and a lace top are considered very popular models. Such dresses are presented with a full yoke made of openwork fabric, as well as with transparent inserts.
Dress with yoke and elastic band. The most common option is the one with a clear boundary between the top and the skirt. These dresses often have an underbust fit. This style is perfect for pregnant women, but even without a belly, models with a yoke with an elastic band look very romantic and sophisticated. In addition, the elastic belt can fit neatly at the waist, which makes the figure slim and graceful. Models with a loose yoke look very beautiful. In this case, the elastic fits the voluminous product, creating a stylish fold on the chest.


