Download a ready-made feedback form. Beautiful feedback form without images using pure CSS
Hi all! In this article you will learn how to create a pop-up feedback form for html and wordpress sites. First of all, such forms will be necessary for online stores, landing pages, and even simple business card sites, since it is really convenient for the user.
For example, a visitor came to your website, looked through the information he needed, seemed ready to order your product or service, but he didn’t want to call another city and spend a lot of money. It is at such moments that the pop-up feedback form comes to the rescue.
Create a feedback form in htmlSo, let's say you already have a website, and you want to create a form that, when filled out, will allow the user to receive feedback from you. To do this, first of all, the frame itself is created.
Paste the following code into the desired location on the site:
Online applicationIf you wish, you can add additional fields for entering information, or remove existing ones. I strongly do not recommend that you use captcha or other protection against bots in such forms, which will make it difficult for the user to fill out the form.
The code is inserted, what do we see?
The form has appeared, but it needs to be given shape. To do this, add the following styles:
/* Feedback form */ #inline ( margin-left:30px; width:80%; margin:0 auto; background:#fff; padding:10px 20px; ) .txt ( display:inline-block; color:#676767 ; width:190px; margin-bottom:10px; border:1px solid #ccc; padding:5px 9px; font-size:15px!important; line-height:1.4em; ) .txtarea ( display:inline-block; color: #676767; width:617px; margin-bottom:10px; border:1px solid #ccc; padding:5px 9px; font-size:15px!important; line-height:1.4em; height:80px; ) .txt:focus, .txtarea:focus ( border-style:solid; border-color:#bababa; color:#444; ) input.error, textarea.error ( border-color:#973d3d; border-style:solid; background:#f0bebe; color:#a35959; ) input.error:focus, textarea.error:focus ( border-color:#973d3d; color:#a35959; ) #send ( color:#FFFFFF; display:block; cursor:pointer; padding:5px 11px; font-size:1.2em; border:solid 1px #F9F9F9; border-radius:2px; background:#70C6B9; width:210px; margin-bottom:20px; ) #send:hover ( background:#979797; ) /* Feedback form */

This is much better. In any case, you will need to adjust the form to the overall design of the site, so yours will ultimately be different from mine.
It looks like this:

What happens? The visitor clicks on the field, and the script presents him with a ready-made mask with the country code. Quite convenient.
To do this, you need to connect the mask script. You can download it at the very end of the article along with the source code.
We include the script before the closing tag. Don't forget to change the path to the file to your own. Okay, the feedback form has been created, the styles have been configured, now you need to assign a handler to it so that notifications are sent to your email.
To do this, insert the following script before the closing tag:
How does this script work?
The last thing left to do is create a sendmessage.php file, insert the following php code into it and upload it to the root of your site.
That's all, a simple feedback form for an html site is ready. Just don’t forget to change the e-mail in the sendmessage.php file to your own.
Adding a pop-up feedback form to the site
There are times when you need a pop-up form that opens when you click a button. It's very easy to do. As an example, let's take the form we created earlier and work with it.
First, we need to connect jQury fancybox, which you can download at the end of the article.
Add these lines before the closing body tag, just change the path to the files to your own.
And we give it styles.
Modalbox ( color:#FFFFFF; display:block; cursor:pointer; padding:10px 11px; font-size:1.2em; border:solid 1px #F9F9F9; border-radius:2px; background:#70C6B9; width:210px; text -decoration:none; text-align:center; margin:0 auto 20px; ) .modalbox:hover ( background:#979797; )
Please note that the button, when clicked, will cause a pop-up window, must be assigned the modalbox class and the path href=”#inline”. Without this, the pop-up form will not open on the site.
Then we hide the form we created earlier so that it opens in a pop-up window. To do this, you need to replace the #inline styles from old to new.
#inline ( display:none; margin-left:30px; width:80%; margin:0 auto; background:#fff; padding:10px 20px; )
As a result, we get a button like this.

When clicked, a pop-up window with feedback opens.

Again, styles, layout of fields and elements can be changed as you need. For example, to call back from the site, it will be enough to leave only 2 fields - name and phone number, and remove the remaining fields.
Don't forget that in order for the form to work, you will need to add the handler that is published above at the end of the site and upload the sendmessage.php file to the root of the site.
Feedback form for WordPressIf your site runs on the WordPress engine, you can use special plugins to add a contact form. One of the best Contact Form 7 plugins. You can download it from the official website, or through the admin panel in the Plugins section.
After activating the plugin, a new tab will appear in the left menu. Open it and click Add New.

Enter the name of the new form, select the fields that should be in the form. Usually the standard ones that are added automatically are quite enough. Keep in shape.
After saving, a shortcode will appear on the screen, which will need to be inserted into the page where the contact form should be displayed, for example, on the Contacts page.

Copy this code, go to the desired page, select the “Text” format in the visual editor, paste this shortcode and save the page.

Then we check whether the form is displayed on the page and whether it works correctly. To do this, you just need to go to the page where you inserted the code. You should see a form like this:
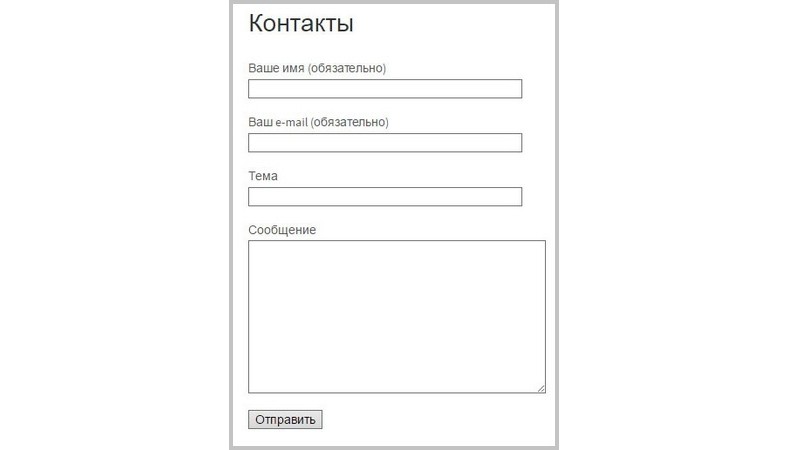
Now your site visitors will be able to contact you through the created contact form in the WordPress engine.
Making a pop-up feedback form for WordPressI myself don’t like adding unnecessary plugins to this engine, as they load the site, slowing down its work. Therefore, for a pop-up form I usually use 2 options.
The first method has already been described above, so let's move on to the second.
To begin, paste the following code right after the opening body tag.
X
Let's figure out what is what:
- A link with id=”callme-open”, when clicked, our form will open. Please note that this link should not be inserted after the open tag, but in the place where you want this button to be located. Usually it is added to the right corner of the header, next to your company phone number.
- The bg-b block will create a darkened site background when the popup form is opened.
- The callme block will contain the feedback form itself.
- X – this will be our cross in the corner of the form, when you click on it the form will close.
- Well, the php code in which the shortcode of the Contact Form 7 plugin will be launched.
Please note that your form id and name may differ from mine. New code has been added, now we give it styles.
Bg-b ( position:absolute; width:100%; height:100%; left:0; top:0; background:rgba(51,51,51,0.55); z-index:1000; ) body ( position: relative; ) .callme ( position:fixed; top:30%; left:50%; width:300px; margin-left:-150px; z-index:1100; background:#fff; padding:20px 20px 10px; border- radius:4px; ) .callme small ( position:absolute; right:10px; top:10px; font-size:15px; cursor:pointer; )
Save the code and check it. The form should now be positioned in the middle of your screen, with a translucent darkened background behind it. Everything is fine, but the last thing left to add is a script that will open and hide this form when you click on the necessary buttons.
This script must be inserted into the footer file, before the closing body tag.
The final touches remain and the pop-up form on WordPress will be ready. Add display:none style to the classes .callme and .bg-b. This is necessary so that the form does not appear on the screen when the site is launched.
We have discussed with you several options for creating a form for a call back. I hope you don't have any problems implementing the form on your site. If you have any problems or questions, you can always get advice in the comments.
UPDATE 06/06/2018In the latest versions of WordPress, jQuery scripts do not work with the $ symbol, so you should take this into account and replace $ with jQuery
Quite often there is a problem in which an end-to-end form on a website stops sending on internal pages. To prevent this from happening, specify a full let in the sendmessage.php file in the handler. For example, like this:
Url: "http://site.ru/sendmessage.php"
And you can download the sources of the first two forms by
UPDATE 07/04/2018Due to numerous requests, the feedback form has been modernized. Now it takes into account the checkbox for consent to send data in accordance with the legislation of the Russian Federation No. 152-FZ “On Personal Data”, adaptability to any screen resolution has been improved, js and css files have been compressed.
You can now view an example, as well as download the sources of the updated feedback form and pop-up form online, using the links.
In response to such a question, the first thing that comes to mind is: “Comfortable and working.” And this is generally logical. Otherwise, what is the point of having a beautiful feedback form on the site that is not used? But first things first.
Many forms - one goalLet's start with what are feedback forms on the website for? The website owner must be able to reach the visitors of his website. People strive to save their time on searching for information about the products they need, clarifying their qualities and characteristics, prices, and, most importantly, placing an order. Feedback forms are an important channel through which communication occurs between a site visitor and its owner, seller and buyer. If this communication channel does not work or is inconvenient for the visitor, he may abandon the idea of contacting you, and, therefore, the idea of becoming your real client.
How regularly and actively feedback forms are used on your website will tell about your website no worse than visit analytics.
This logically follows the conclusion that has already been stated above - feedback forms should be convenient and should work!
 It is worth noting that the second part of this conclusion depends not only on correct programming. From the technical side, the form may work perfectly, but the operator must quickly respond to requests coming from the site. Otherwise, feedback forms will be useless. If the operator calls the visitor back in two days, the need to order a product or service from the person may simply disappear.
There can be a great variety of feedback forms (“Order a call back”, “Ask a question”, “Leave a review”, “Fill out an order form”, “Contact a manager”, etc.), and they can be used for different tasks. But everyone will have essentially the same goal - to ensure a connection between a site visitor and its administrator or owner, to obtain the visitor’s contacts for further interaction with him.
Seven tips to rememberLet's remember a few simple rules that need to be taken into account when developing and posting FOS on the site.
The form should be positioned so that it is convenient for the visitor to find it.
Place the form in a visible place - so that your site visitor does not have to make an effort to find a feedback form among many different elements on the page or endlessly scroll down the page.
Traditionally, forms can be placed in the website header or on the contact page.
If necessary, you can duplicate key forms in the footer so as not to force visitors who have viewed the entire page to scroll up again:

If there are pages with a product or service that has a special offer and a visitor can get it through an online order, place a quick call or order form on this page.
In addition, this will allow you to “hook” a visitor who is already interested in the product or service. The visitor looked at the description, guarantees, prices, decided that the product or service suits him, and so, we immediately offer him, without leaving this page, to leave a request to order this service.
The form must be displayed and work equally correctly on all devices and in all browsers.
Or briefly - check the cross-browser and cross-platform compatibility of the feedback forms on your site. The form may be visible and easy to fill out on a laptop or desktop computer, but on a tablet the data entry field may be too narrow and awkward to enter text on the touch screen. Will the client then try over and over again to enter their details in order to contact you? The answer is obvious.
The form should be short and clear.
What does it mean? The form should not consist of a large number of fields or filling steps. Unless, of course, there is a strict need for this. People strive for simplicity; they don’t want to spend a lot of time figuring it out and filling out ten thousand fields.
If the service involves obtaining fairly detailed information, make it easier for the client (if this is possible, of course). Highlight a few key fields that need to be filled out:

Looks more convenient than, for example:

It’s better to call back and verbally clarify everything you need, but make it easier for the visitor to fill out the form. And thereby increase the chances that he will contact you!
Continuing the theme of clarity, pay attention to the fact that the form has a title - “Order a call back”, “Order a call to a surveyor”, “Order a free consultation”, etc. It is better to duplicate the same header in electronic notifications that will come from the form to your email. Then not only will the visitor to your site not get confused and forget the application for what exactly he is filling out. But you yourself will receive clear information about what information was of interest to the visitor who submitted the request. This will help you quickly navigate further communication with the visitor and build a dialogue correctly.
The form should have a pleasant and practical design.
 All fields must be clearly visible. If you use a lot of colors when creating a form design, you should pay attention to ensure that there are not too many of them, that they are combined and not overly bright. The person filling out the form should not strain their eyesight. The same applies to choosing colors for text messages.
It is better to avoid combining dark on dark. If, for example, on a dark blue background you make a dark red or dark green inscription “Your message has been sent,” it simply will not be visible.
The form must contain a call to action.
A small touch that encourages the visitor to take or complete an action. In our case, send a message from the site!
It is also better to highlight the button in a contrasting color. Together with a call to action, this will make it noticeable and attract the visitor's attention.
The form should roll up easily.
So, the form is easy to find, it has a nice design, and is convenient to fill out. What else?
Don't forget to ask the developers to add a "cross" to the form so that you can close it. Or configure the form to automatically collapse after filling it out.

It seems like a small thing, but it can spoil the overall picture.
For example, a visitor left a request on the site and wants to return to viewing the site. BUT! The form hangs, does not disappear, and it is not clear how to close it. Or another option - the visitor changed his mind about writing a request, and decided to call himself. It may turn out unpleasant.
Setting up a response message.

Something like that…
The person sending the message wants to be sure that their message will be received and considered by you. Technically, setting up an automatic notification will not take much time, but it will strengthen the visitor’s confidence that his message will not go unanswered. This is usually used in forms that require you to provide your email when filling out. However, modern services allow you to set up automatic alerts via SMS.
SummarizingThere are a lot of subtleties and other details: you can experiment with shape and design, you can add unobtrusive graphics on the topic, etc. But the basic criteria do not change. To all that has been said above, I would like to add a big, but important, wish - periodically check the operation of the feedback forms on the site. Technical glitches should not be an obstacle to your business!
The feedback form, or to put it another way, is one of the most important elements of any website. And of course, like all other elements of the user interface, contact elements must be somehow externally stylized and designed in order to attract the attention of users and encourage communication.
I offer for your consideration a couple of options for styles of feedback forms, exclusively by means of 3, without the use of additional images in the design. Nothing superfluous, just short code fragments (snippets) for contact forms, made in light and dark colors.
Depending on the color of the main background of the page, the basic background color of the form itself will visually change. The size of the form depends on the size of the container in which the form will be placed.
The Html form framework is standard, the necessary input fields and a “Submit” button are required for linking with CSS, each form element is assigned a specific class, nothing complicated, it won’t be difficult to understand.
| < form> < input name= "name" placeholder= "Enter your name!" class = "name" required /> < input name= "emailaddress" placeholder= "Enter your Email!" class = "email" type= "email" required /> < textarea rows= "4" cols= "50" name= "subject" placeholder= "Enter your message:" class = "message" required> < input name= "submit" class = "btn" type= "submit" value= "Send" /> |
CSS
I won’t go into much detail about the styles, I’ll just note one thing: I used some CSS3 properties in the design, a linear gradient, a shadow effect, slightly rounded corners, etc., I tried to achieve some cross-browser compatibility for these properties, but in older versions of browsers, the form will be still look a little different ((.
| /* Basic form style */ form ( margin: 0 auto; max- width: 95 %; padding: 30px 30px 6px 30px; border: 1px solid rgba(0 , 0 , 0 , .2 ) ; - moz- border- radius : 5px; - webkit- border- radius: 5px; border- radius: 5px; - moz- background- clip: padding; - webkit- background- clip: padding- box; background- clip: padding- box; background: rgba( 0 , 0 , 0 , 0.5 ) ; - moz- box- shadow: 0 0 13px 3px rgba(0 , 0 , 0 , .5 ) ; - webkit- box- shadow: 0 0 13px 3px rgba(0 , 0 , 0 , .5 ) ; box-shadow: 0 0 13px 3px rgba(0 , 0 , 0 , .5 ) ; overflow: hidden; ) /* Message field */ textarea( background: rgba(255 , 255 , 255 , 0.4 ) ; width: 100%; height: 110px; border: 1px solid rgba(255 , 255 , 255 , .6 ) ; - moz- border- radius: 4px; - webkit- border- radius: 4px; border- radius: 4px; - moz- background- clip: padding; - webkit- background- clip: padding- box; background- clip: padding- box; display: block; font- family: "Open Sans", sans- serif; font-size: 18px; font-weight: 300; color: #fff; padding-left: 25px; padding- right: 20px; padding-top: 12px; margin- bottom: 20px; overflow: hidden; ) /* Input fields */ input ( width: 100%; height: 48px; border: 1px solid rgba(255 , 255 , 255 , .4 ) ; - moz- border- radius: 4px; - webkit- border- radius: 4px; border- radius: 4px; - moz- background- clip: padding; - webkit- background- clip: padding- box; background- clip: padding- box; display: block; font- family: "Open Sans" , sans - serif; font- size: 18px; font- weight: 300; color: #fff; padding- left: 20px; padding- right: 20px; margin- bottom: 20px; ) input[ type= submit] ( cursor: pointer; ) input. name ( background: rgba(255 , 255 , 255 , 0.4 ) ; padding- left: 25px; ) input. email ( background: rgba(255 , 255 , 255 , 0.4 ) ; padding- left: 25px; ) input. message ( background: rgba(255 , 255 , 255 , 0.4 ) ; padding- left: 25px; ) ::- webkit- input- placeholder ( color: #fff; ) :- moz- placeholder( color: #fff; ) : :- moz- placeholder ( color: #fff; ) :- ms- input- placeholder ( color: #fff; ) input: focus, textarea: focus ( background- color: rgba(0 , 0 , 0 , 0.2 ) ; - moz- box- shadow: 0 0 5px 1px rgba(255 , 255 , 255 , .5 ) ; - webkit- box- shadow: 0 0 5px 1px rgba(255 , 255 , 255 , .5 ) ; box- shadow: 0 0 5px 1px rgba(255 , 255 , 255 , . 5 ) ; overflow: hidden; ) /* Styles for the submit button */ . btn ( width: 138px; height: 44px; - moz- border- radius: 4px; - webkit- border- radius: 4px; border- radius: 4px; float: right; border: 1px solid #253737; background: #416b68; background: - webkit- gradient(linear, left top, left bottom, from(#6da5a3), to(#416b68)); background: - webkit- linear- gradient(top, #6da5a3, #416b68); background: - moz - linear- gradient(top, #6da5a3, #416b68); background: - ms- linear- gradient(top, #6da5a3, #416b68); background: - o- linear- gradient(top, #6da5a3, #416b68); background- image: - ms- linear- gradient(top, #6da5a3 0%, #416b68 100%); padding: 10. 5px 21px; - webkit- border- radius: 6px; - moz- border- radius: 6px; border - radius: 6px; - webkit- box- shadow: rgba(255, 255, 255, 0.1) 0 1px 0, inset rgba(255, 255, 255, 0.7) 0 1px 0; - moz- box- shadow: rgba( 255 , 255 , 255 , 0.1 ) 0 1px 0 , inset rgba(255 , 255 , 255 , 0.7 ) 0 1px 0 ; box-shadow: rgba(255 , 255 , 255 , 0.1 ) 0 1px 0 , inset rgba(255 , 255, 255, 0.7) 0 1px 0; text-shadow: #333333 0 1px 0; color: #e1e1e1; ) . btn: hover ( border: 1px solid #253737; text- shadow: #333333 0 1px 0; background: #416b68; background: - webkit- gradient(linear, left top, left bottom, from(#77b2b0), to(# 416b68)); background: - webkit- linear- gradient(top, #77b2b0, #416b68); background: - moz- linear- gradient(top, #77b2b0, #416b68); background: - ms- linear- gradient(top , #77b2b0, #416b68); background: - o- linear- gradient(top, #77b2b0, #416b68); background- image: - ms- linear- gradient(top, #77b2b0 0%, #416b68 100%); color: #fff; ) . btn: active ( margin- top: 1px; text- shadow: #333333 0 -1px 0; border: 1px solid #333333; background: #ffCC00; background: - webkit- gradient(linear, left top, left bottom, from( #ffCC00), to(#ff6600)); background: - webkit- linear- gradient(top, #ffcc00, #ff6600); background: - moz- linear- gradient(top, #ffcc00, #ff6600); background: - ms- linear- gradient(top, #ffcc00, #ff6600); background: - o- linear- gradient(top, #ffcc00, #ff6600); background- image: - ms- linear- gradient(top, #ffcc00 0% - moz - box-shadow: rgba(255, 255, 255, 0) 0 1px 0, inset rgba(255, 255, 255, 0. 7) 0 1px 0; box-shadow: rgba(255, 255, 255, 0) 0 1px 0, inset rgba(255, 255, 255, 0.7) 0 1px 0; outline: none; ) |
/* Basic form style */ form ( margin: 0 auto; max-width: 95%; padding: 30px 30px 6px 30px; border: 1px solid rgba(0,0,0,.2); -moz-border-radius : 5px; -webkit-border-radius: 5px; border-radius: 5px; -moz-background-clip: padding; -webkit-background-clip: padding-box; background-clip: padding-box; background: rgba( 0, 0, 0, 0.5); -moz-box-shadow: 0 0 13px 3px rgba(0,0,0,.5); -webkit-box-shadow: 0 0 13px 3px rgba(0,0,0 ,.5); box-shadow: 0 0 13px 3px rgba(0,0,0,.5); overflow: hidden; ) /* Message field */ textarea( background: rgba(255, 255, 255, 0.4) ; width: 100%; height: 110px; border: 1px solid rgba(255,255,255,.6); -moz-border-radius: 4px; -webkit-border-radius: 4px; border-radius: 4px; -moz-background -clip: padding; -webkit-background-clip: padding-box; background-clip: padding-box; display: block; font-family: "Open Sans", sans-serif; font-size:18px; font-weight : 300; color:#fff; padding-left:25px; padding-right:20px; padding-top:12px; margin-bottom:20px; overflow:hidden; ) /* Input fields */ input ( width: 100%; height: 48px; border: 1px solid rgba(255,255,255,.4); -moz-border-radius: 4px; -webkit-border-radius: 4px; border- radius: 4px; -moz-background-clip: padding; -webkit-background-clip: padding-box; background-clip: padding-box; display: block; font-family: "Open Sans", sans-serif; font -size:18px; font-weight: 300; color:#fff; padding-left:20px; padding-right:20px; margin-bottom:20px; ) input ( cursor:pointer; ) input.name ( background: rgba( 255, 255, 255, 0.4); padding-left:25px; ) input.email ( background: rgba(255, 255, 255, 0.4); padding-left:25px; ) input.message ( background: rgba(255, 255, 255, 0.4); padding-left:25px; ) ::-webkit-input-placeholder ( color: #fff; ) :-moz-placeholder( color: #fff; ) ::-moz-placeholder ( color: #fff; ) :-ms-input-placeholder ( color: #fff; ) input:focus, textarea:focus ( background-color: rgba(0, 0, 0, 0.2); -moz-box-shadow: 0 0 5px 1px rgba(255,255,255,.5);-webkit-box-shadow: 0 0 5px 1px rgba(255,255,255,.5); box-shadow: 0 0 5px 1px rgba(255,255,255,.5); overflow: hidden; ) /* Styles for the submit button */ .btn ( width: 138px; height: 44px; -moz-border-radius: 4px; -webkit-border-radius: 4px; border-radius: 4px; float:right; border: 1px solid #253737; background: #416b68; background: -webkit-gradient(linear, left top, left bottom, from(#6da5a3), to(#416b68)); background: -webkit-linear-gradient(top, # 6da5a3, #416b68); background: -moz-linear-gradient(top, #6da5a3, #416b68); background: -ms-linear-gradient(top, #6da5a3, #416b68); background: -o-linear-gradient (top, #6da5a3, #416b68); background-image: -ms-linear-gradient(top, #6da5a3 0%, #416b68 100%); padding: 10. 5px 21px; -webkit-border-radius: 6px; -moz-border-radius: 6px; border-radius: 6px; -webkit-box-shadow: rgba(255,255,255,0.1) 0 1px 0, inset rgba(255,255,255,0.7) 0 1px 0; -moz-box-shadow: rgba(255,255,255,0.1) 0 1px 0, inset rgba(255,255,255,0.7) 0 1px 0; box-shadow: rgba(255,255,255,0.1) 0 1px 0, inset rgba(255,255,255,0.7) 0 1px 0; text-shadow: #333333 0 1px 0; color: #e1e1e1; ) .btn:hover ( border: 1px solid #253737; text-shadow: #333333 0 1px 0; background: #416b68; background: -webkit-gradient(linear, left top, left bottom, from(#77b2b0), to (#416b68)); background: -webkit-linear-gradient(top, #77b2b0, #416b68); background: -moz-linear-gradient(top, #77b2b0, #416b68); background: -ms-linear-gradient (top, #77b2b0, #416b68); background: -o-linear-gradient(top, #77b2b0, #416b68); background-image: -ms-linear-gradient(top, #77b2b0 0%, #416b68 100% ); color: #fff; ) .btn:active ( margin-top:1px; text-shadow: #333333 0 -1px 0; border: 1px solid #333333; background: #ffCC00; background: -webkit-gradient(linear , left top, left bottom, from(#ffCC00), to(#ff6600)); background: -webkit-linear-gradient(top, #ffcc00, #ff6600); background: -moz-linear-gradient(top, # ffcc00, #ff6600); background: -ms-linear-gradient(top, #ffcc00, #ff6600); background: -o-linear-gradient(top, #ffcc00, #ff6600); background-image: -ms-linear -gradient(top, #ffcc00 0%, #ff6600 100%); color: #fff; -webkit-box-shadow: rgba(255,255,255,0) 0 1px 0, inset rgba(255,255,255,0.7) 0 1px 0; -moz-box-shadow: rgba(255,255,255,0) 0 1px 0, inset rgba(255,255,255,0.7) 0 1px 0; box-shadow: rgba(255,255,255,0) 0 1px 0, inset rgba(255,255,255,0.7) 0 1px 0; outline: none; )
Maybe this will be interesting to you: 2. Contact form in light colorsThe second design option for the feedback form is presented in light colors; the dimensions of the form (width, height), as in the first option, are not fixed, and will easily fit into the dimensions of the container where this form will be located.

As in the first option, the Html structure of the contact form is standard, form elements with certain classes corresponding to the classes in CSS.
| < form> < input name= "name" placeholder= "Enter your name!" class = "textbox" required /> < input name= "emailaddress" placeholder= "Enter your Email!" class = "textbox" type= "email" required /> < textarea rows= "4" cols= "50" name= "subject" placeholder= "Enter your message:" class = "message" required> < input name= "submit" class = "button" type= "submit" value= "Send" /> |
CSS
When forming the basic sizes of forms and internal elements, I used percentage values for the width, thanks to which the form can easily be adjusted to the dimensions of the container in which it will be located. The color scheme of the “Submit” button, its size and location can be easily changed; just experiment with certain values.
| /* Basic form styles */ form( margin: 0 auto; max- width: 95%; box- sizing: border- box; padding: 40px; border- radius: 5px; background: RGBA(255 , 255 , 255 , 1 ) ; - webkit- box- shadow: 0px 0px 15px 0px rgba(0 , 0 , 0 , .45 ) ; box- shadow: 0px 0px 15px 0px rgba(0 , 0 , 0 , .45 ) ; ) /* Margin styles input */ . textbox( height: 50px; width: 100%; border- radius: 3px; border: rgba(0 , 0 , 0 , .3 ) 2px solid; box- sizing: border- box; font- family: "Open Sans" , sans-serif; font-size: 18px; padding: 10px; margin-bottom: 30px; ) . message: focus, . textbox: focus( outline: none; border: rgba(24 , 149 , 215 , 1 ) 2px solid; color: rgba(24 , 149 , 215 , 1 ) ; ) /* Textbox styles */ . message( background: rgba(255 , 255 , 255 , 0.4 ) ; width: 100%; height: 120px; border: rgba(0 , 0 , 0 , .3 ) 2px solid; box-sizing: border- box; - moz - border- radius: 3px; font- size: 18px; font- family: "Open Sans" , sans- serif; - webkit- border- radius: 3px; border- radius: 3px; display: block; padding: 10px; margin - bottom: 30px; overflow: hidden; ) /* Basic button styles */ . button( height: 50px; width: 100%; border- radius: 3px; border: rgba(0 , 0 , 0 , .3 ) 0px solid; box-sizing: border- box; padding: 10px; background: #90c843; color: #FFF; font- family: "Open Sans" , sans- serif; font- weight: 400; font- size: 16pt; transition: background. 4s; cursor: pointer; ) /* Change the button background on hover */ . button: hover( background: #80b438; ) |
/* Basic form styles */ form( margin:0 auto; max-width:95%; box-sizing:border-box; padding:40px; border-radius:5px; background:RGBA(255,255,255,1); -webkit -box-shadow: 0px 0px 15px 0px rgba(0, 0, 0, .45); box-shadow: 0px 0px 15px 0px rgba(0, 0, 0, .45); ) /* Input field styles */ . textbox( height:50px; width:100%; border-radius:3px; border:rgba(0,0,0,.3) 2px solid; box-sizing:border-box; font-family: "Open Sans", sans-serif; font-size:18px; padding:10px; margin-bottom:30px; ) .message:focus, .textbox:focus( outline:none; border:rgba(24,149,215,1) 2px solid; color:rgba( 24,149,215,1); ) /* Text field styles */ .message( background: rgba(255, 255, 255, 0.4); width:100%; height: 120px; border:rgba(0,0,0,.3 ) 2px solid; box-sizing:border-box; -moz-border-radius: 3px; font-size:18px; font-family: "Open Sans", sans-serif; -webkit-border-radius: 3px; border -radius: 3px; display:block; padding:10px; margin-bottom:30px; overflow:hidden; ) /* Basic button styles */ .button( height:50px; width:100%; border-radius:3px; border:rgba(0,0,0,.3) 0px solid; box-sizing:border-box; padding:10px; background:#90c843; color:#FFF; font-family: "Open Sans", sans-serif; font-weight:400; font-size: 16pt; transition:background .4s; cursor:pointer; ) /* Change the button background on hover */ .button:hover( background:#80b438; )
There are a lot of options for designing contact forms, the main thing is to have a little imagination and basic knowledge of CSS. On the pages of my blog, you can find others and examples of the style of feedback forms.
For those who are especially inattentive, I want to clarify, once again: the forms presented in the article are just an outer shell; in order for the forms to actually perform their functions, you need to attach a script handler to them, of which there are plenty of them scattered on the Internet, so it’s convincing Please do not write in the comments that the forms do not work, etc., everything works great, you just need to understand what, where and why))).
With all respect, Andrew.
Hi guys. Seryoga is in touch. I know that I haven’t written for a long time - things to do, things to do... And now, to be honest, I don’t have any time at all. And we will make the form not according to my lesson, but according to the lessons of my friend - Krotova Romana.
We will create a feedback form for the site consistently. Therefore, this article will be divided into 3 lessons.
We will simply enter it into HTML and create a PHP handler for sending letters. Everything will be consistent, from scratch to result. So that you understand everything and can embed the necessary fields yourself.
Roma will show you how to do Ajax loading. That is, send data from the form without reloading the page. Which, you see, is very convenient and modern.
Well, in the third (lesson is being prepared - there will be a link here later), we will build in a validation check. Not using the browser, but using special scripts.
Video 1. Creating a feedback form for the site.Paying attention! For the form to work, it is necessary that your hosting supports PHP.
If you have any questions regarding unclear points in writing a form handler for sending letters, do not hesitate to ask them in the comments.
Code from the lesson on creating a feedback formThis is what we ended up with in the index.php file
Let me remind you what it contains simple feedback form. Without decoration or other bells and whistles. So as not to burden you with unnecessary information.
Contents of the submit.php file:
Here a basic check of the form is carried out to ensure that it is complete, so as not to send empty messages. If everything is “good”, the letter is sent. And there is a redirect to a notification page about the successful sending of the letter.
If (!empty($_POST["name"]) AND !empty($_POST["email"]) AND !empty($_POST["message"])) ( $headers = "From: Krotov Roman " ." Reply-To: [email protected]" . "X-Mailer: PHP/" . phpversion(); $theme = "New message from the site"; $letter = "Message data:"; $letter .=" "; $letter .="Name: ". $_POST["name"]; $letter .=" Email: ".$_POST["email"]; $letter .=" Phone: ".$_POST["phone"]; $letter .=" Message: " .$_POST["message"]; if (mail(" [email protected]", $theme, $letter, $headers))( header("Location: /testform/thankyou.php"); ) else ( header("Location: /testform"); ) ) else ( header("Location: / testform"); )
Well, I don’t see the point in posting the notification page itself here. There's the basic structure of an HTML document and just one line of text.
So, let's get started, first of all we will mark up the page and write styles for it. The markup will include a regular feedback form with two inputs (phone, mail) and one text area, where, according to our idea, the user will enter his message. We will place the form handler on a separate page.
Feedback form
Enter phone:
Your mail:
Your question:
Let's write the styles:
Html, body( height: 100%; margin: 0; ) html( background-color: #fff; color: #333; font: 12px/14px Verdana, Tahoma, sans-serif; cursor: default; ) #feedback-form ( background-color: #ececec; margin: 50px auto 0; text-align: center; width: 430px; padding: 15px; ) #feedback-form h2( margin-bottom: 25px; ) #feedback-form input, #feedback -form textarea( background-color: #fff; border: 1px solid #A9A9A9; padding: 1px 5px; width: 90%; ) #feedback-form input( height: 26px; ) #feedback-form textarea( height: 75px; padding-top: 5px; ) #feedback-form input( margin-top: 15px; background-color: #0B7BB5; border: 1px solid #CCCCCC; color: #FFFFFF; font-weight: bold; height: 40px; line- height: 40px; text-transform: uppercase; width: 225px; cursor: pointer; )
As a result of all these actions you will get this form:
Now it's time to tackle the server. Our script will include several parts:
- Setting;
- Secondary functions;
- Processing of incoming data;
- Message output.
All these parts, of course, are conditional, since no one is stopping us from making a mess out of the code or, conversely, moving key parts to other files. But I think it’s better to make the handler in one file, so that it’s convenient to connect it to other projects.
SettingsAt this stage, we will create three variables: $my_email (the mailbox to which the data is sent), $path_log (the path to the log file) and $time_back (the time the user returns to the site).
// Specify your mailbox $my_email = " [email protected]"; // Specify where the logs will be stored $path_log = "log.txt"; // Time the user returns to the site (sec) $time_back = 3;
Secondary functionsHere we describe five functions that will simplify data processing.
Message output templates:
Function error_msg($message)( $message = "".$message.""; return $message; ) function success_msg($message)( $message = "".$message.""; return $message; )
Clearing data received from the form:
Function clear_data($var)( return trim(strip_tags($var)); )
Sending letter:
Function send_mail($email, $subj, $text, $from)( $headers = "From: ".$from." \r\n"; $headers .= "MIME-Version: 1.0\r\n"; $headers .= "Content-Type: text/html; charset=utf-8 \r\n"; $result = mail($email, $subj, $text, $headers); if(!$result)( return false; ) return true; )
And the last function that will check the phone and mail for the correct recording of their format.
Function check_format($data, $type)( switch($type)( case "email": $pattern = "/^*@(+(*+)*\.)++$/i"; if(preg_match( $pattern, $data))( return true; ) break; case "phone": $pattern = "/^(\+?\d+)?\s*(\(\d+\))?[\s-] *([\d-]*)$/"; if(preg_match($pattern, $data))( return true; ) break; ) return false; )
As you can see, all the functions we wrote are small in size. You could leave them outside the data processing area, but when you need to change or expand something, for example check_format(), it will be much simpler and more convenient.
Processing incoming dataFirst of all, we find out which page the user came from. Then we define the variables in which our messages and the status of sending the letter will be stored.
// Find out the previous page $prev_page = $_SERVER["HTTP_REFERER"]; // Our messages $msg = ""; // Email status $status_email = "";
Now, to avoid problems with the encoding, we indicate it using the header.
Header("Content-Type: text/html; charset=utf-8");
If($_SERVER["REQUEST_METHOD"] == "POST")( if(isset($_POST["number"], $_POST["email"], $_POST["question"]))( $number = clear_data ($_POST["number"]); $email = clear_data($_POST["email"]); $question = clear_data($_POST["question"]); if(check_format($number, "phone") && check_format($email, "email") && !empty($question))( // Form a letter $e_title = "New message";
$e_body = "";
$e_body .= "";
$e_body .= "Телефон: ".$number;
$e_body .= "!}
"; $e_body .= "Mail: ".$email; $e_body .= "
"; $e_body .= "Question: ".$question; $e_body .= ""; $e_body .= ""; // END Form a letter if(send_mail($my_email, $e_title, $e_body, $prev_page)) ( $status_email = "success"; $msg = success_msg("Thank you for your question.
We will respond to you as soon as possible."); )else( $status_email = "error"; $msg = error_msg("An error occurred while sending the email."); ) // Write to file $str = "Time: ".date ("d-m-Y G:i:s")."\n\r"; $str .= "Phone: ".$number."\n\r"; $str .= "Mail: ".$email." \n\r"; $str .= "Question: ".$question."\n\r"; $str .= "Email: ".$status_email."\n\r"; $str .= "= ======================================\n\r"; file_put_contents($path_log, $str, FILE_APPEND); )else( $msg = error_msg( "Fill out the form correctly!"); ) )else( $msg = error_msg("An error occurred!"); ) )else( exit; )
In the written code, we determine whether the form has been submitted, otherwise we close this file using the exit function. Next, we check for the presence of cells with our data in the POST array; if they arrived, we clear them of possible garbage. After cleaning, we check the mail and phone formats, as well as the presence of text in the question variable. Next, we generate a letter, send it and write logs, where, in addition to the data, we save the status of sending the letter. This way we can track the operation of the mail() function and at the same time not lose data.
Message outputAll we have to do is notify the user about a successful or “not so” completed operation and return him back to the site with the form. To do this, we use markup with PHP script inclusions.
To redirect the user back to the site, we will use the refresh meta tag, where we insert PHP code with the already created variables. We'll also need to use a little JavaScript to make the page a little more dynamic. We write a function timeBack(), which will count the seconds in reverse order before the redirection.


