DIY tank battle from arduino. Autonomous tank on Arduino
In previous materials, we reviewed videos on making various radio-controlled toys. Let's continue this topic. This time we invite you to familiarize yourself with the manufacturing process of a radio-controlled tank.
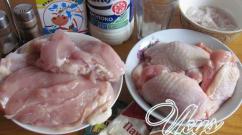
We will need:
- finished chassis;
- Arduino Nano;
- 3 servos;
- rotating system;
- toy pistol;
- PS2 joystick;
- receiver to joystick;
- battery box;
- rechargeable batteries;
- wires;
- laser.
The finished chassis, the purchase link for which is provided at the end of the material, has two motors, two gearboxes, a switch and a compartment for batteries. According to the author of the idea, buying a ready-made chassis will cost less than making it yourself. If the batteries you plan to use do not fit in the chassis compartment, as in the author's case, you can hide the motor driver there.
The first step is to attach the joystick receiver to the chassis. To do this, remove the cover from it.
We also remove the cover from the gearbox.
We make two holes on the cover that will be used to secure the cover with screws.
Fill the nuts that hold the screws with glue so that they do not unscrew while driving and fall into the gearbox.
Now you need to attach the motor driver. According to the author, when using wires with special connectors, the compartment will not completely close, so you need to bite off the connectors, strip the wires and solder directly to the outputs on the driver.
Before installing the driver, you need to take care of the rotating system for the tank muzzle. To do this, we disassemble the plastic rotary system and install two servos in it. The first will be responsible for horizontal movements, and the second for vertical movements.
Putting the rotary system back together.
We install the system on the tank hull.
You need to make 3 additional holes in the housing. Two of them are needed for the motor wires, and the wide hole is needed for the bus in the motor driver control.
The gun needs to be connected to a servo drive. To do this, just make a hole in the servo drive and the gun body and connect it with a screw.
The next thing you need to do is connect the trigger of the gun to the servo. To do this, drill holes on the trigger and the attachment on the servo drive. We connect the elements with a piece of wire.
In the upper part of the rotary system, two through holes must be made, which must also pass through the barrel of the gun. These holes will be used to install the muzzle on the rotary system.
Let's move on to programming the Arduino Nano board.
We assemble the remaining components according to the diagram below.
On the top of the chassis we install pieces of rulers that will serve as wings. We install battery compartments on the wings.
We glue the laser to the barrel with hot glue.
Our radio-controlled tank is ready.
Let's build a radio-controlled tank with a first-person view that can be controlled from a distance of up to 2 kilometers! My project was based on a remote control rover, it is easy to build, easy to program and a great project for hobbyists!


The bot is very fast and agile, not to mention the fact that it has two powerful engines! It will certainly outrun a human, no matter what surface the race is on!
The bot is still a prototype, even after months of development.
So what is FPV?
FPV, or First Person View, is a First Person View. We usually see FPV while playing games on consoles and computers, such as racing games. FPV is also used by the military for surveillance, defense, or to monitor protected areas. Hobbyists use FPV in quadcopters for aerial filming and just for fun. This all sounds as cool as the cost of building a quadcopter, so we decided to build something smaller that rides on the ground.
How to manage this?
The bot is based on an Arduino board. Since Arduino supports a wide variety of add-ons and modules (RC/WiFi/Bluetooth), you can choose any of the communication types. For this build we will use special components that will allow control over long distances using a 2.4Ghz transmitter and receiver that controls the bot.
There is a demo video in the last step.
Step 1: Tools and Materials


I buy most of my parts at local hobby stores, the rest I find online - just look for the best deals. I use a lot of Tamiya solutions and my instructions are written with this feature in mind.
I bought spare parts and materials from Gearbest - at that time they were having a sale.
We will need:
- Arduino UNO R3 clone
- Pololu Dual VNH5019 Motor Shield (2x30A)
- Pin dads
- 4 spacers
- Screws and nuts
- Signal transmission module (transmitter) 2.4 Ghz - read more in step 13
- Receiver 2.4 Ghz for at least two channels
- 2 Tamiya Plasma Dash / Hyper dash 3 motors
- Tamiya Twin Motor Gearbox Kit (stock motors included)
- 2 Tamiya universal boards
- Tamiya track and wheel set
- 3 lithium polymer batteries 1500mAh
- First-person camera with support for remote direction and zoom control
- transmitter and data receiver for FPV 5.8Ghz 200mW
- Bottle of superglue
- Hot glue
Tool:
- Multitool
- Screwdriver Set
- Dremel
Step 2: Assembling the Twin Gearbox


Time to unpack the gearbox. Just follow the instructions and everything will be fine.
Important note: use 58:1 gear ratio!!!
- lubricate the gears before assembling the box, not after
- do not forget about metal spacers, otherwise the box will creak
- use 58:1 gear format, it is faster than 204:1
Step 3: Improving the motors

The gearbox comes with motors, but in my opinion they are very slow. Therefore, I decided to use Hyper dash motors in the project, instead of Plasma Dash, which consume more energy.
However, Plasma Dash motors are the fastest in Tamiya's 4WD motor series. The motors are expensive, but you get the best product for the money. These carbon coated motors spin at 29,000 rpm on 3V and 36,000 rpm on 7V.
The motors are designed to work with 3V power supplies and increasing the voltage, although it increases performance, reduces their service life. With the Pololu 2x30 Motor Driver and two lithium polymer batteries, the Arduino program should be set to a maximum speed of 320/400, you will soon find out what this means in the code step.
Step 4: Motor Drivers


I have been interested in robotics for a very long time and I can say. that the best motor driver is Pololu Dual VNH5019. When it comes to power and efficiency, this is the best option, but when we talk about price, it is clearly not our friend.
Another option would be to build the L298 driver. 1 L298 is designed for one motor, which is the best solution for high current motors. I'll show you how to build your own version of such a driver.
Step 5: Assembling the Tracks


Use your imagination and configure the tracks to your liking.
Step 6: Screw the spacers and attach the FPV


Again, use your imagination and figure out how to position the struts and camera for the first person view. Secure everything with hot glue. Attach the upper deck and drill holes for mounting the FPV antenna and for the installed spacers, then secure everything with screws.
Step 7: Upper Deck

The purpose of creating the upper deck was to increase free space, since the FPV components take up a lot of space on the bottom of the drone, leaving no room for the Arduino and motor driver.
Step 8: Install Arduino and Motor Driver

Simply screw or glue the Arduino into place on the top deck, and then attach the motor driver on top of it.
Step 9: Install the receiver module


It's time to connect the Rx module to the Arduino. Using channels 1 and 2, connect channel 1 to A0 and 2 to A1. Connect the receiver to the 5V and GND pins on the Arduino.
Step 10: Connect the Motors and Batteries


Solder the wires to the motor and connect them to the driver according to the channels. Regarding the battery, you will need to create your own connector using a JST male connector and DINA male connectors. Please look at the photos to better understand what will be required of you.
Step 11: Battery
Take the battery and determine the location where you will install it.
Once you find a location for it, create a male adapter to connect to the battery. The 3S 12V Li-po battery will power the FPV camera, motor and Arduino, so you will need to create a connector for the motor power line and the FPV line.
Step 12: Code for Arduino (C++)

The code is very simple, just download it and everything should work with the VNH motor driver (make sure to download the driver library and put it in the Arduino libraries folder).
The code is similar to Zumobot RC, I just replaced the motor driver library and configured some things.
For the L298 driver, use the standard Zumobot program, just connect everything according to how it is written in the library.
#define PWM_L 10 ///left motor
#define PWM_R 9
#define DIR_L 8 ///left motor
#define DIR_R 7
Just download the code and proceed to the next step.
Files
Step 13: Controller


There are different types of controllers for radio-controlled toys on the market: for water, land, air. They also operate on different frequencies: AM, FM, 2.4GHz, but at the end of the day they are all just regular controllers. I don't know exactly the name of the controller, but I know that it is used for aerial drones and has more channels compared to land or water ones.
I'm currently using Turnigy 9XR Transmitter Mode 2 (No Module). As you can see, the name says that it is moduleless, which means that you choose which 2.4GHz communication module to build into it. There are dozens of brands on the market that have their own features of use, control, distance and other various features. Now I'm using FrSky DJT 2.4Ghz Combo Pack for JR w/ Telemetry Module & V8FR-II RX, which is a little expensive, but just look at its specifications and goodies, then the price will not seem so high for all this stuff. Plus the module comes immediately with the receiver!
And remember that even if you have the controller and modules, you will not be able to turn it on until you have batteries that match the controller. Either way, find a controller that suits you and then you'll decide on the right batteries.
Tip: If you're a beginner, seek help from local hobby shops or find ham radio enthusiast groups because this step is no joke and you'll need to shell out a significant amount of money.
Step 14: Check


First turn on the bot, then turn on the transmitter module, after that the receiver module should indicate successful binding by flashing the LED.
Beginner's Guide to FPV
The part installed on the bot is called the FPV transmitter and camera, and what you have in your hands is called the FPV receiver. The receiver connects to any screen - be it LCD, TV, TFT, etc. All you need to do is insert batteries into it or connect it to a power source. Turn it on, then change the channel on the receiver if necessary. After that, you should see on the screen what your bot sees.
FPV signal range
The project used an inexpensive module capable of operating at a distance of up to 1.5 - 2 km, but this applies to using the device in open space; if you want to get a stronger signal, then buy a higher power transmitter, for example 1000mW. Please note that my transmitter only has 200mW power and was the cheapest I could find.
There's only one last step left - to have fun controlling your new spy tank with camera!
The main part of the robot is the chassis from the radio-controlled tank and other components, their list will be written below. This tank is the author's first project on the platform Arduino, and he was glad that he used it. The author used materials and books from the Internet.
Materials and tools:
- Tank chassis
- Arduino Uno
- Jumpers and breadboard
- Integrated motor driver SN754410NE
- Conventional servo drive
- Ultrasonic range finder
- 9V battery with connector for it
- D type batteries
- USB cable for Arduino
- Base for chassis
- Screwdrivers
- Thermal gun and glue for it
- Soldering iron and solder


Step one. Tank chassis.
The author took the chassis from an old Abrams tank purchased at a flea market. The resulting tank was disassembled so that the chassis could be removed from it. It is not at all necessary to use the same tank; any radio-controlled one will do. Moreover, the original motor left much to be desired, so I had to assemble my own; its assembly will be in the next step. Having prepared the chassis, the author attached the base to them with hot glue. It doesn’t matter where it will be fixed, but it was decided to glue it in the center.


Step two. Engine driver.
To control the engine, the SN754410NE driver is used, the author used it because it was available, you can take any similar one.
Connecting the driver to Arduino is as follows:
All GND pins are connected to the GND pins of the breadboard.
- Driver pins 1 and 16 to 9 and 10 of Arduino.
- Pins 2 and 7 of the driver are connected to pins 3 and 4 of the Arduino (they are responsible for controlling the left motor).
- Driver pins 10 and 15 are connected to Arduino pins 5 and 6 (they are responsible for controlling the right motor).
- Pins 3 and 6 are connected to the left motor, and 14 and 11 to the right motor.
- Pins 8 and 16 must be connected to power on the Bredboard, the power source is a 9V battery.


Step three. Installing a rangefinder.
The ultrasonic sensor allows robot avoid obstacles in its path when moving. The sensor is located on a standard servo and will be mounted on the front of the robot. At the moment when the robot notices an obstacle within 10 cm, the servo will begin to turn in both directions, thereby searching for a passage. Arduino reads information from the sensor and decides which side is more favorable for further movement.
First of all, a servo drive is attached to the sensor. The author secures the servo drive so that it can only rotate 90 degrees in each direction, in other words, the full rotation of the servo drive will be 180 degrees.
The sensor has three contacts GND, signal and 5V. The 5V power is connected to the Arduino's 5V power supply, GND to GND, and the signal to pin 7 of the Arduino.


Step four. Nutrition.
Arduino receives power through a 9V battery, it is connected to the appropriate connector. The motors are powered by four D-type batteries, which are installed in the battery holder. To receive power to the motors, the holder wires are connected to the board on which the SN754410NE motor driver is already installed.


Step five. Robot assembly.
After completing all the previous steps, it is time to put all the parts together. First of all, the Arduino is attached to the base of the tank. After this, an ultrasonic range finder is attached to the front of the robot using hot glue. Then, the author attaches the batteries next to the Arduino. Batteries can be installed on any part of the tank. After installing all the components, all the wires were pulled up and power was applied to the board to ensure proper assembly.


Step six. Program code.
After completing the assembly of the tank, it is time to write a program for it. The program should show the robot when to move and when to pause in order to avoid a collision with an obstacle. When writing code from the author
The robot consists of a chassis from an RC tank and several other components, a list of which is given below. This is my first project on , and I liked the Arduino platform. When creating this robot, I used materials from books and the Internet.
Necessary materials
1. Chassis from a radio-controlled tank.
2. Arduino Uno.
3. Breadboard and jumpers.
4. Integrated motor driver SN754410NE.
5. Standard servo drive.
6. Ultrasonic rangefinder.
7. 9V battery and connector for it.
8. 4 D batteries and a connector for them.
9. USB A-B cable.
10. Base 6" x 6".

Tools
1. Set of screwdrivers.
2. Hot glue gun.
3. Solder and soldering iron.
Chassis
I took the chassis from a tank I bought for $10. The base can be attached to it anywhere, but I attached it in the middle.

Motor driver SN754410NE
To control the motors I used the SN754410NE driver. I used it because I had it, but you can use another one, like L293.
Now about connecting the driver to the Arduino Uno. Connect all GND pins (4,5,12,13) to GND of the breadboard. Connect driver pins 1 and 16 to pins 9 and 10 of the Arduino. Connect driver pins 2 and 7 to pins 3 and 4 of the Arduino, these are the control pins of the left motor. Connect driver pins 10 and 15 to pins 5 and 6 of the Arduino, these are the control pins of the right motor. Connect contacts 3 and 6 to the left motor, and contacts 14 and 11 to the right. Pins 8 and 16 should be connected to power on the breadboard. Power source: 9V battery.

An ultrasonic rangefinder helps the robot avoid obstacles while moving. It is located on a standard servo, which is located on the front of the robot. When the robot spots an object 10 cm away, the servo starts to spin, looking for a passage, and then the Arduino decides which side is the most pleasant to move around.
Attach a connector to it. Limit the servo so that it cannot turn more than 90 degrees in each direction.
The sensor has three contacts GND, 5V and a signal. Connect GND to GND, 5V to 5V Arduino and connect the signal to pin 7 of Arduino.

Nutrition
Arduino is powered by a 9V battery through the appropriate connector. To power the motors I used 4 D size batteries and the appropriate connector. To power the motors, connect the wires from the holder to the board with SN754410NE.

Assembly
Once all the pieces are ready, it's time to assemble them. First we have to attach the Arduino to the base. Then, using hot glue, we attach the rangefinder with a servo drive to the front of the robot. Then you need to attach the batteries. You can place them anywhere you like, but I placed them next to the Arduino. When everything is ready, you can turn on the robot to make sure the Arduino is working.

Program
So, after assembling the robot, it is time to write a program for it. After spending several days, I wrote it.
The robot will move in a straight line as long as the object is more than 10 cm away. When it notices the object, it begins to rotate the sensor, searching for a path. When scanning is completed, the program selects the optimal side for movement. If the robot is at a dead end, it turns 180 degrees.
The program can be downloaded below. You can modify and supplement it.