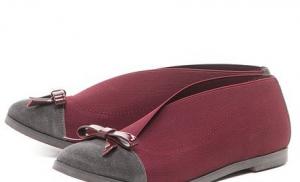
Examples of gel nail design
Beautiful and well-groomed female hands can attract no less interest and attention than makeup and hair. Gel polish manicure is a great helper in achieving this goal. Most women and girls mistakenly believe that getting a spectacular manicure is possible only by visiting a beauty salon. Our article in a simple and understandable form tells how to easily decorate your nails with gel polish yourself.
Benefits of Gel Coating
To make a choice in favor of a gel manicure, a list of all the advantages of this wonderful coating will help. Compared to painting with regular nail polish, gel coating has a number of advantages:
- Duration of use. A manicure made of quality materials and applied in compliance with the rules lasts for several weeks, without additional adjustment. Such a coating remains free of cracks and chips for 2-3 weeks, and some brands of gel polish will retain the result for up to 4 weeks, which allows you to perfectly save time and money required for more frequent manicure with regular varnish.
- Original design. Various patterns and ornaments, including three-dimensional ones, the use of rhinestones as an additional decoration, unusual overflows from a wide color palette, and other creative possibilities in application - all this is possible when using a gel. A unique design is available due to the properties of the coating and the peculiarities of its application.
- Guaranteed strength after drying. Gel polish that has been dried in a special lamp, unlike ordinary varnish, will not "pull off" from an awkward movement either after a couple of minutes or after a couple of hours. To remove it, you will need certain funds, which means you can safely do various things without fear of damaging your fresh manicure.
- Benefits of nails and harmlessness to the body. The use of any gel polish helps to strengthen nails, due to the durable coating applied to the surface. But some manufacturers produce products that include components that strengthen and nourish the nails. Moreover, all gel varnishes are hypoallergenic, and have no contraindications during pregnancy and lactation.
- Shine and color. Depending on the chosen brand of gel polish, the coating remains shiny and shiny for at least a week, or throughout the entire period. And the color scheme will suit the taste of the most demanding young lady.
The advantage of gel polish over classic material is obvious. Perhaps the only drawback of this coverage is the need for an initial material investment. To make a gel manicure, you will need to purchase not only one bottle of varnish, but also additional components, equipment: for the base, fixing, drying, etc. On the other hand, visiting salons and private masters is also not free, but having spent on the necessary base in the beginning, in the future, doing an independent manicure will become much more profitable.
Gel manicure at home
Having evaluated the advantages of a gel coating, the question arises, how to do it and what is needed for this? After all, photos with nails covered with gel look so impressive that they suggest thinking about the participation of a professional in obtaining this beauty. And is it so easy to acquire a manicure of a similar attractiveness without resorting to the services of a master? But it's really not difficult, let's look at the key points.
What you need for a gel polish manicure
For an independent gel manicure, you can purchase a ready-made starter kit, including the necessary material and equipment . And you can purchase the necessary components separately by examining the list of required items:
- UV lamp or LED lamp - watt lamps, with optimal drying time and the ability to polymerize various varnish options. However, for private use, a simple 9-watt lamp is also suitable, which can dry the coating only for a longer time (about 7 minutes a layer). LED lamps are much more expensive, but the drying time ranges from 30 to 90 seconds;
- sanding files and cuticle remover - for preparing the nail plate before applying gel polish;
- degreaser and disinfector - to improve the adhesion of the base layer of varnish to the nail, and to prevent fungus. Both bottles can be purchased for 100 rubles, or you can resort to trickery and use 70% medical alcohol, as a 2-in-1 universal remedy;
- primer and base gel polish (base) are the first components in application. The primer not only increases the adhesion (adhesion) of materials to the surface, but also protects the nail from the penetration of the gel into the plate. The gel base retains the strength and color saturation of the coating;
- color gel polish;
- topcoat (top) - the final layer that preserves the color and integrity of the gel coating. Tops are divided into the following types - gloss and mat, with and without a sticky layer;
- napkins without lint.
There are other components of a multi-layer coating, such as a dehydrator, prep-primer, this and more can be useful for both experienced craftsmen and beginners.
→ on our project.
How to make a gel polish manicure step by step
When the necessary kit is ready, it's time to start applying. A step-by-step description will help you understand what and how to apply, and calculate the time required.
- Preparation of nails. To do this: soften and remove the cuticle, grind the surface of the nail with a file or buff, form the free edge of the nail into the desired shape, and finally degrease the nail, treat it with a disinfectant.
- Application of a primer. Which will serve as a preliminary basis for subsequent gel layers. The primer does not require drying in a lamp, drying naturally in 1-2 minutes.
- Basic coverage. Apply the base with rubbing movements on the nail, in one even layer, avoiding contact with the skin. Drying in a UV lamp lasts at least 2 minutes, in LED, 30 seconds is enough. When applying the base, it is important to process the end part of the marigold, since it is she who is damaged first of all.
- Painting in the selected color, can be carried out in several layers, depending on the shade; for a more intense color, 2-3 layers of colored coating are required. Each applied layer is dried in a lamp for 2 minutes.
- Finishing top layer... It is applied in the usual way, but somewhat thicker than the previous ones, because the safety of the manicure and the brightness of the color depend on it. Do not forget about processing the end of the nail; it takes 3 minutes to dry the finishing layer in a lamp. If a sticky layer remains on the top after drying, then it must be removed with a lint-free napkin or with the use of another special tool.
The lesson on the rules for applying a gel coating is over, after doing everything told in stages, you will get a fashionable manicure that can please for a long time.
Removing the correct gel coating
No matter how high-quality and expensive the materials used are, it will still come time to remove your outdated manicure. Removal assistance will be provided by:
- a special composition based on acetone for dissolving the gel layer;
- cotton pads;
- sanding file;
- foil;
- orange or plastic sticks.
 Removing gel polish with a special composition
The process of removing the gel polish is not difficult, it takes about 15 minutes. At the beginning, the nail plate is sanded with a file, then a cotton pad moistened with a solution is placed on it, hiding from above with a piece of foil. Thus, the nails are kept for 10-15 minutes, and then the remnants of the softened and exfoliated gel are removed with an orange stick. After removing the varnish, it is recommended to lubricate the skin near the nails with a nourishing cosmetic oil.
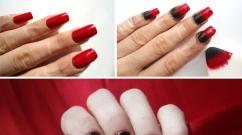
Gel polish manicure options for short nails
 Option of manicure with gel polish for short nails
Short nails are not a reason to deny themselves an elegant manicure, gel polish can be used with equal success by those who have extended nails and who, due to their professional activities or natural characteristics, cannot grow marigolds in any way. Therefore, do not despair, but resort to the tricks of using gel polish on short nails:
- Color spectrum. Do not use an abundance of shades, three tones will be enough for a decent manicure.
- The size of patterns and ornaments. Large drawings are definitely not for short marigolds. This design can visually reduce the nail even more. Ornaments with too small drawing will also not be suitable - details and an abundance of thin lines will be smeared and lost.
- Decorations. Sculpting and rhinestones on short nails look cumbersome and awkward, it is better to avoid this.
The classic way to decorate nails that are not too prominent is French manicure and light, not dense tones. Vertical and oblong patterns look good, both in the center and along the entire length of the marigold. Medium-sized designs such as flowers are also fine for short nails. If you are new to nail art, do not worry, the shape of the nails, even short ones, will always push ideas in the right direction.
Examples of gel nail design
Manicure has long become a new form of art, year after year, offering all kinds of novelties in painting and decorating nails. In different seasons, there are new trends in nail art, but samples of previously used ideas do not go anywhere, but are refreshed and supplemented with new touches. Consider some examples.
Original French manicure

A casual and not flashy version of a jacket, has won recognition among many women, because it is simple to perform, and the color scheme is ideal for almost any wardrobe and occasion. For a French gel manicure, you will need all the necessary materials and tools, and stencil strips to create an even border.
The whole nail is covered with the main layer; a light, flesh-colored shade is suitable for this. The next step after drying the base is to draw a "smile" line using white or milky colored gel polish. If you are not confident in your abilities to draw an even border, use stencil stripes, after drying the main tone. The rest of the process is no different from the standard gel coating procedure.
Trending ideas for moon manicure
Lunar manicure gained popularity almost a century ago, although then there was no question of any gel polish, but today many women choose this type of nail design, calling the option a reverse jacket. The principle of application of the coating is not too different from the French manicure, with the difference that the second colored varnish is applied near the base of the nail, and not the free edge, in the shape of a crescent.
Often these two options are combined in one decoration. The hole and border of the nail are painted in the same tone, giving an interesting look to the nail. The use of a large number of shades does not imply moon manicure. Among the latest trends are the use of matte finishes and varnishes with metallic effects - imitation of gold and silver dust.
Beautiful gradient manicure

Stylish manicure with smooth transitions and overflows from one color to another, you can do it yourself. It will take 3-5 color gel polishes and a little patience. After completing the necessary preparation of the nail surface using a primer and base, apply the colored gels in stages, starting from the base of the nail.
The hole area can be painted over with the lightest of the selected shades, dried. Then apply the second, third, etc. shades, dividing sections of the nail into sections. The boundaries between colors are blurred with a toothpick or sponge for a gentle and smooth transition. Dry in a lamp and secure with a top. In this way, you can get a beautiful gradient manicure, and if you wish, even imitate the rainbow spectrum using 7 primary colors.
Stylish "Cat's Eye"

Having entered the trend a few years ago, manicure still does not lose its position among the most popular nail art options. In this case, it is not at all necessary to use yellow-green colors, as many believe. Manicure "Cat's Eye" got its name due to the flickering line, reminiscent of the play of the stone of the same name, and not by analogy with the cat's pupil.
In the design of nails in this style, you can use any shades, but bright and dark, intense tones are ideal. For example, black and red will add originality to such a manicure. The radiance effect is achieved with a colored magnetic gel polish a.
The application technique is not strikingly different from other gel manicure, with the exception of additional equipment - an ordinary magnet. Magnetic gel polish is applied in several layers to the prepared nail, usually 2 layers are enough. The first layer is dried, and over the second applied layer, you need to hold the magnet. Bringing the magnet as close to the nail as possible, trying not to catch the colored layer with the edge, count to 5 or 10, that's it, the shine pattern has formed. After that, the nail is dried, and the process ends with all the necessary operations, and you get a surprisingly attractive and radiant, in the literal sense of the word, manicure.
Using a variety of tools and application techniques, it is possible to obtain different patterns and pictures when applying a gel coat. Here are some simple but interesting ways:
Drawing with a gel with a needle and dots
It is easier for beginners to start their nail art with simple patterns and geometric elements. For these purposes, a needle and dots are excellent, with which you can easily draw lines of various thicknesses and points, turning them into a drawing by extruding drops and stretching them. It is interesting to look at the correct form of drops, similar or contrasting shades located one in the other, with this application, each drop should be dried separately.
Drawing with a needle allows you to create the finest lines that cannot be achieved with the thinnest brush. These two simple devices allow you to draw anything that takes skill and imagination. For example, flowers and petals that are classic for manicure, with due care and attention, it is easy to draw with a needle, and the floral theme, like no other, creates a spring image and mood;
Technique of stamping (stamping) nails
This will require a rubber stamp and a 3D stencil shape. Varnish is poured into a stencil with a pattern, a rubber stamp is dipped into this mold with a pattern or pattern, then the stamp is transferred to the nail, fixing after drying with a top;
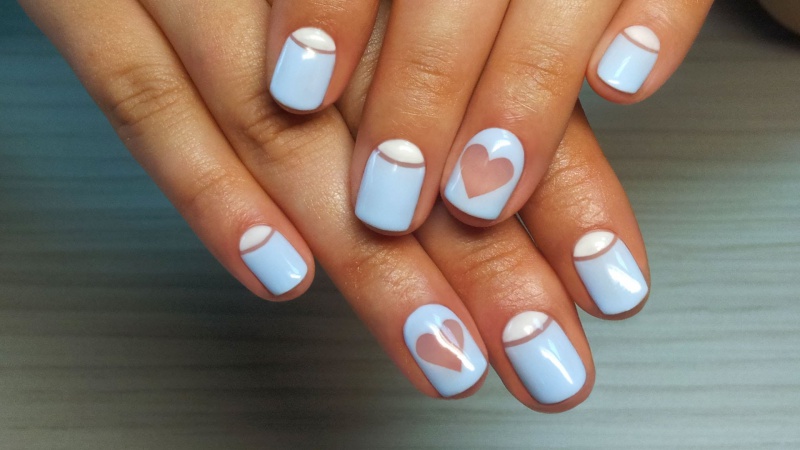
Adhesive paper stencil tapes
You can purchase ready-made ones, and delimiting the surface to be coated with them, apply other shades to the free zones of the main color, obtaining an elegant and clear geometric pattern after removal. It is possible to make adhesive stencils yourself using scotch tape, masking tape, and even polyethylene.
Gel polish manicure is attractive and very practical to wear. Allowing you to do your usual homework, it preserves the beauty and integrity of the coating for a long time.
Gel coating is practically unlimited in design possibilities, having appeared only a few years ago, gel polish already has its own traditions of decorating and continues to create new trends of its own. Anyone looking for a stunning finish that is different from painting with regular varnish will not fail by opting for a gel polish.