Drawings on nails with gel polish: 25 photos of stylish manicure + video
Many people believe that gel varnishes can be used only in a plain, simple coating and that although a manicure lasts long enough, it is boring and has time to get bored. Fortunately, this is a misconception! A wide variety of designs can be made with gel varnishes. And what is most interesting is not to wear one design for 2 weeks, and that is how much gel polish lasts on nails in perfect form, from above you can overlap the design with ordinary simple varnishes. Only you need to remove ordinary varnishes with a liquid without acetone, so as not to damage the top coating. If, for example, you made an original and bright drawing with gel polish, but you have a serious meeting or event where such a manicure would be inappropriate, you can easily cover the design with an ordinary dim varnish in a nude range.
There are a lot of techniques and options in which you can create beautiful patterns on your nails with gel varnishes. With a little effort, patience, time and, of course, imagination, you get a unique and attractive manicure.
Today site site will show what patterns on nails can be done with gel polish and get an elegant, stylish and long-lasting manicure. Detailed video tutorials on the step-by-step execution of drawings will help you understand the technique and make a manicure so that it lasts for a long time and pleases the eye.
Drawings on nails with gel polish: photo gallery
Drawings can be done with the very same colored gel polish using a thin manicure brush. By the way, it is not necessary to buy expensive brushes designed specifically for nail design. It is enough to pick up a thin brush in an art store, while saving well. We offer ideas for drawings that can be done on gel polish. We hope they will help you decide on the choice of your unique design.
For drawings you may need:
- Thin brushes;
- Dots, which is a rod with a ball at the end. With the help of dots, you can make various patterns in the form of polka dots, balls, flowers;
- Palette (a piece of foil, plastic or thick cardboard, plate);
To draw flowers, you can use a dotsem or a brush.... After applying the base and color coat, remove the sticky layer with a degreaser. Then a drawing is made in the form of flowers on two or three fingers, then dots are put in the middle of the flowers, as well as additional elements in the design. The drawing is dried in a UV lamp, then covered with a top coat. As the main color, select the dark tones of the varnish (in this example, it is dark blue, almost black). Flowers are made with a light varnish of the same palette - soft blue. The middle of the flowers are applied in the same color as the base color on the nails, and they are also refreshed with white gel polish. You can choose a light color of gel polish as a base, and choose a darker one for drawings.
Now it is very fashionable to decorate each nail in its own style. The main thing is to combine the colors correctly. Choose three harmonious colors, highlight two or three fingers (ring and middle) with a special, interesting pattern. To complete the drawing, as in the photo below, you need:
- Prepare nails for coating with gel polish (manicure, remove the shine with a buff for natural nails, degrease the nail plates, primer). Apply a base coat and cure in a UV lamp;
- Cover your thumb, forefinger and little finger with black gel polish. Cover the middle finger with white varnish. Nameless delicate light coral gel polish. Dry in a UV lamp and apply colors in a second layer, dry again. Some colors may need a third coat. After drying, you need to remove the sticky layer;
- Using dots, apply peas of different diameters on the middle finger with black and coral gel polish. Do not use too much gel polish to prevent the drawing from spreading. Each nail can be dried separately or together;
- On two little fingers, as well as on the index finger of one hand, we make strips. This can be done neatly with a thin brush, or you can use suitable stencils. If you use a stencil, you need to try not to get the gel polish on the stencil itself, dry it in a lamp along with the stencils.
- Finally, cover the nails with a top coat and dry them again in the lamp, remove the sticky layer, apply oil to the cuticles.

Cute drawings on gel polish can be done using stamping. This is a special print with discs that will make it easy to transfer and print the pattern on the nail. Stamping should be done with regular varnish after applying the top coat and removing the sticky layer.


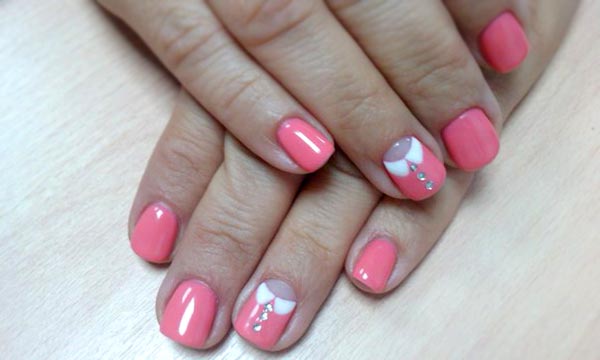
You can lay out a beautiful drawing or pattern with rhinestones of different sizes.


It is not necessary to paint with paint or gel varnishes, you can easily get a drawing if you glue a suitable sticker with a picture under the top coating. Neat, stylish and reliable!

Drawings can be done using velvet powder, which is glued (poured from above) onto the applied drawing with glue or gel varnish. You do not need to overlap the velvet pattern with the top.

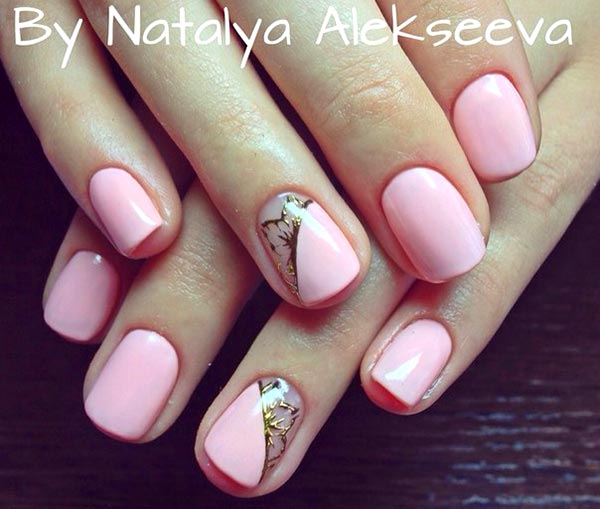
Nail art can be done using the casting technique. The result is sparkling patterns that imitate gold or silver.


Video: drawings on nails with gel polish
Video: beautiful drawings with gel polish
Have you tried to make drawings on your nails with gel polish? Share in the comments!