Can a smartphone give away? Turning a gadget into a Network access point: how to distribute Wi-Fi from an Android phone
Nowadays, the Internet is needed by many different devices. Almost everything is connected to the Internet, from laptops and tablets to televisions. The easiest way to connect such devices to the Internet is a wireless Wi-Fi network. In this material you will learn how to distribute Wi-Fi from Android to your devices that require a connection to the World Wide Web.
It's actually very easy with Android. Now we will demonstrate this using the example of a Samsung smartphone with the TouchWiz shell. If you have a phone with a different skin, some menu items may be slightly different.
The first thing you need to do in order to distribute Wi-Fi from Android is to open the settings and go to the “Other networks” section. In other shells, this settings section may be called simply “More”.

After this you will be taken to the access point settings. Here you need to enable the “Portable Hotspot” function. In other shells, this item may be called “Portable access point”.

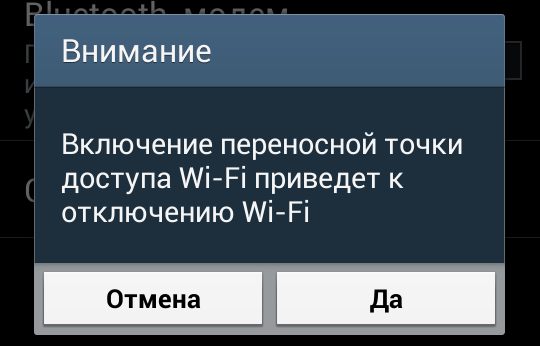
You will then see a warning that this action will disable Wi-Fi. Click on the “Yes” button to continue.
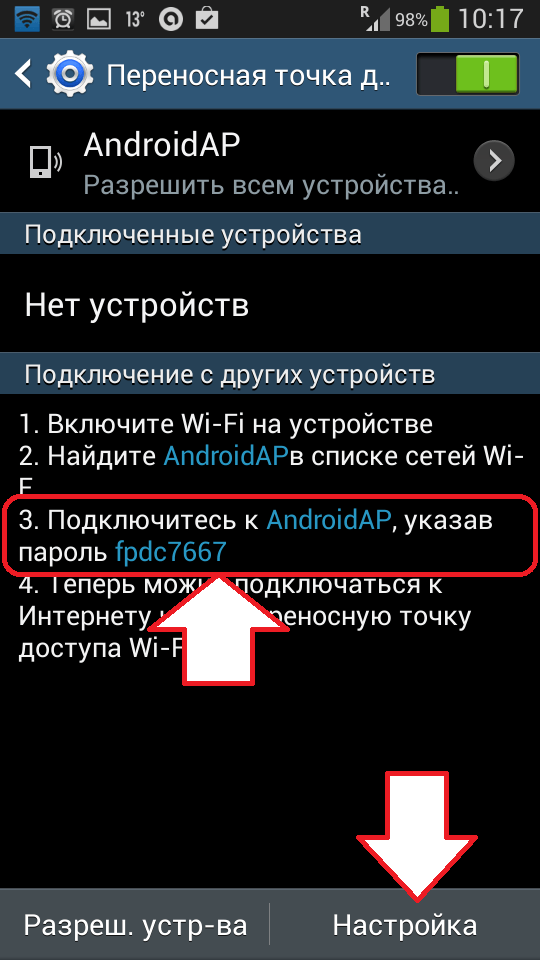
That's it, these simple steps are enough to distribute Wi-Fi from Android. Now your Android smartphone works like a dot Wi-Fi access and you can connect other devices to it. In order to obtain information about the password from this access point, open the “Portable access point” section.

After this, a screen will open in front of you, on which the password and name of your access point will be indicated. If you want to change this data, then you need to click on the “Settings” button.
If you click on the “Settings” button, a pop-up window with the access point settings will open. Here you can change the name of the access point (SSID of the network), change the encryption method (in our case, WPA2 PSK is used), and also change the password for connecting to this access point.

After making all changes to the settings, the pop-up window must be closed by clicking on the “Save” button.
It should be noted that in order for an Android smartphone to be able to distribute the Internet via Wi-Fi, it must have access to this Internet. In other words, your smartphone must be connected to the mobile Internet and there must be money in your account.
Surely, many who have an Android computer tablet have thought about distributing the Internet via a Wi-Fi network to other devices. For example, your tablet is connected to 3G or 4G mobile internet. You have a laptop, smartphone or any other Wi-Fi enabled device that needs to be connected to the Internet. So, here you go. Any Android tablet has the ability to turn into a hotspot.
By enabling a certain function on your tablet, a wireless network will be created to which you can connect your laptop or phone.
Let's take a closer look at the ability to distribute the Internet from a tablet.
Create a Wi-Fi hotspot on your tablet
Step 1. Turn on Wi-Fi on your tablet and go to settings.

Step 2. Click on the button More to expand the list of settings wireless networks.

Step 3. Select Modem mode.

Step 4. In line WLAN access point set the switch to position ON.

Step 5. Click Setting up a WLAN access point.

Step 6. In the window that appears, set the following parameters for the future network:
- Network name (SSID) - name of the Wi-Fi network;
- Protection. There are two options. If you want to make the network public, select the access type Public. If you want to protect your network from unnecessary connections, then choose WPA2-PSK.

In the password line, enter the security key. (password must be at least 8 characters). For reliable protection, use numbers, signs and Latin letters.

In this window you can select the maximum number of connected users. After setting all fields, click the button Save.
Addition
A small but important addition. Some tablet computer models have an auto-off feature for the access point. This feature allows you to disable Wi-Fi network when inactive for a certain period of time. That is, if you do not use the Internet or tablet for 5 or 10 minutes, then the Internet distribution stops. Therefore, if you go somewhere for 5 minutes, you will have to reconnect to the Internet.
To solve this problem go to section WLAN access point(step 4) and select Automatic access point shutdown. Set the switch to position Always on.

All necessary settings have been completed. Now the created network can be detected on any device and connected to it.
Connect to the distributed Wi-Fi
on a laptop
Step 7. On your computer, on the taskbar, click on the network icon, in the window that appears, find the name of the wireless network and click on it. Click Connection.

Step 8. Enter your password Wi-Fi networks and press OK.

Step 9. If the connection is successful, a window will appear where you will need to select a network location. Everything is simple here, if you are at home, then select home network, if at work, then the Enterprise Network, if at public place(cafe, store, airport, train station), then the Public Network.

Step 10. Go to your browser and check your Internet access.
on the phone
Step 11. Turn on Wi-Fi on your phone (if it's not turned on) and go to settings.

Step 12. Next click on the link WiFi.

Step 13. A window will open with a list of available networks. Select your network.

Step 14. If your network is protected by a key, then enter it in the password line and click Connect.

That's all. Internet distribution from an Android tablet should be in full swing and continuously.
Any modern phone can distribute the Internet to other devices using a Wi-Fi access point. This requires minimal effort from the user. You just need to go to the settings and enable the appropriate function. In this article we will talk about how this is done on phones with the operating system Android, iOS and Windows Phone.
How to share Wi-Fi from an Android phone
In order to distribute Wi-Fi from a phone based on the Android operating system, you need to open the phone settings and go to the “Other networks” section. If you cannot find a settings section with this name, it means that this section is called differently on your phone. In order to find the section you need, pay attention to the sections that are located immediately after “Wi-Fi” and “Bluetooth”.
Next, open the “Modem and access point” section. If there is no section with exactly the same name, then look at sections with similar names. The section you need may be called “Modem Mode”, “Connecting an Access Point”, “Modem” or simply “Access Point”.


After this, a warning may appear on the screen about enabling the access point and disabling Wi-Fi. If such a warning appears, then click on the “Yes” button to continue.

That's it, the access point has been created and your phone is already distributing Wi-Fi. But in order to connect to it you need to know at least the password. To do this, open the “Mobile access point” settings section (it is located next to the switch).

As a result, a window should open with information about the created access point. Here you can see the name of the access point and the password for connecting to it.

How to share Wi-Fi from iPhone
If you have an iPhone, then in order to distribute Wi-Fi you need to open the settings and go to the “Modem Mode” section. If you don’t have such a settings section, then most likely you need to enable and configure Mobile Internet.

After you get to the “Modem Mode” settings section, you need to activate this mode. To do this, move the switch to the “On” position.

In the same settings section, the name of the Wi-Fi access point and the password for connecting to it will be displayed.
Distributing WiFi from a phone based on Windows Phone 8
On phones with the Windows Phone 8 operating system, you can also distribute WiFi. To do this, you need to open your phone settings and go to the “Internet Sharing” section.


After this, the phone will automatically start distributing WiFi. The name of the access point and the password for connecting to it will be displayed in the same settings section.
You can distribute the Internet from an Android smartphone in three ways: via Wi-Fi, via USB and via Bluetooth. For this purpose, the Android OS provides standard functions. But it’s not enough to distribute the Internet - you also need to connect third-party devices to the network, and for this you have to carry out a number of simple manipulations. Let's see how to distribute the Internet from an Android phone to each of three ways.
We distribute the Internet using Wi-Fi:
To use your smartphone as an Internet access point via Wi-Fi, do the following actions:
2. Open the item “ Modem mode»;

3. Check the box " Wi-Fi hotspot"- the smartphone starts distributing the Internet via Wi-Fi.
You can make changes to the “Wi-Fi access point settings” by selecting the appropriate menu item - change the password or network name, or select a different protection method. Connecting to the Internet distributed in this way is very simple, and you probably know how to do it. You can use the hotspot from both Android and Windows devices.
Internet distribution using Bluetooth:
To use your smartphone as an Internet access point via Bluetooth, do the following actions:
2. We return to the main menu “Settings”, open the item “ Bluetooth", turn on visibility mode on the Android device;

3. We distribute the Internet via Bluetooth.
To connect to the Internet, which is distributed via Bluetooth, download and install the application on your Android smartphone or tablet. Open the application and see a list of Bluetooth devices, select the one you need - the one from which the Internet is distributed. Internet connection is complete.
Internet distribution from an Android device via USB:
To use a smartphone or tablet computer as an Internet access point for your home computer via USB, do the following actions:1. Go to “Settings”, then to “Wireless Networks”, where by checking the box select the item “ USB modem" - this item is usually hidden and becomes visible only when the Android device is connected to the PC via a USB cable;

2. On your home computer, go to the list of connections, select the connection that you just created. Your home PC is now connected to the Internet using a USB connection.
That's probably all - as you can see, distributing the Internet from an Android smartphone or tablet is very simple.
How to distribute the Internet from your phone if your friends really ask?
If the Internet is needed on several devices at once, but is available on only one, you need to know how this is done.
How does shared Internet work on a smartphone?
Absolutely all users can use their smartphone as a remote Internet access point.
The main condition for distribution is the presence of a 2G, 3G or 4G Internet connection on your smartphone.
This traffic will cost the same as your regular mobile Internet - according to the tariffs of your operator cellular communication.
A smartphone that distributes the Internet can broadcast the signal to several devices simultaneously. Limits on the number of calls to an access point depend on many factors, including the factory settings of the individual device.
The more devices are connected to one access point, the slower the network connection speed will be.
Instructions for Android
If you are a user of an Android smartphone or tablet, you can distribute the Internet as follows:
- in the window that opens, find the wireless networks tab and open full list parameters by clicking on the “More” item;
- go to the device menu and then turn on the settings panel (Fig. 1);
- now click on “Access Point” and “Settings” (Fig. 2);
- In a new window you need to configure the connection parameters. First, specify the network name - this is the name that other devices will see when they try to connect to your device. Select the protection level - the degree of security and complexity of encrypting the access point password depends on it. The network can be left open - all users can connect to the access point (if possible, do not use open network, it may not be safe for your device). Next, you need to come up with a password to access the connection (Fig. 3).
Instructions for iOS
If you are an iPhone or iPad user, follow the instructions:
- go to the device settings;
- select the cellular connection settings window (Fig. 6);
- set the “Modem mode” parameter to the “Enabled” state (Fig. 6);
- now scroll down the settings page until the modem settings section appears (Fig. 7);
- in the APN field, enter your operator, his name and access password (for example, for the MTS network, all three parameters will have the value “mts"). You can find out the data from your operator;
- After entering this data, a new modem mode item will appear in the settings window (Fig. 8). Open it.


 Rice. 8 – enable Internet distribution
You can now connect to the device from your PC or another smartphone.


