Digital camera as a web camera. Video surveillance via USB camera
From this article you will learn about new features of the phone, namely using it instead of a webcam.
You will be offered several options with which you can connect a webcam through your phone.
How to use a smartphone instead of a webcam
Read also: TOP 12 Best webcams with good picture quality for online communication and streaming
A smartphone is a multifunctional device that can be used to solve various tasks.
However, not many people know about the possibility of using a mobile gadget as a webcam, or how useful this function is.
In fact, there are such situations in life: you urgently need to answer a video call, but the webcam, as luck would have it, is faulty.
In this case, your gadget’s camera will come to the rescue. By following the step-by-step instructions, you can use your gadget to transfer video in other video chats.
If you require:
- Make a video call on Skype, but the standard camera is missing or faulty;
- To broadcast on the Internet, use several cameras;
- Create remote video surveillance.

Even if the screen on your gadget is broken, but it is still working, you can easily replace the webcam, as long as the front or main camera module remains working.
To connect you need:
- Special utilities for pairing the gadget with a PC or laptop;
- Wi-fi access point.
Programs for turning your phone into a webcam via USB
Read also: TOP 15 Best programs for changing voice timbre online | 2019
Almost any gadget can replace a webcam if a special program is installed on it correctly.
As a result, a phone with the utility installed will turn out to be an excellent device that can be used to communicate with family or business partners via video communication, and you can also use it to broadcast video.
The operation of applications designed to turn a phone into a webcam is based on synchronizing the gadget with a personal computer via a connection via a USB cable or.
These utilities will allow you to replace the built-in camera in your phone instead of the regular webcam installed on your laptop or computer.

The image quality will depend on the installed program and the resolution of the mobile camera.
Using the programs DroidCam, AlterCam and USB Webcam, you can connect your phone as a webcam via USB.
Using one of these applications allows you to transport images from the gadget's camera to a laptop via Bluetooth or a USB cable and can be used using web services for instant messaging.
In addition to the camera, you can also use the microphone of your mobile phone to communicate on Skype.
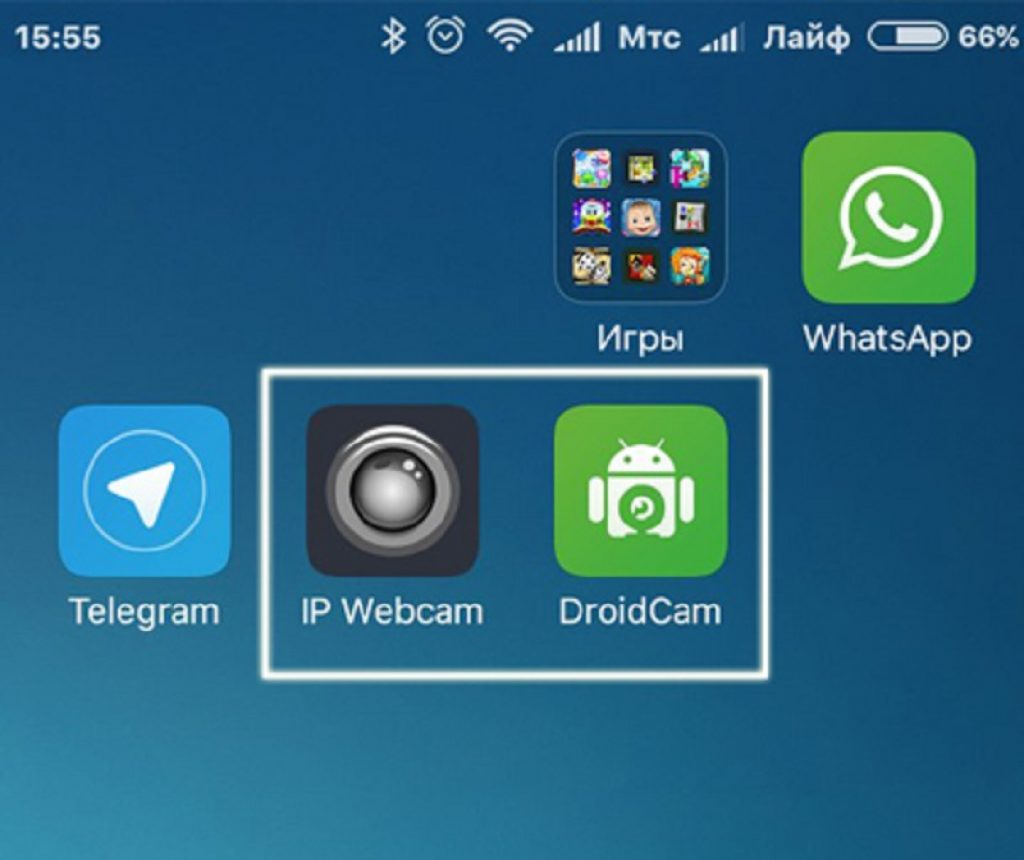
DroidCam
Read also: How to create a video online: TOP 10 best free and paid sites | 2019
One of the best programs for that run on Android. With its help, the gadget will undergo metamorphosis in a matter of minutes and become an excellent portable webcam.
Android version Windows versionStep-by-step installation instructions:
1 In order for your phone to turn into a camera, you need to install Android utilities.
While it is installing, proceed to install the program on your desktop computer. Unpack the archive. To do this, click on the archive file "Extract..." and select the location where you plan to extract the contents of the archive, then click the button "Ok".
After the unpacking process is completed, go to the folder you selected for unpacking and run the installation file and follow the instructions that appear on the screen.

2 Now you need to connect your phone to your PC using a USB cable or Bluetooth.
3 After successfully connecting one of your gadgets to another, run the program on both devices.
In the active window you need to enter a mobile gadget, which allows you to distinguish the device from all others.
You can find this path in the DroidCam application running on your phone. In addition to the IP address, DroidCam also shows the port number.
.
4 A notification will be sent to your computer desktop that your phone has been detected. You need to select the video quality to get started.
5 To continue working and start streaming, you just need to press the button "Start" . The application will send the image from the gadget's camera to the PC. If your mobile device has two cameras, go to the application settings on your phone and check if the corresponding checkbox is selected, which is responsible for the active camera.
AlterCam
Read also: TOP 12 Best IP cameras for video surveillance of a home or office | Review of current models in 2019
You can also connect your phone to your computer as a webcam via a USB cable using the AlterCam program.
This program allows you to install a virtual webcam on your system.
You can broadcast any video into it: both from a real camera and just video clips stored on your computer.
We will consider the option when the video source is the camera of a mobile device.
Using the IP protocol, the AlterCam program connects to a mobile camera and broadcasts video from it in real time to a virtual webcam.
The process of turning your phone into a webcam may seem complicated, but setting it up is a snap.
Android version Windows versionStep-by-step instruction:
1 First, download the AlterCam application and install it on your PC. After installation is complete, the program will launch automatically.
2 After this, you need to install the IP Webcam application on your smartphone. You can find it in the Play Store.

3 The installed application must be launched on the phone. When you start, a list of settings will appear; as a rule, you don’t have to change them, you just need to go to the very bottom and select “Run”.
4 You need to run the program on your computer. In the window "Camera" select "Add IP camera".
5 Now you need to connect to the camera of your mobile device using the AlterCam program. To line "IP Camera Name" , which will appear when the window opens "Add IP camera" enter any value, for example, my phone number.
The image quality of the IP camera will depend on the resolution settings in the smartphone application. If you don't know the exact value, leave this setting unchanged.
6 At the bottom of the application open on the phone, the camera’s IP address is indicated; move it to the “IP camera address” line in the window open on the computer.
After this, you need to add “/live” or “/video” at the end of the address. The first option is for devices running on the operating system, the second is for Android.

7 Having transferred the IP address to the computer, you can press the button "OK" . If all actions were performed correctly, an image from the phone camera will appear in the AlterCam program. If this does not happen, check that all steps are performed correctly step by step.
8 After the image appears in the AlterCam program, you need to select a virtual camera in the settings of the voice program that you will use. Let's look at Skype as an example.
Log in to Skype using your username and password. Click on the tab at the top "Tools" and select a section "Settings" . In the general settings you will see the “Video Settings” submenu, and select the program there.
USB Webcam
Read also: Slowdown effect: TOP 15 programs for Slow Motoon + Reviews
The program allows you to use your phone as a webcam via a USB cable. First you need to install the application on your phone and PC.
You can download the program for PC on the developer’s website. In folder "Installation path" you need to find the usbwebcam.bat file and run it.
Android versionIf the program is installed correctly, the image in all programs that use the camera will be broadcast from the phone's camera. True, the frame rate will be low.
You can reduce the resolution of the video stream in the application settings using a hardware key.
After launching the program on your smartphone, you need to enable software debugging to activate the webcam through a personal computer.
You can find this option in the menu "Options" , where you need to go to the submenu "System" , and then to “Developer Options”.
After enabling USB debugging, connect your phone via a data cable to your PC. Launch the program on your computer; to start working, you need to press any key.
The USB Webcam application must also be running on the phone. Now log into your Skype account, go to "Tools" , then subsection "Settings" .
In settings, open the section "Video settings" , in the window that opens, select "GWebcamVideo" . If everything works correctly, a picture from the smartphone camera will appear on the monitor screen.
If you see a green screen, your device is not supported by USB Webcam.
Modern people have long been accustomed to the fact that a smartphone is a multifunctional device with which you can solve a wide range of problems. But the user may not even be aware of some of the capabilities of his mobile gadget. For example, in a situation where a webcam is required for video communication, it can be replaced with an Android phone camera.
Turning your phone into a webcam is useful if you need to:
- Make an urgent video call on Skype, but you don’t have a standard camera at hand, or it’s broken;
- Install an additional webcam for Internet broadcasting;
- Create remote surveillance using your phone.
Even a phone with a broken screen can be used as a webcam. The main thing is that the front or main camera module is in working condition. For different ways to connect your phone you will need:
- USB cable;
- Wi-Fi hotspot;
- Programs for pairing your phone and computer or laptop.
Method 1. How to use your phone as a webcam via USB
You can connect your smartphone as a webcam to a PC or laptop using a regular USB cable. You will need some software to set up a video call. The most popular and convenient is the Android application DroidCam Wireless Webcam, which can be downloaded for free in the Google Play digital store. You also need to install the DroidCam program on your PC.
This software will work in conjunction: the Android application will configure the phone as a webcam, and the PC program will receive and process the signal from the mobile device.

Let's look at the step-by-step setup of the phone:
- Install the DroidCam Wireless Webcam application on your smartphone;
- Open the page http://www.dev47apps.com/ in your browser, download the distribution and install it on your computer or laptop;
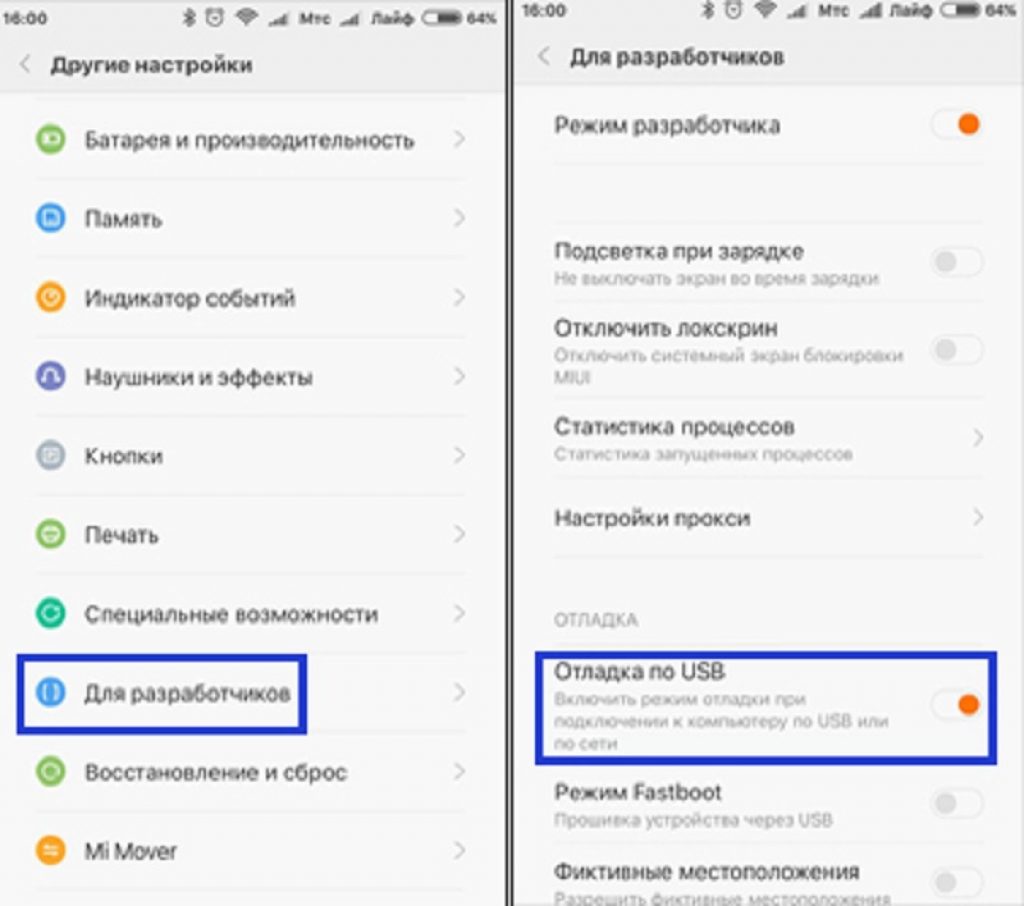
- Enable developer mode on your phone. You can read about how to do this in our article “The 10 most useful hidden features of Android”;
- Launch the USB Debugging feature. To do this, in the phone settings, select the “For Developers” menu item and press the button in the corresponding item.


- Launch the DroidCam Wireless Webcam application;
- Connect your smartphone to your computer via a USB cable;
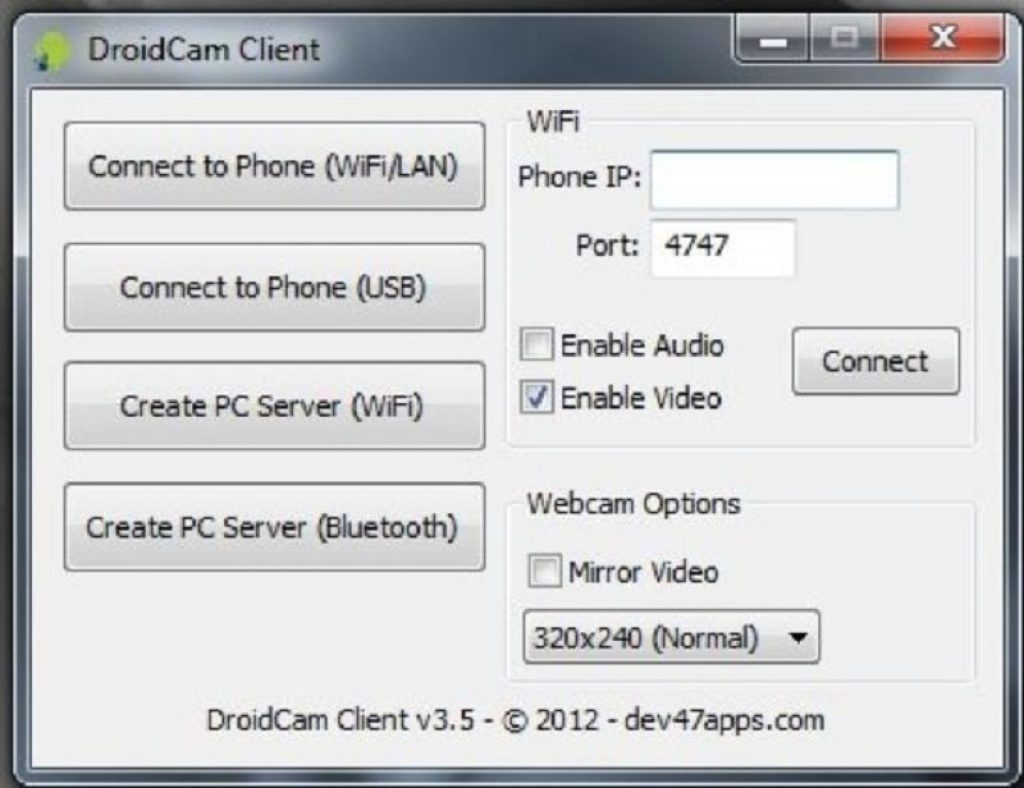
- Launch the DroidCam client on your computer;
- Click on the USB connection button;
- Click on the Start button.


An image from the phone's camera will appear on the client's screen. In the settings of the DroidCam Wireless Webcam application, you can select the front camera as the main one for connection, and also assign the phone’s microphone to capture sound.


Method 2. How to use your phone as a webcam over Wi-Fi
The DroidCam Wireless Webcam program allows you to configure your phone as a webcam via a Wi-Fi connection. To do this, follow steps 1 and 2 from the above instructions. Then go through the following steps:
- Start Wi-Fi on your phone;
- Open the DroidCam Wireless Webcam application;
- Open the DroidCam program on your PC;
- Click on the Wi-Fi connection button;
- In the Device IP line, enter the number that will be displayed on the main screen of the Android application in the WiFi IP item;
- Check the Audio and Video checkboxes;
- Click Srart.


After this, the application will capture the video signal from the phone's camera and transmit it through the client to the computer. The free version of the application only connects the phone and PC, and also contains advertising. The paid DroidCam application does not show advertising banners and allows you to customize the video: set the contrast and brightness, change the resolution, and so on.
Please note! On the Internet you can find many recommendations for applications that allow you to use your phone as a webcam. The second most popular program is the USB Webcam Android application. It should work similarly to the DroidCam utility, that is, you need to download the application to your smartphone and the PC program from the official website. The problem is that, although the application is still available on Google Play, the client developer’s website has ceased to exist, and downloading the distribution from a third-party source risks introducing a dangerous virus to your computer.
Method 3. Turn your smartphone into an IP camera for remote video surveillance
This method is suitable for those who do not want to limit themselves to the length of the USB cable or the reception area of the home Wi-Fi signal. You can turn your smartphone into a webcam, even if you’re on the other side of town, using the IP Webcam Android application, which can be downloaded for free from the Google Play store. To output a video signal from your phone to a PC or Skype, you will need a special adapter, which can be downloaded from the official website.

To set up your phone as a webcam you need:
- Install the application on your smartphone;
- Install the adapter on your computer;
- Set up a camera for video capture in the application;
- Set video resolution and quality;
- Change additional settings: video orientation, focus and flash mode, white balance, color effect, and so on;
- Select “Start broadcast” in the application.


- Via browser;
- Via VLC player;
- Via Skype.
To watch the video in a browser, enter the IP address and port of the device into the search bar. This information can be found by clicking the “How do I connect” button in the application. Indicate that you are connecting directly and select the connection method: via mobile network or Wi-Fi. In a pop-up window, the application will indicate the required number, for example, 192.168.0.39:8080. Next, on the video broadcast page, select the viewing and listening mode.

- Install the distribution;
- Open the player;
- In the top menu, select “Media”;
- Click "Open URL";
- Enter a line with the address specified in the application and add the word videofeed, for example, like this: http://192.168.0.39:8080/videofeed ;
- Click Play.


To connect to a broadcast on Skype:
- Open the adapter program;
- Enter an address similar to the one used for the VLC player;
- Specify the resolution 320x240 (if the signal does not connect, increase the resolution to the next level, for example 640x480);
- Click "Apply";
- In Skype, open Video Settings;
- In the “Select webcam” selector, select MJPEG Camera.


The IP Webcam application differs from DroidCam Wireless Webcam in its advanced functionality and simpler connection, which does not require installing additional drivers for your phone.
While studying ways in which a phone can be turned into a webcam, we used a gadget model from the Fly company.
Why Fly
Since 2003, the British company Fly has been a stable manufacturer of high-quality smartphones, in which engineers try to take into account all the requirements of modern users. The company's main focus is on creating budget smartphones that are not inferior in quality to mid-price models. Even in a gadget for 7-8 thousand rubles, the user will find a powerful 4-core processor, a capacious battery, an excellent camera, a high-quality IPS screen, and all this is framed by a stylish design.

We turned our smartphone into a webcam for a while. Since testing took quite a lot of time, we needed a gadget with a capacious battery, a large screen, a high-speed Internet module and a fast processor. And the Cirrus 9 smartphone ticked all the boxes. The large 5.5-inch IPS screen made it very convenient to manage application settings and study instructions for managing programs. A powerful 1.25 GHz quad-core processor ensured stable system operation while downloading and launching several applets simultaneously. The 4G LTE module made it possible to instantly download the largest application, and a capacious 2800 mAh battery kept the smartphone in a state of full combat readiness all this time.
Almost any electronic device, if desired, can be used in an atypical role. This also applies to smartphones, tablets, TVs, computers, cameras, and even ordinary calculators.
If you want to “transform” (conditionally) your gadget into some other device, you need to ask yourself at least one question, but the key one: “Does this really need to be done?” Most of these transformations can negatively affect the basic functionality of the device, which, under certain consequences, can lead to actual failure of operation (when interfering with the structure of the system or physical modifications).
But it’s good that these problems do not relate to the topic discussed in this article. Since below we will provide a small guide on how you can connect your camera to a computer as a web camera, what you need for this, as well as how to make the settings correctly and whether all cameras and computers are suitable for this.
What is needed for this
There are several key points worth noting right away, namely:
- The above guide is relevant for cameras (popularly “DSLRs”; digital cameras are not considered in this case) of the mid-price category and/or those that have already left the “modern models” category.
This is due to the fact that the vast majority of modern gadgets have been supplied with the built-in function of working in “web camera” mode for quite a long time.
Older models cannot boast of such functionality.
- Connecting a DSLR to a computer and using it for video calls is only possible if it supports video streaming. In other words, the camera must be able to display the resulting image directly on the screen of a receiving device, for example, a TV or monitor.
To check the availability of this functionality, do the following:

Similar “tulips” were supplied with the models whose category was mentioned above. Currently, most cameras are equipped with HDMI support.
- Not only the camera must meet the above requirements, but also the computer itself.
The installed video card must be equipped with a corresponding connector for one of the “tulips”, which is responsible for transmitting the video signal.

On well-known Chinese online stores, the cost of such devices is minimal, about 300-500 rubles.
So, taking into account all of the above, it is worth noting that the “transformation” in question is not a “five-minute” matter, as it requires certain monetary costs and time for delivery/receipt.
In addition, you should ask yourself the question again: “Do you really need to do this?” The most ordinary webcam costs the same money as, but does not require other investments or any complex settings. Therefore, it may be worth considering purchasing a specialized device. Question, question...
If your determination has not faded, go to the direct settings for image display and device recognition.
Settings
You need to understand that even if your camera and computer meet all the above requirements, if you simply connect them, then nothing useful will come of it.
For correct operation, you will need additional software that creates a virtual webcam, the responsibilities of which will be taken over by your camera.
Quite often, such software is supplied bundled with a TV tuner or other video capture device in the form of an installation disk.
Or you can simply additionally download the free program “SplitCam”, or similar options “ManyCam” and “ActiveWebCam”.
For Canon products there is a proprietary utility called “PSRemote”.
You should first disable shutdown on the camera when idle, and also provide it with a power source if you plan to use it for a long time without interruption.

Conclusion
So, as can be seen from the above small guide, there is nothing complicated in the process discussed in this article. The main thing is desire, a little time and small financial costs.
If you have a simple digital video camera, then it can be used as a webcam, that's for sure. There are different methods, and below we will talk about two possible methods. This is very convenient, because it allows you to save money on buying a webcam, although it is not very practical, because you have to fuss with the setup. Oh yes, the image quality from a regular camera will be significantly better than the image quality of almost any webcam.
Method 1: Using TeVeo Video Suite
There is such a program as TeVeo Video Suite. It is completely free and available to everyone. It’s easy to find it on the Internet by simply googling its name. This software is intended for the following tasks:
- Show video from the camera to everyone through the browser interface;
- Show videos only to certain people who have a password;
- Communication with users who are registered on the TeVeo website.
Those. The owner of the video camera receives his own Internet address. He can give the link to anyone, and this link will have access to an online image recorded by a video camera. If desired, the link can be “password-protected”, and then the video will only be accessible if the user enters the password. The idea is not bad, but it has shortcomings. The most important thing is that sound broadcasting is impossible. However, the problem can be solved using Skype. You communicate with a friend via Skype by voice and at the same time broadcast video on the TeVeo website using the TeVeo Video Suite program. A little impractical, but the point is that a computer “without magic” does not recognize a regular digital video camera connected via a USB interface as a webcam.
There are also alternative programs to Skype, for example NetMeeting.
Method 2. Use a special virtual driver
Here we will talk about how to “deceive” our computer and hammer into its head that our ordinary video camera is nothing more than a webcam.
This is done using a special driver: it receives a stream from a simple video camera, but outputs it “disguised” as a webcam. The driver itself is available together with the TrackerCam program. There are different versions of this program on this page. Please note: there are paid and free versions. The free functionality will be enough for you.
Download the program, install it, run it. Next, you may need to specify in the program itself which video camera to use as a webcam. This is easy to do: Tuner > Display & Camera > Select camera.
As soon as you specify the desired camera, launch Skype and go to video settings. There, in theory, our virtual webcam should appear, showing video.
TrackerCam is not easy. It is an analogue of the TeVeo Video Suite program mentioned above and also allows monitoring via the Internet. In our case, we only needed a driver. We really hope that our advice helped solve the problem.
Please rate the article:
It's no secret that Skype has become incredibly popular in recent years. Now this is one of the few programs that allows you to organize communication with relatives or loved ones over a long distance completely free of charge. Not only can we communicate just like on the phone, we also have the opportunity to see each other. But here many are faced with the fact that they do not know how to connect a webcam to a computer. This is what we will talk about now.
General provisions
First, you need to understand that there are several types of webcams. Some do not require additional software, while others install normally only if drivers are available. What kind of camera do you have? We'll deal with this a little later. As a rule, a disk may be included with the webcam; if there is none, then it is most likely not needed. Additionally, the connection process differs depending on the hardware and operating system used. So, it can be a laptop or computer running Windows HP or Linux OS. But since connecting a webcam to a computer is not too difficult, even a novice user can cope with this procedure without experiencing any problems. However, before you start, read the useful information that will be useful to you in practice.

What do we need to get started?
We have already said a little about the fact that webcams are different, but the installation principle is not very different. That's why in order to do everything right, we need several integral components. One of them is high-speed Internet. As practice shows, without access to the network there is no particular benefit from the web. This is due to the fact that with its help you can only take your own pictures, but the quality in this case will not be the best. In addition, we will need the camera itself. Currently, most models have a USB connector. If the webcam does not have a microphone, which is typical for older models, you will need headphones with one. If you have a new camera, then you can do without a headset, since you will hear the interlocutor through the speakers, and speak directly into the webcam. By the way, do not forget to free one USB port, because we will need it. Well, now let's see how to connect a webcam to a computer.
Stage one
If you work on a laptop or netbook, then it already has a webcam. To use it you do not need to install, update or download anything. But if you decide to install a higher-quality analogue, then this is a different matter. First, connect the camera to the appropriate port, where it is located, you will figure it out, since it is almost impossible to mix it up. Next, you need to wait a little while the driver is automatically installed from your operating system database. The same procedure applies when connecting a storage device, mobile phone or other equipment, so don’t worry. After this, you will receive a message stating that the device has been successfully installed and is ready to use; in rare cases, you will need to restart your PC. Well, now let's go further and consider a slightly different situation.

Stage two: manual installation
If the camera does not install automatically, you will need to insert a driver disc. But here you may encounter the problem that it is missing or does not work. Of course, this does not mean that you need to throw away the device, so do not despair, because you can turn on the webcam on your computer even without a driver without any problems. To do this, you will need to go to the manufacturer's website and find the appropriate software there. All you have to do is download and install. You can go the other way and install a utility called DriverPack. Its essence is that it will automatically search for a suitable driver on the network and install it. To check if it works, go to “My Computer” and find your USB video device there. If you can enter it and see the picture, then everything is in order, and now you can talk with your family and friends.

Setting up and connecting a webcam to a computer
We must not forget that this USB device has a lot of internal settings. Sometimes the factory settings are quite acceptable, so you don't need to do anything else. But in some cases, you will need to adjust a number of parameters, for example, the volume of audio recording and playback. If this indicator is at the maximum, the voice may be poorly recognized or extraneous noise will be observed. In addition, sometimes it is useful to change the image quality as well as its size. In the latter case, you can make it wider or, conversely, narrower. This is necessary in order to see the interlocutor in full or only his face. In addition, modern webcams have a number of other settings, such as saturation, sharpness, brightness, contrast, etc. If you connected the device to a PC using drivers, the settings will be set automatically, and most of them will be at 50%.

Setting up in Skype: step one
In principle, connecting a webcam to a computer is quite simple and quick. Sometimes it is much more difficult to set it up directly in Skype. Let's figure out how to do this. First, you need to log in to the program, go to the “Tools” section and select “Settings” there. After that, select “video settings”. If you see the picture, then everything is in order, but when a text message from Skype is displayed on the screen, this indicates that there is a problem. The first thing to do is check whether the device is connected to the port and whether the computer finds the webcam. Go to "my computer" and see if "usb video device" appears there. By the way, one of the most common mistakes is that “webcam” can only be used in one program. Therefore, if it is open somewhere else, Skype simply will not see it. It's easy to guess that fixing this is very simple. It is enough to close one of the utilities. You may also need to restart Skype, after which everything will fall into place.
Setting up in Skype: step two
Any webcam requires drivers; the only question is how they will be installed. This can be an archive of your operating system or a disk that comes with the package. If the camera is not displayed in Skype, and you have tried all the methods described above, then do the following. Go to the “Control Panel”, select “System” - “Hardware”, and then “device manager”. You will see a list of all devices running on this PC. Somewhere among them should be your webcam. If it is not there, then this only means that the problem is either with the port socket or with the device cable. If you do find the camera and see a yellow exclamation mark next to the icon, this indicates that there are no drivers. Next, right-click on the icon, select “properties” and “update drivers”. If there is no exclamation mark and the “webcam” is still not visible, reinstall the driver. After this everything should work.

A few important details
Many users report that the webcam does not appear in My Computer. There is nothing wrong with this, especially if you do not use the Windows HP operating system. This is due to the fact that later updates do not support this function. For example, you won’t be able to call up the webcam on a laptop running Win 7; it will only work in Skype. It is worth drawing your attention to the fact that there are a lot of manufacturers of this equipment. They all take a different approach, so the setup will be slightly different. For this simple reason, it is simply impossible to develop a single algorithm, however, debugging is not so difficult. Moreover, in approximately 70% of cases, a webcam, which is installed on a computer automatically, does not cause any inconvenience to the user.

Conclusion
So we have figured out how to install and configure the web. Everything is extremely simple: insert the cable into the port, install the drivers, update them if necessary, close all utilities that use the web - and you can enjoy communication. You also already know how to connect a webcam to a computer without an installation disk, so this shouldn’t be a problem. However, before purchasing, check whether it is necessary to install a driver for this device. They may not give you the disk, but they will tell you where you need to go to download the necessary software. That's probably all on this topic.