Computer troubleshooting programs. Useful utilities for diagnosing and testing hardware
Hi all. In today's article we will talk about a complete diagnosis of all devices in your computer. I will show and tell you how to independently diagnose a computer and all its component devices:
- HDD.
- RAM.
- Video card.
- Motherboard.
- CPU.
- Power unit.
We will check all this in this article and for each of the computer devices I will make a video in which I will clearly show how to diagnose a particular device.
In addition, using diagnostics, you will be able to determine whether you should completely replace the device or whether you can repair it; we will also analyze the main problems of devices that can be determined without diagnostics. Well, let's start with the most important question that interests everyone - diagnostics HDD/SSD.
HDD and SSD disk diagnostics.
Disk diagnostics are done in two directions: they check the Smart system of a hard or solid-state drive and check the disk itself for bad or slow sectors. In order to check the SMART HDD and SSD, we will use the program. You can download it from our website in the download section.
Well, now let’s go directly to the disk diagnostics itself, after downloading the program, run the file of the required bit depth and look at the main window if you see the icon of blue color the signature “good” or in English “good” means everything is in order with your SMART disk and you don’t need to carry out further diagnostics.
If you see a yellow or red icon with the words carefully, bad, then there are some problems with your disk. You can find the exact problem below in the list of essential SMART diagnostic items. Wherever there are yellow and red icons opposite the inscription, it will indicate that it is in this part that your disk was damaged.
If your disk has already exhausted its lifespan, then there is no point in repairing it. If you have several broken sectors, then there is still a possibility of repair. I will talk about repairing bad sectors further. If there are many bad sectors on the disk, more than 10, or many very slow sectors, then it is not worth restoring such a disk. After some time, it will still crumble further, it will need to be constantly restored/repaired.
Software disk repair.
By repair I mean the relocation of bad and slow sectors on the disk. This instruction is only suitable for HDDs, that is, only hard drives. For SSD this operation will not help anything, but will only worsen the condition of the solid-state drive.
Repairing will help extend the life of your hard drive a little more. To restore bad sectors we will use the HDD regenerator program. Download and run this program, wait until the program collects data about your drives, after the data has been collected you will see a window in which you will need to click on the inscription - Click here to bad sectors on demaget drive surfase directly under Windows XP, Vista, 7, 8 and 10. You need to click on the inscription quickly in OS 8 and 10, so the window will quickly disappear, in 7 everything is fine. Next, click NO. Then select your drive from the list. Click the start process button. A window will appear like command line in which you will need to press 2, Enter, 1, Enter.
After the completed operations, the system will begin scanning for bad sectors and moving them to unreadable disk partitions. In fact, bad sectors do not disappear, but in the future they do not interfere with the operation of the system and you can continue to use the disk. The disk verification and repair process may take long time, depends on the size of your disk. When the program is finished, press button 5 and Enter. If you encounter any errors while testing and fixing bad sectors, it means that your disk cannot be recovered. If you have found more than 10 bads - bad sectors, then restoring such a disk does not make sense, there will always be problems with it.
The main signs of disk failure are:
Video on how to diagnose HDD/SSD:
RAM diagnostics
This time we will carry out diagnostics random access memory. There are several options in which you can check the RAM, this is when your computer is still turning on and working somehow, and when you can no longer turn on the computer, Only the BIOS loads.
The main signs that the RAM is not working:
- When loading resource-intensive applications, the computer freezes or restarts.
- When using the computer for a long time, more than 2 hours, Windows begins to slow down, and as time increases, the slowdown increases.
- When installing any programs, you cannot install them, the installation fails with errors.
- Sound and video jamming.
The first thing we will look at is how to check the RAM if your Windows boots. It’s very simple, in any operating system starting with Windows Vista you can type the Windows memory checker in the search. The shortcut that appears is launched as administrator and we see a message stating that you can reboot and start the scan right now or schedule a scan the next time you turn on the computer. Select the value you need. After the computer restarts, the RAM test will automatically start immediately. It will be carried out in standard mode, wait until the end of the test and you will find out if everything is okay with your RAM. In addition, after you have already loaded Windows, in the event viewer you can open the Windows logs, select the System item and find the memory diagnostic event in the list on the right. In this event you will see all the information about the diagnostics performed. Based on this information, you can find out whether the RAM is working.
The next option for diagnosing RAM if you cannot boot Windows. To do this, you need to write the program to a disk or bootable USB flash drive and run it from the BIOS. In the window that appears, a test to check random access memory (RAM) will be automatically launched. Wait until the test is completed and if there are any problems with your memory, the test window will change from blue to red. This will indicate defects or failure of the RAM. That's all, you have learned how to diagnose RAM.
Video on how to check the RAM:
Video card diagnostics
The main signs of a video card defect:
- The computer hits the blue screen of death.
- Artifacts appear on the screen - multi-colored dots, stripes or rectangles.
- When loading games, the computer freezes or restarts.
- When using a computer for a long time in a game, performance decreases and the game begins to lag.
- Video jamming, video playback failure, problems with flash player.
- No smoothing in text or when rewinding documents or web pages.
- Changing the color scheme.
All these are signs of some kind of video card defect. Testing a video card should be divided into two stages: checking the graphics chip and checking the video card memory.
Checking the graphics chip of the video card (GPU)
To check the graphics chip, you can use various programs that put a load on this chip and identify failures under critical load. We will use the program, and FurMark.
Launch Aida at the bottom of the tray near the clock, right-click and select system stability test. In the window that appears, check the box next to GPU Stress Test. The test will be launched below and you will see a graph of temperature changes, fan speed, and current consumption. To check, a 20-minute test is enough; if at this time the lower field with the graph turns red or the computer reboots, then there are problems with your video card.
Let's launch OCCT. Go to the GPU 3D tab, do not change the settings and press the ON button. Next, a window will appear with a furry donut, which is visual test. The test will take 15-20 minutes. I recommend monitoring the temperature and monitoring the power readings; if multi-colored dots, stripes or rectangles appear on the screen, this will indicate that there is a problem with the video card. If the computer turns off spontaneously, this will also indicate a defect in the video card.
Now we have analyzed the diagnostics of the video card processor, but sometimes there are also problems with the video card memory.
Diagnostics of video card memory
For this diagnostic we will use the program. Unpack the program and run it as administrator. In the window that appears, put a checkmark next to the inscription signal if there are errors and press the start button. A check of the video card's RAM will be launched; if any errors are detected with the memory, the program will emit a characteristic sound signal; on some computers the signal will be a system one.
That's all, now you can diagnose the video card yourself. Check the GPU and video card memory.
Video card testing video:
Motherboard diagnostics
The main signs of a motherboard malfunction:
- The computer hits the blue screen of death, reboots and turns off.
- The computer freezes without rebooting.
- The cursor, music and video (freezes) get stuck.
- Connected devices disappear - HDD/SSD, drive, USB drives.
- Ports, USB and network connectors do not work.
- The computer does not turn on, does not start, does not boot.
- The computer works slowly, often slows down or freezes.
- The motherboard makes various sounds.
Visual inspection of the motherboard
The first thing you need to do to diagnose a motherboard is to conduct a visual inspection of the motherboard. What you need to pay attention to:
- Chips and cracks - if such damage is present, the motherboard will not turn on at all or will turn on only once.
- Swollen capacitors - due to swollen capacitors, the computer can turn on after 3, 5, 10 attempts or after a certain time, it can also go out for no reason and slow down.
- Oxidation - the computer may turn on every once in a while and slow down. It may not turn on at all if the tracks are completely oxidized.
- Warmed up chips, there will be small burnt spots or holes on the microchips - because of this, the computer may not turn on or the ports, network cards, sound or USB will not work.
- Scratches on paths are the same as with chips and cracks.
- Burnt around chips and ports leads to complete inoperability of the motherboard or its individual parts.
Software diagnostics of the motherboard
If your computer turns on and boots into Windows, but there are strange glitches and slowdowns, it’s worth doing software diagnostics of the motherboard using the program. Download and install the program, launch it, right-click on its icon at the bottom of the tray near the clock and select “service” - “system stability test”. Check the boxes next to Stress CPU, Stress FPU, Stress cache, and uncheck the rest. Press the "Start" button, the computer will freeze, and the test will begin. During the test, monitor the temperature of the processor and motherboard, as well as power. We carry out the test for a minimum of 20 minutes and a maximum of 45 minutes. If during the test the bottom field turns red or the computer turns off, then the motherboard is faulty. Also, the shutdown may be due to the processor, uncheckStress CPU and check again. If you find overheating, then you need to check the cooling system of the motherboard and processor. If the power supply fluctuates, problems may occur with both the motherboard and the power supply.
If the computer starts but Windows does not load, you can check the mainland through a boot test. It needs to be written to a disk or flash drive. I will show you in more detail how to use it in the video.
Diagnostics of the power supply unit (PSU)
The main signs of a faulty power supply:
- The computer does not turn on at all.
- The computer starts for 2-3 seconds and stops working.
- The computer turns on 5-10-25 times.
- When under load, the computer turns off, reboots, or displays a blue screen of death.
- When under load, the computer slows down a lot.
- Devices connected to the computer spontaneously disconnect and connect (screws, drives, USB devices).
- Squeak (whistle) when the computer is running.
- Unnatural noise from the power supply fan.
Visual inspection of power supply unit
The first thing to do if the power supply is faulty is to do a visual inspection. We disconnect the power supply from the case and disassemble the power supply itself. We check for:
- Burnt, melted elements of the power supply unit - make sure that all the elements are intact; if you find burning or something obviously melted, we take the power supply unit for repair or replace it with a new one.
- Swollen capacitors - replace swollen capacitors with new ones. Because of them, the computer may not turn on the first time or may die under load.
- Dust - if dust is clogged in the fan and radiators, it must be cleaned, because of this the power supply under load may turn off due to overheating.
- Burnt fuse - when there is a voltage drop, the fuse often burns and needs to be replaced.
We checked everything but the power supply is behaving badly, let's see.
Software diagnostics of power supply
Software diagnostics of the power supply can be carried out using any test program that gives the maximum load on the power supply. Before doing such a check, you need to determine whether all elements of your PC have enough power from the power supply. You can check this like this: run the AIDA 64 program link above and go to the site for calculating the required power of the power supply. On the website, we transfer the data from Aida to the appropriate fields and click the Calculate button. This way we will be sure exactly how much power the power supply will be enough for the computer.
Let's proceed to the diagnosis of PD itself. Download the program. We install and launch it. Go to the Power Supply tab. Check the box to use all logical cores (does not work on all computers) and press the ON button. The test lasts an hour, and if during this time the computer turns off, reboots, or displays a blue screen, there are problems with the power supply (Before checking the power supply, you must first check the video card and processor to avoid the test being incorrect).
I won’t show you how to diagnose a power supply with a multimeter, because there is a ton of this information on the Internet, and it’s better for professionals to do such diagnostics. I will show you testing the power supply in more detail in the video below:
Have you ever encountered such a situation - the computer starts to malfunction or turns off completely? What is the problem? It turns out that you don’t always need to contact service center. Try using specialized software. The use of programs is useful not only in cases of malfunctions. Let's look at the best programs for identifying computer hardware and when to use them.
Why do you need such software?
Have you ever encountered situations where you need to know some PC specifications? And this is not the only reason to use such software. Iron detection software is useful if:
- Drivers are updated;
- To find out the temperature of the HDD or CPU;
- When the system slows down and freezes.
Sometimes it is necessary to know the hardware model or version. Users do not remember such parameters. They may not be in the documentation. Let's consider what software is needed in such situations.
Speccy
Official website of the program: filehippo.com/download_speccy. On home page There will be a link from which we download the “exe” file with the program. Installation is simple and will not cause any difficulties even for beginners. Shows information about RAM, sound devices, CPU and motherboard temperatures. Works on all versions of Windows.

The utility window displays equipment models and small icons indicating the temperature. By double-clicking on them, see the changes that have occurred in five minutes. The utility will not be released by the developers as a professional monitoring tool, but you can find out when it’s time to change the thermal paste on your video card using the program.
Speccy characteristics:
- Shows detailed information about the characteristics of the PC and its devices;
- Uses system tools for diagnostics.
Program for determining computer hardware Aida64
Download the program from the official Internet project: aida64.com/downloads/latesta64xe.
Previously called Everest, but was renamed by the developers to AIDU. Shows detailed information about the system and what is installed. Aida64 is configured for advanced diagnostics of PC operation. Has tests for RAM, CPU, video, HDD.
Important! When checking out your computer, or before purchasing a new one, take a stress test. If the device worked for at least fifteen minutes and no blue screen appeared, everything is fine.
Characteristics of AIDA 64:
- Shows information in real time;
- Generates a detailed report;
- Completely in Russian.
Aida can:
- Edit programs in startup. It is because of them that the PC begins to work slower;
- A section displaying all connected devices. This will help determine its model and find the correct driver. Shows a link from where to download it.
HWInfo
Official website of the utility: www.hwinfo.com. Among the features, we note the ability to download the program installer, and the presence of a portable version. Once launched, HWInfo displays general information about the PC.

Small, but powerful program. If you look at the temperature sensors, then in addition to the current indicators, the program will show the maximum permissible parameters for the equipment. If they are close to the maximum, think about it. Works with all versions of Windows.
Important! It is convenient to update drivers, since the utility publishes a link to the manufacturer’s website.
GPU-Z
If your video card is malfunctioning, pay attention to this application. It supports most existing video adapters. Shows information about frequency, RAM resource usage, load. Determines memory timings and BIOS version of the motherboard. Download it from the site cpuz.ru/gpuz_download.htm

Peculiarities:
- Works only with a video card;
- The main feature is monitoring of the main quantities of the device;
- Minimum settings.
CPU Thermometer
Download it from cputhermometer.com

Suitable for those who know what it is normal temperature CPU. Performs one function - shows the loading percentage processor cores. Minimizes to the system tray and launches along with the OS.
CPU-Z
Official website of the program: cpuid.com/softwares/cpu-z.html

The utility will measure the CPU temperature, evaluate its efficiency and resistance to overloads. The creators have implemented a lot into the application important functions. In addition to testing, the utility receives information about motherboard, each stick of RAM and GPU. Creates a report exported to txt or html format.
Peculiarities:
- Shows CPU temperature;
- Detailed information about hardware;
- Benchmark (solution to a problem to determine performance) CPU;
- Works on Windows and Android.
Monitor your temperature with Core Temp
Download the program from: alcpu.com/CoreTemp/

Receives information from PC temperature sensors. Checks whether the system is using a lot of CPU. A special feature of the program is the overheat protection function. She will report this and take certain actions. Will put the PC into sleep mode, or turn it on (can be configured as desired).
Shows CPU core values, frequency and voltage on the chip. Differs from similar programs in the ability to display maximum temperature heating depending on the processor model. Even if you are a novice user, by looking at the minimum and maximum values you will understand whether the temperature readings are normal.
Advantages:
- Consumes few system resources;
- Clear interface;
- Protects the system from overheating;
- Ability to search for new drivers;
- BIOS update;
- Advanced diagnostic settings;
- Free.
Open Hardware Monitor
Located at: openhardwaremonitor.org/downloads/

Dwaremonitor connects to sensors on the motherboard, so it shows accurate and detailed information. The window displays the current and maximum temperature readings. By looking at the values, it will become clear whether the equipment has a tendency to overheat.
Main characteristics:
- Reports an increase in temperature;
- The results are recorded in a log;
- Support for all existing processors, information about which comes from special online databases;
- Compatible with all versions of Windows.
SpeedFan
The utility is located on the website speedfan.ru.softonic.com/

Displays the temperature of the CPU, SMAPT drive and other parts of the PC. A distinctive feature is the regulation of the cooler rotation speed. This is what it will be used for. SpeedFan prevents overheating and helps reduce noise levels.
Important! For correct settings try it different variants. The main thing is to monitor the temperature.
Peculiarities:
- Information about the temperature is shown in the system tray (near the clock);
- The number of fan revolutions is set in the menu.
Conclusion
Of the programs listed above, use Core Temp and Hardware Monitor in combination. The first will protect against overheating. The second will show detailed information about other parameters. To reduce noise or optimize cooling, use SpeedFan. AIDA and CPU-Z are suitable for testing hardware. Compared to their analogues, they show the most truthful results. If you don't like complex software, use the minimalist CPU Thermometer.
There are situations when you need to find out the exact model of a video card or any other component. Not all necessary information can be found in the device manager or on the hardware itself. In this case, they come to the rescue special programs, which help not only to determine the model of components, but also to obtain many additional useful information. In this article we will look at several representatives of such software.
Both advanced users and beginners can use this program. It helps not only to obtain information about the state of the system and hardware, but also allows you to carry out some configuration and check the system with various tests.

Everest is distributed absolutely free, does not take up much space on your hard drive, and has a simple and intuitive interface. You can get general information directly in one window, but more detailed data is located in special sections and tabs.
AIDA32
This representative is one of the oldest and is considered the progenitor of Everest and AIDA64. The program has not been supported by developers for a long time, and no updates have been released, but this does not prevent it from properly performing all its functions. Using this utility, you can instantly obtain basic data about the state of your PC and its components.

More detailed information is located in separate windows, which are conveniently sorted and have their own icons. You don’t have to pay anything for the program, and the Russian language is also present, which is good news.
AIDA64
This popular program is designed to help diagnose components and conduct performance tests. It combines all the best from Everest and AIDA32, improves it and adds several additional functions that are not available in most other similar software.

Of course, you will have to pay a little for such a set of functions, but this will only need to be done once; there are no annual or monthly subscriptions. If you can’t decide on a purchase, then a free trial version with a period of one month is available on the official website. Over such a period of use, the user will definitely be able to draw a conclusion about the usefulness of the software.
HWMonitor
This utility does not have such a wide range of functions as previous representatives, but it has something unique. Its main task is not to show the user all the most detailed information about its components, but to allow them to monitor the condition and temperatures of the hardware.

The voltage, loads and heating of a specific element are displayed. Everything is divided into segments to make it easier to navigate. The program can be downloaded absolutely free from the official website, but there is no Russian version, but even without it everything is intuitive.
Speccy
Perhaps one of the most extensive programs presented in this article in terms of functionality. It combines a lot of different information and ergonomic placement of all elements. Separately, I would like to touch upon the function of creating a system snapshot. Other software also has the ability to save test or monitoring results, but most often this is only in TXT format.

It’s simply impossible to list all the features of Speccy, there are really a lot of them, it’s easier to download the program and look through each tab yourself, we assure you that learning more and more new things about your system is a very interesting thing.
CPU-Z
CPU-Z is a narrowly focused software that is focused only on providing the user with data about the processor and its state, conducting various tests with it and showing information about RAM. However, if you need to get exactly this information, then additional functions are simply not needed.

The developer of the program is the CPUID company, whose representatives will be described in this article. CPU-Z is available for free and does not require a lot of resources and hard drive space.
GPU-Z
Using this program, the user will be able to obtain the most detailed information about the installed graphics adapters. The interface is designed as compactly as possible, but at the same time all the necessary data fits in one window.

GPU-Z is perfect for those who want to know everything about their graphics chip. This software is distributed absolutely free of charge and supports the Russian language, however, not all parts are translated, but this is not a significant drawback.
System Spec
System Spec - developed by one person, freely distributed, but there were not enough updates for a long time. This program does not require installation after downloading to your computer; you can use it immediately after downloading. It provides a large amount of useful information not only about the hardware, but also about the state of the system as a whole.

PC Wizard
Currently this program is not supported by developers, and therefore no updates are being released. However, the latest version can be used comfortably. PC Wizard allows you to find out detailed information about components, track their condition and conduct several performance tests.

The interface is quite simple and clear, and the presence of the Russian language helps you quickly understand all the functions of the program. You can download and use it absolutely free.
SiSoftware Sandra
SiSoftware Sandra is distributed for a fee, but for its money it provides the user with a wide range of functions and capabilities. What’s unique about this program is that you can connect to your computer remotely, you just need to have access to do so. In addition, it is possible to connect to servers or simply to a local computer.

This software allows you to monitor the state of the system as a whole and find out detailed information about the hardware. You can also find sections with installed programs, various files and drivers. All this can be edited. Downloading the latest version in Russian is available on the official website.
BatteryInfoView
A narrowly focused utility whose purpose is to display data about the installed battery and monitor its condition. Unfortunately, she can’t do anything else, but she completely fulfills her task. Flexible configuration and a number of additional functionality are available.

All detailed information can be opened with one click, and the Russian language allows you to master the software even faster. You can download BatteryInfoView from the official website for free, and there is also a crack with installation instructions.
Is not full list all programs that provide information about PC components, however, during testing they performed quite well, and even a few of them will be quite enough to receive all possible detailed information not only about the components, but also about the operating system.
Sometimes it is simply necessary to diagnose the system. The main goal is to obtain detailed data about your hardware. This can be done using special software. It's hard to say which one is the most best program to determine computer hardware. Let's look at the most popular of them and draw conclusions about which one is worth using and which one is not.
AIDA 64 review
You've probably heard about this one, it's very functional and easy to use. Perhaps this is the most popular software for checking the hardware of your computer or laptop. The utility provides the most detailed information about your operating system, drivers, hardware, programs, etc. Distinctive feature is that “Aida 64” allows you to perform monitoring, that is, monitor the stability of your computer both during downtime and under load. You can speed coolers and much more. If you need real-time information, then AIDA 64 is good program to determine computer hardware. But the utility’s capabilities don’t end there. Let's talk about additional features.
A program for checking computer hardware or all the features of Aida

As noted above, there is currently a lot of software that allows you to find out all the details of the operating system and in general. But not all programs allow you to perform stress tests, which are necessary to check stability. This is especially necessary after overclocking the processor or video card in order to find out how the component will behave when elevated temperature, load, etc. If you are planning to update your device, then first you need to do a test that will show where the most vulnerable spot and what you need to pay attention to first. In addition to all this, Aida 64 allows for real-time monitoring. This is useful when you need to know the temperature of the processor or video card while performing certain tasks (watching multimedia, playing games, etc.)
A small guide about the sections of Aida 64

We have already said almost everything regarding the capabilities of the utility, and now let's go through the sections. If necessary, you can get detailed information about Moreover, the program for identifying computer hardware and searching for drivers “Aida” will help you find out even the most detailed information about components that have just gone on sale. You can also find out the device's power supply features, BIOS settings and much more. If you go to the Motherboard menu, you can find out everything about your processor. These are frequency, temperature, cooler speed and more. By visiting Data Storage, you can find out details about your hard drives and other connected storage devices.
Determining computer hardware using SoftwareSandra
This is another fairly informative utility that allows you to obtain general data about the system. If you do not need detailed information, but only generalized data about your computer, then this is what you need. However, in addition to large quantity summary information, there is also more detailed information. To get it, you need to go to the “Devices” tab and select the component you are interested in there. This could be a memory bus, processor, port or video card. Basically, that's all that concerns your hardware. If we talk about monitoring, as in the AIDA utility, then it is there too. The only difference is that it is designed as a diagnostic rather than a purely informational module. You can get here all the necessary information about the temperature of the processor, video card, cooler rotation speed, etc. The good thing about the utility is that it does not load your system and works quite quickly and stably. It's completely free, so you don't need to activate or pay anything.
Determining performance using standard OS tools

If you don’t want to download something from the Internet or this option is simply not available, then you can go the other way - use the application built into the operating system. It is not as informative as the utilities described above, but nevertheless, the data obtained will be quite enough for you to identify weak spots. This program for identifying a computer and setting its power is available to all users of Win 7, 8, Vista. You need to go to My Computer and select Properties. You will see a field called "System". It presents general information about the amount of RAM, installed processor, etc. There is also a line “Windows Experience Index”. Go there and you can see a rating from one to eight. The higher it is, the better the individual component of your computer performs. If the processor is rated 3 and the video card is 6, then the weak link is the first component, so it is this that needs to be changed first.
Instead of a conclusion

Basically, you received a lot of useful information and learned about what program can be used to determine computer hardware. Do not forget that stress tests are not recommended to be done too often, as this will negatively affect the system components - they should not work under overload, and if they should, then rarely and not for long. You can get a sufficient amount of information if you go to “Start” - “All Programs” - “System Tools” and “System Information”. Most of the comprehensive information can be taken from here, but if you need to perform monitoring or a stress test, then you need to download Aida 64 or something like that.
09.09.2016
The article provides programs that allow you to conduct both comprehensive testing of a computer and individual subsystems. All programs support modern hardware and software, including Windows 8.1.
In some cases, assessing PC performance, the results provided by the computer's built-in test tools are not enough. Then you need to use professional testing tools. They perform a more detailed assessment of the performance of the computer's hardware and allow you to obtain detailed information about the system.
Despite the similarity in purpose of such utilities, their significant diversity is hidden, differing in implementation, ease of use, set of diagnostic tools and program functionality. There are both highly specialized ones, designed for a detailed study of one of the computer subsystems, and those that make it possible to conduct a comprehensive diagnosis of the system and subsystems separately.
Test modules allow you to determine the composition of a computer system and make decisions on ways to improve its performance. An analysis of the systematized information displayed on the screen about the existing system can give the user a specific answer to the causes of problems that occur when working with a computer.
Here we offer today's most popular computer testing utilities, providing the user with information about the functioning of the hardware and software. The main requirements were accessibility, high degree information content and functionality.
These are the programs (to download the program, click on it):
AIDA64
A full computer test is carried out using the professional AIDA64 utility, which presents the user with system information, as well as configuration and diagnostic data of the equipment used. Modern versions the programs are produced by FinalWire Ltd, Budapest, Hungary. The latest product build 5.00.3300 dates back to December 2014. The company produces products on a commercial basis, but the AIDA64 Network Audit or AIDA64 Business version can be tested within a month on a computer with a free license by filling out the order form presented on the developer’s website and receiving a key for use and download link via email. The AIDA64 v5.00 utility is currently also available for smartphones and tablets.
The program allows you to check your computer completely; detailed information about the scan results is presented in a report that opens, which can be saved in html, csv or xml formats. The computer test results contain information about the hardware and the full composition of the software, namely the operating system, drivers, startup, installed and launched programs under the Microsoft Windows operating system. AIDA64 utility shows everything running processes, as well as hotfixes (patches) and licenses, retrieves hardware information at a relatively low level using its own database of approximately 21,000 devices. The program can collect information from remote computers over a TCP/IP network.
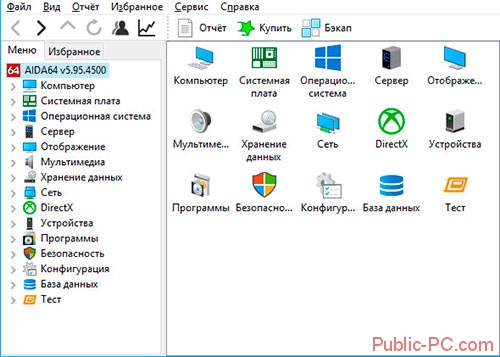
The utility's interface allows you to set the Russian language, which makes it accessible to the Russian-speaking population.
Start page AIDA64 v5.00  AIDA64 v5.00 Graphics Process Benchmark
  AIDA64 v5.00 system stability test (click to enlarge)
  AIDA64 v5.00 processor test (click to enlarge)
Hard drive testing
PC3000DiskAnalyzer
PC performance also depends on the functionality hard drive. Testing a computer's hard drive can be done, for example, using the free PC3000DiskAnalyzer utility.
The program names of the executable files are PC3000DiskAnalyzer.exe, PrfChartView.exe and ReportViewer.exe.
The utility supports popular media, such as: HDD, SATA, SCSI, SSD, external USB HDD/Flash.
The utility is launched by the file PC3000DiskAnalyzer.exe, the window that opens asks you to select the type of hard drive that is supposed to be scanned. Next, the main program window appears.
 PC3000DiskAnalyzer window for selecting disk type
 Start testing the disk by pressing the “test/run” button, or by pressing the F9 key. Next, you are asked to select one of the testing options:
- Verification;
- Reading;
- Record;
- HDD RAM cache test.
 Test window
 The “verification” and “read” options are quite safe, while the “write” and “test HDD RAM cache” modes can lead to data loss. To check the disk in a gentle mode, “verification” is quite enough. The mode allows you to check the speed indicators of your hard drive, find bad sectors, and determine which of them respond quickly and which have errors. The output diagram shows the errors present on the disk and the sectors that are responding with a delay.

Testing RAM
MemTest
The MemTest utility tests the RAM of computers running on the x86 and x86-64 platforms. Two versions of the program are common: MemTest86 and MemTest86+. The versions were written by different authors, but the idea of the test is the same: compare write and read data, this is done in two passes. The check is carried out from low to high ranks and vice versa.
The utility does not require an operating system and is carried out by its own bootloader. The utility is easy to use and has high operating speed. The program identifies deviations and instability of the computer and will help debug the system after changes made related to replacement or overclocking, introducing the equipment to its maximum operating mode. Latest version 5.01 was released in 2013, although the authors made changes a little later. The utility can be downloaded from the official website.
Monitor testing
Nokia Monitor Test
The most famous set of computer tests used to check the quality of TFT and CRT monitors is the Nokia Monitor Test. Tests allow you to check and configure:
- Focus degree;
- No geometric distortion;
- Image saturation;
- Brightness and contrast of the picture;
- Presence of dead pixels;
- And some other parameters.
The program is accompanied background information, the program is free, its most popular version is 2.0, you can download it from the website.
 Nokia Monitor Test main window
 Testing video cards
FurMark
 Window for launching the FurMark program
 FurMark program is designed for testing video cards personal computer. It determines whether the overclocked video card is stable and how efficient the cooling system is. A distinctive feature of FurMark is the use of a stress test function that ensures the maximum load on the card.
Its features:
- Free product;
- Compact, fast tests;
- Testing for the required resolution, up to 4K;
- Measuring video card parameters and determining the load for the cooling system;
- Almost all video cards are supported.
 FurMark testing window
 Graphics testing
3DMark
Computer tests 3DMark 11, developed by the Finnish company Futuremark, are aimed at determining the performance of graphic components and a comprehensive assessment of a personal computer when playing computer games. Its main purpose is to test stability and evaluate the performance of a personal computer video card. The program is developed for hardware and software platforms that support the MS Windows family of operating systems, in particular it supports Windows 8.1.
The latest versions of the program, in addition to the video card, also test the central processor for gaming artificial intelligence tasks and the physics engine. She essentially represents computer game, which is non-interactive for the user.
Most releases of the program divide tests into two groups: gaming and specific synthetic ones. The first represent a non-interactive, almost full-fledged computer game that works in real time and uses game engine. Unlike a full-fledged user, he does not influence the gameplay and does not control the progress of the game or the virtual camera; his task is to observe. The test measures the number of frames and the frame rate per second. The next type of test is calculation-based and evaluates only those GPU units that perform specific operations, such as shaders, texturing, rasterization, etc.
The latest version 1.0.5 of the program was released on April 19, 2013. Basic version programs with unlimited time for using the test can be downloaded for free from the official website of the program.
 3DMark 11 launch window
 Bottom line
Having tested the computer using these means, the user is able to independently assess how efficient his computer is, whether his computer is capable of pulling out powerful games, video editing, working with 3D graphics.


