Lush velvet dress. How to sew from velvet correctly: some tips and methods
Girls - they are so... girls! Since childhood, they have been happy to try on their mother’s shoes and jewelry, and if they get to the closet, then even outfits. The most beautiful ones, of course, are velvet ones. This is the dream of every little fashionista! Any mother can sew a dress with her own hands, and we will be happy to help her.
Choosing fabric
Most often it has a monochromatic color, but a printed version with a pattern or panvelvet with an etched or embossed design looks no less attractive.
To ensure that the outfit does not hinder movement, it is best to choose a material with elastane.
Dress models
A girl's dress made of velvet can be of any silhouette:
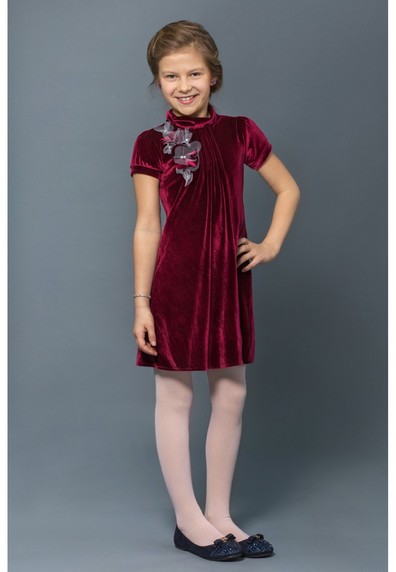
Straight models do not require a lot of fabric, loose ones do not restrict movement. Lush - they look especially solemn and turn the girl into a charming princess. The optimal length is knee-length.
The easiest way to sew elegant dresses from a trapezoid silhouette without sleeves. Its pattern does not have darts, and the desired volume is achieved through folds, gatherings or flaring of the base.
How to make a pattern?
You will need measurements:
- OG - chest volume,
- DI – product length.
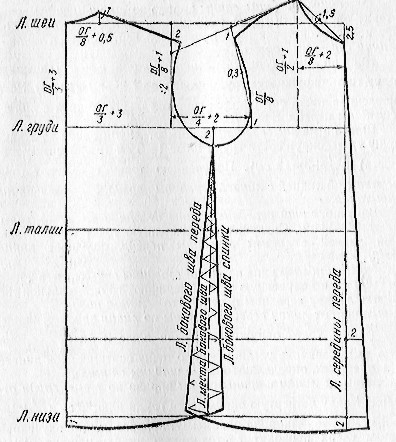
The patterns need to be checked for accuracy, since velvet cannot be ripped open - marks will remain from the seams. Therefore, first sew a sample from inexpensive fabric and add all the details to the pattern.
Important! Be sure to add 1.5-2 cm seam allowances to the tested pattern - this material frays a lot on cuts.
It is best to cut the back with a seam in the center, this will make it easiest to process the neck fastener on the back.
How to cut velvet?
The consumption is on average 25-50% more due to the fact that it must be cut strictly in one direction of the pile. Before purchasing, lay out the patterns according to the expected width of the fabric and calculate the length of the cut.
Important! Before cutting, carefully iron the material from the inside out and steam off any jammed pile. If somewhere it was not possible to lift it, mark this place from the inside out so that it does not fall into the product.
Decide how you will lay out the pattern pieces: “against the pile” or “along the pile”. Determining its direction is very simple: run your palm over the surface. “Along with the pile” - the fibers will be smoothed, “against the pile” - they will rise. Strictly following the chosen direction, lay out and trace the pattern pieces.
Important! Don't forget to mirror the paired cut pieces.
How to sew velvet?
The parts are basted with oblique stitches, on both sides of the stitching line, so that the parts do not move while sewing on the machine.
Important! For sewing, use only thin needles (No. 75-90) and threads (No. 50-60), test them on an unnecessary piece.
Set up the machine correctly:
- for non-elastic fabric, choose a straight stitch (stitch length - 2.5-3 mm) with loose thread tension;
- for elastic - it is better to use a zig-zag stitch up to 1 mm wide, it will give the seams the necessary stretch.
In a product without lining, the cuts of each part are processed using an overlocker or a zig-zag stitch.
Sewing a velvet dress
- Baste and join the shoulder seams, remove the basting and carefully press the seam allowances to the back of the garment.
- Baste and sew the center back seam to the mark and carefully press the seam allowances in different directions.
- For a garment without lining, finish the edges of the shoulder and center seams.
- Process the neck.
- Baste and join the side seams and carefully press the seam allowance to the back of the garment.
- In a product without lining, process the cuts of the side seams and the bottom of the dress.
- Finish the armholes in the same way as the neckline.
- Using a hand blind stitch, carefully sew the hem on the bottom.
- Manually make an air loop using threads to match the fabric and sew on the button.
Use your imagination and together with your daughter, decorate the outfit of her dreams
Hello, site readers!
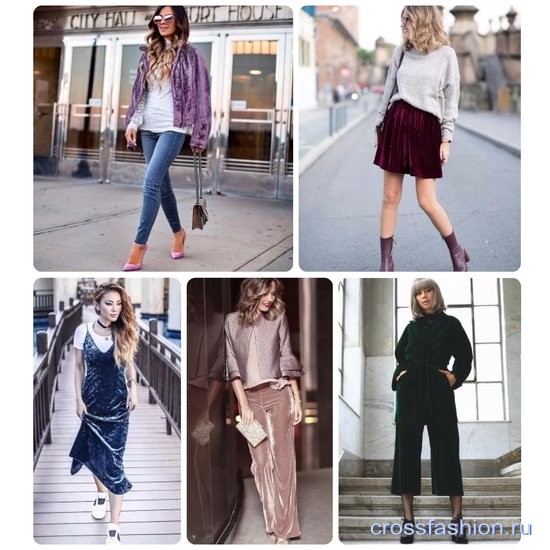
Today I want to talk to you about velvet, because it is what has been exciting the minds and wardrobes of fashionistas over the past few seasons.
So, what is velvet? As Wikipedia tells us, Velvet (probably from German Barchent; English Velvet, French Velours) is a fabric with cut pile, which is obtained through a special interweaving of threads: four in pairs form the upper and lower base, and the fifth is the pile. Velvet with a high pile is called plush.
Natural velvet (for example, on silk) is a rather expensive fabric, so as an alternative to it, velvet fabric on a cotton or even polyester basis was invented.
In any case, the thing is made of velvet modern context looks stylish, fashionable and relevant.
Today we will try to sew a velvet top with thin straps. This item can be combined with almost everything - with business jackets, oversized denim jackets and even over T-shirts.
And if you take more fabric, you can sew a whole dress using the same principle.
So, we will need:
- 0.5 m of fabric (for a dress – 1 m)
- 1.5 m lace, 1 m velvet braid
- thread, scissors, chalk, pins
Preparing the fabric. If there is a risk of spoiling the cut, then regular decating should be abandoned. It is best to try to “steam” the fabric (a small piece to start with) without touching the surface with the iron. If there are “creases” on the fabric, you can try to smooth them out with steam by first placing the fabric on a damp terry towel.
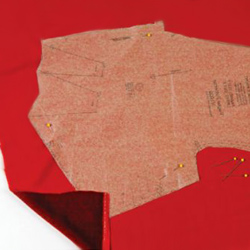
We cut out the details: shelf, back, then facings. Usually velvet is cut with the pile facing up. The pattern can be taken from a magazine (specifically, mine is No. 108 from Burda 5/2016)...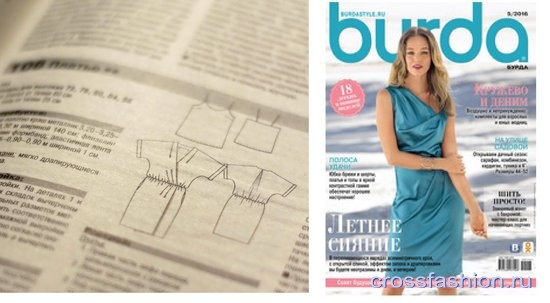
...or, slightly violating all the “correct” technologies, simply apply the existing top to the fabric and cut it out. In this case, it is important to take into account the fit of the existing item and check your chest circumference with the same measurement on the top; if necessary, add the necessary centimeters + seam allowances.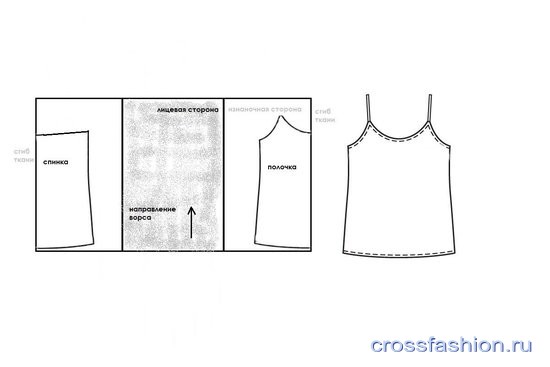
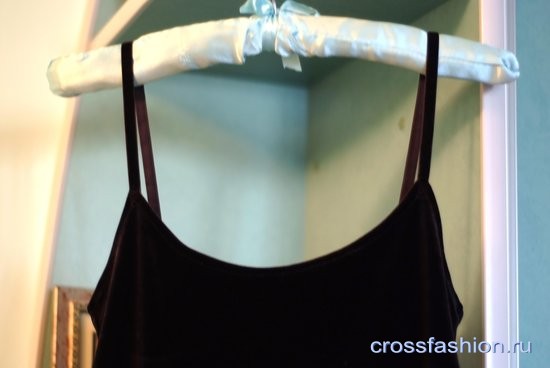
I used ready-made velvet ribbon as straps. At first I tried to cut out the straps like bias tape from fabric, but in 4 folds they turned out to be quite rough. You can use silk or satin, but cutting and sewing such material is still “pleasure,” so we follow the path of least resistance.
Well, then there’s very little left - we sew our parts along the side seams. For everything to turn out beautifully, be sure to sweep away the details. It is better to choose threads and needles as thin as possible so as not to damage the pile.
If the seams are pressed, we pre-process the parts using an overlocker; if not, we overcast the seams after stitching.
We iron the seams. In order not to leave marks from the iron and not to wrinkle the pile, velvet should be ironed either through a special material (as a rule, it is quite expensive and cannot be found in any sewing store) or through a piece of the same velvet - then the pile will not wrinkle. It is better to iron on a terry towel, without pressing the iron too hard and choosing a mode in accordance with the type of base of your fabric.
The next step is sewing on the straps. We fasten them with pins, try them on, and leave them at the desired length. On top of the sewn straps, right side to right side, we place facings sewn together on the main parts and stitch along the entire perimeter.![]()
We stitch, iron, and secure the side seams with several stitches so that the facing does not turn outward. If your fabric is elastic enough, then you can cheat and do without hemming at all, and (as Burda recommends for sewing this top) just overcast the seam allowances and stitch by 0.5 cm. But there is also back side medals - if the fabric is very elastic, then there is a possibility of stretching it greatly, so in this case it makes sense to duplicate the upper sections.
The final touch is lace. Add to taste.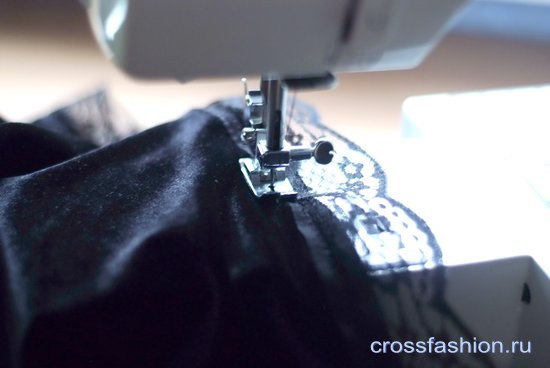

This is such a simple but effective thing we came up with. We wear it with pleasure.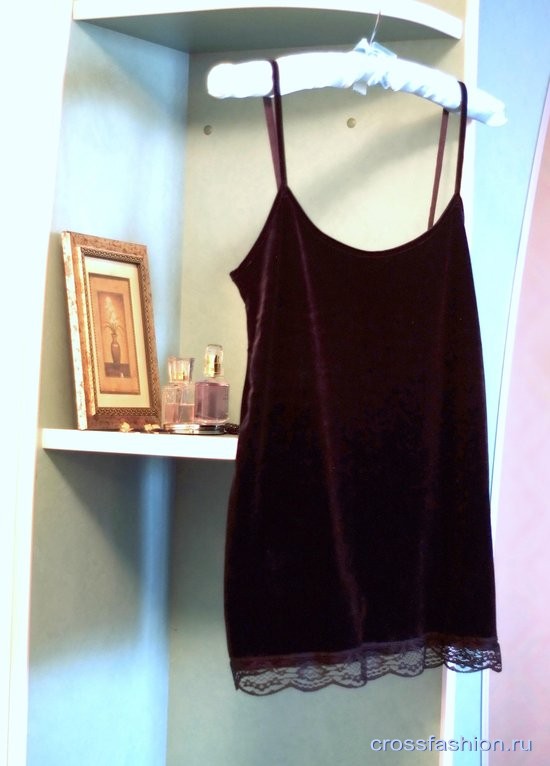

In the autumn-winter season 2016-2017, velvet triumphantly returned to the catwalks and took a leading place in the collections of all famous designers, so we decided to keep up with world fashion and create a luxurious evening velvet dress with a smell on a lining, with a tied belt. What you need for the New Year's event. This dress is easy to sew yourself, it has a simple cut, there is no hidden zipper, the dress is tied at the waist, and besides, it does not require a lot of money, and at the same time it looks very rich.
In addition to the noble texture of velvet, I also chose the main fabric in a noble emerald color. Dark green shades are very refreshing and suit both blondes and fair-haired girls with light eyes, and brunettes with brown ones. For the lining fabric I chose an equally noble stretch satin; it will not weigh down the dress, is pleasant to the body and, in addition, a beautiful shine will be visible when walking on the hem of the dress, which will give the dress a special shine and zest.
For the dress we will need:
stretch velvet 2m 20 cm (main fabric),
satin stretch 1.70 m (lining). 
Step 1. Layout and cutting out the details of the dress.
Layout of pattern pieces on fabric is usually done in two ways: either turning (when the pattern pieces are laid out on the face of the fabric in an unfolded form), or folding the fabric in half face to face and placing the pattern on the wrong side of the fabric (paired pieces are cut out in this way). Since my pattern has both doubles and singles, I save time and cut the pieces two ways at once.
So, the details of the main fabric:
6. The middle part of the belt - 1 piece.
7. The ends of the belt - 2 parts.
8. Sleeves - 2 parts.
Satin (lining fabric) details:
1. Front part of the bodice - 2 parts.
2. Back of the bodice - 2 parts.
3. The central part of the back skirt - 2 parts.
4. The right part of the skirt - 1 piece.
5. Left part of the skirt - 1 piece. 
During the sewing process, I decided not to sew the belt to the product, since the seams were very thick. I sewed it separately. I did the layout and cutting of the belt after cutting out the main parts. Also, during the sewing process, it was decided that it was necessary to sew a zipper into the middle seam along the back, since it was decided to make the dress unswing.
Attention! When sewing velvet products, it is necessary to take into account the direction of the overflow (pile) of the fabric. This is very important, since the details of the product may turn out to be different shades! I wanted to sew a dress with an “amber” effect so that the shimmer would be lighter at the bottom of the dress, on the skirt, so I cut the front part of the bodice “against the grain” or “upside down”.
Lay out the parts on the fabric, pin them to the fabric to prevent movement, trace along the outline using tailor's chalk, a felt-tip pen or a piece of soap (I always use soap, this is the safest way for the fabric) and cut out the parts. I have patterns with allowances, so I cut along the contour without leaving additional allowances. 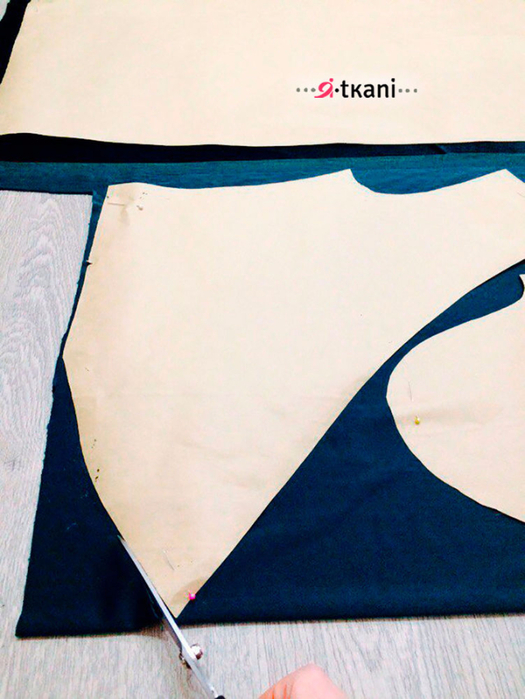
Pin the lining details to the fabric in the same way, trace and cut out. I pin thin fabrics together with pins so that during cutting the fabric does not fidget or move. 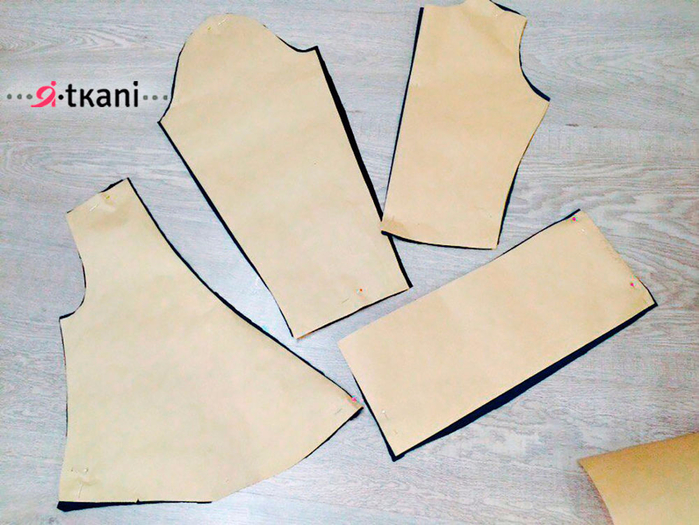
Step 2. Pin and sew the shoulder and side seams on the bodice of the dress. 
We do not overcast the allowances, since the bodice will be lined. Separately, we stitch and overlock the sleeves. 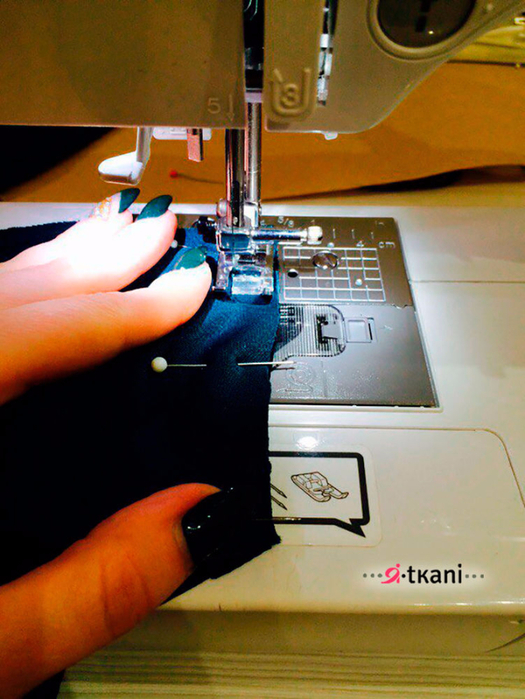

Step 3. Pin and stitch the shoulder and side seams of the dress bodice lining. We also do not overcast the allowances, because high-quality stretch satin does not fray or crumble from under the seams. We iron the allowance onto the shelf. Connecting top part bodice with lining along the neckline and front edges. Next, we process the top of the dress as a single piece. 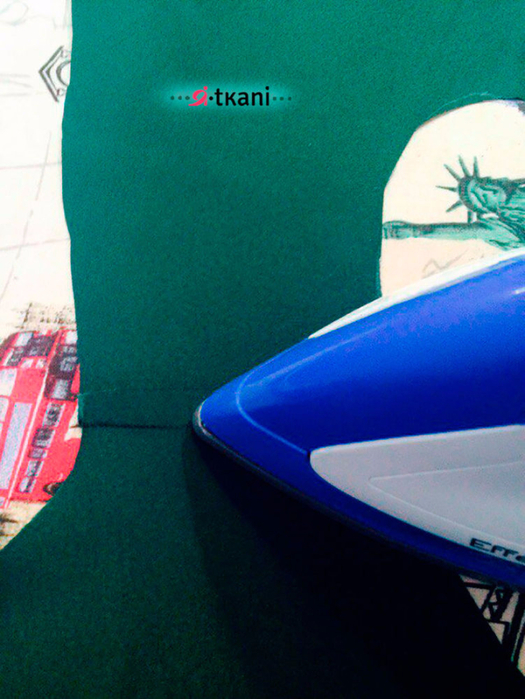
Step 4. We stick the sleeves into the armhole, pushing them down a little. It is better to inject sleeves from the side of the sleeve, and not like me :) or rather, it is better to inject them correctly from the side of the sleeve, but it is more convenient for me this way, and I usually work as it is more convenient and faster for me. We sew the sleeves into the armhole, and then sew them in from the sleeve side. 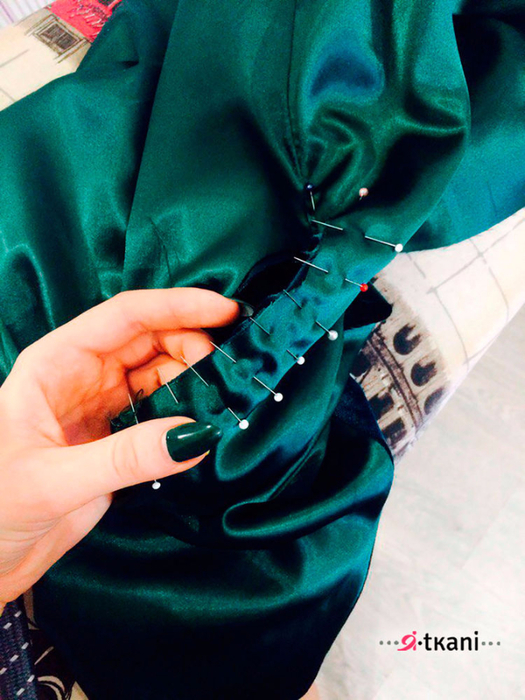
Overlock the seam allowances with an overlocker. We get two such halves of the dress. 
Step 5. Pin and sew the side seams of the central part of the back skirt with the side seams of the left and right parts of the skirt. 
We'll do the same with the skirt lining. Iron the seams to the back.
Step 6. Connect the skirt lining to the top of the skirt along the side sections. 
Iron the cuts onto the lining. 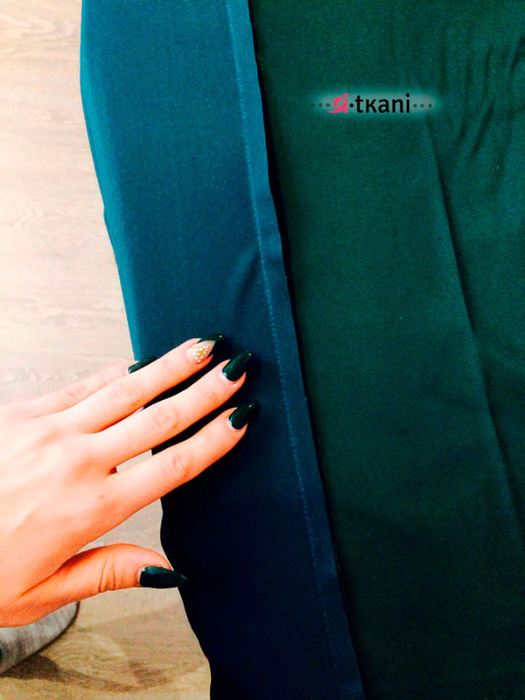
Step 7. Using an overlocker, overlock the middle seam along the back and sew in a hidden zipper. To fix the edges, I first basted the satin and velvet before processing. We hide the edges of the zipper tape into the seam and manually grab them to the dress. We connect the skirt. Iron the allowances. 
Then we place the top on the skirt, pin or baste it and grind it down on a machine. 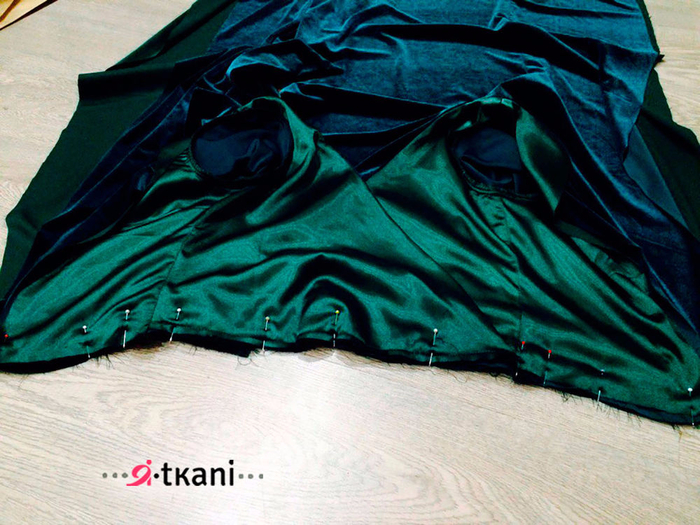
We overlock the allowance with an overlocker or process it with bias tape, iron it onto the skirt, or iron it out like I did if you are sewing from thick or bulky fabric. 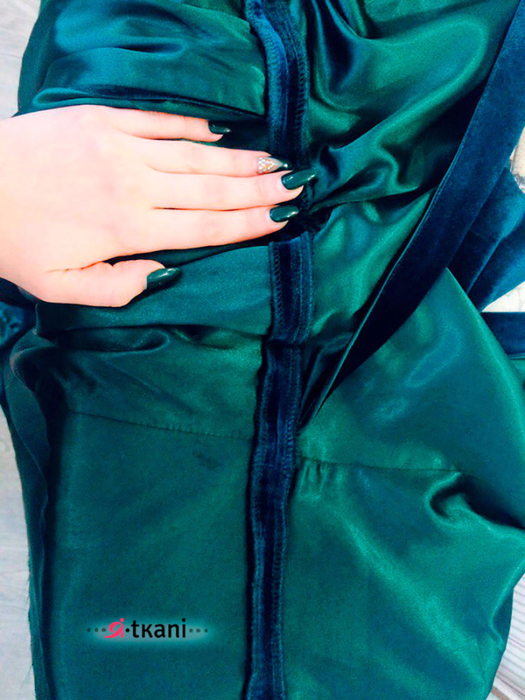
Step 8. Using an overlocker, overlock the middle seam along the back and sew in a hidden zipper. 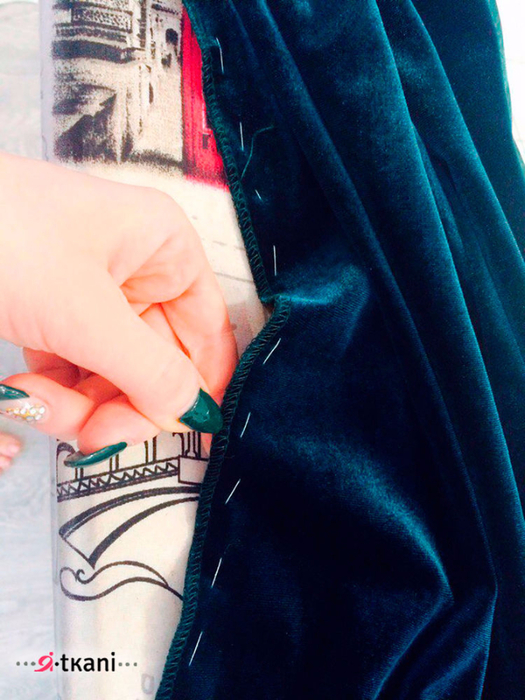
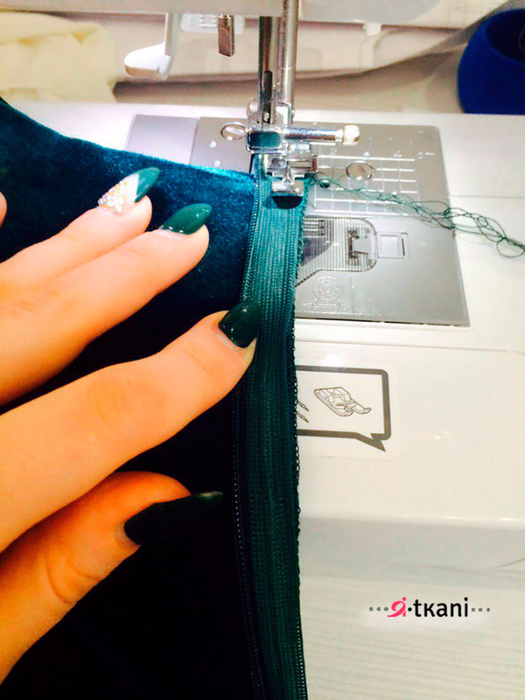
To fix the edges, I first basted the satin and velvet before processing. We hide the edges of the zipper tape into the seam and manually grab them to the dress. We connect the skirt below the hidden zipper. ![]()
Iron the allowances.
Step 9. Sew the bottom of the skirt as a single piece. 
Iron and hem by hand with a blind seam or sew the seam on a machine. 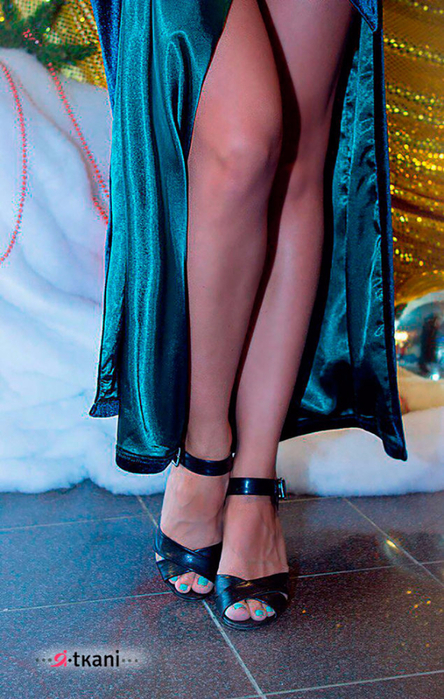
I made it with a machine seam. You can also glue the bottom using adhesive web. We sew the bottom of the sleeves and hem them with a hidden seam.
Step 10. Sew the belt. We connect it at the seams, sewing the ends.
A brilliant dress for going out is ready! 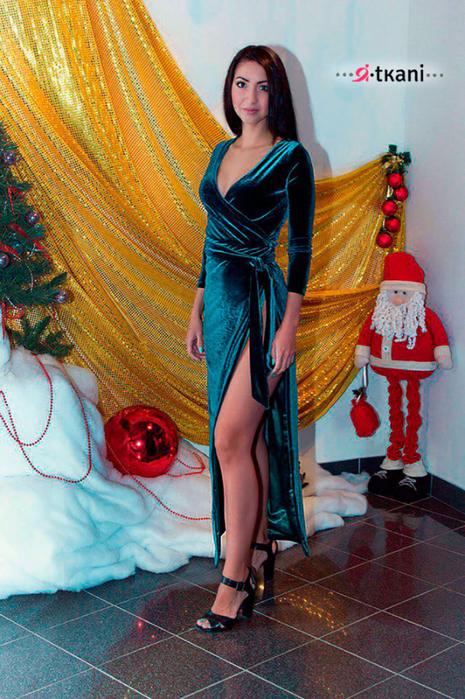
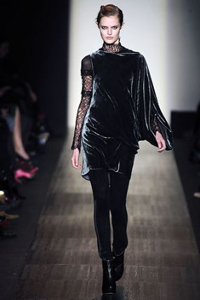
It's that time of year when velvet begins its triumphant return in the form of... holiday dresses for girls and women of all ages. Listen to the advice of professionals who sew from velvet 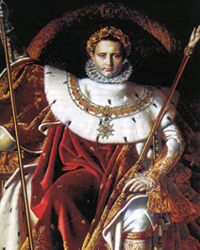 the best. This season, designers were inspired to create extraordinary looks. How to sew from velvet correctly?
There are a few tricks that can help you create one of these looks without any hassle. With modern sewing technology, velvet no longer intimidates tailors and seamstresses. Once you gain some skills, you can easily incorporate velvet into your day and evening wardrobe.
This fleecy fabric can be very different: from very thin and light to heavy upholstery. Originally woven from silk, velvet is now made from cotton, rayon, acetate, polyester and various combinations of these. These are usually double fabrics - two layers are woven simultaneously, one on top of the other. The thread that connects both layers is cut at the end of production to create the characteristic beautiful pile.
Styles and designs
Due to the nature of velvet, the seams on it are usually visible. Try to minimize raised details such as darts, seams, loops, and stitching. Choose simple semi-fitted or loose models. Gatherings, soft folds and draperies in this case work better than sharp lines, reliefs and contours.

Do not tear out the stitching threads from the fabric, as this will damage it and make it look bad. Consider all the details of the model before you start sewing, or sew the product using patterns that you have already perfected.
home distinguishing feature velvet is a pile that has a certain direction. When you run your hand over the fabric, you feel its smoothness or roughness. If you run your hand against the pile, the velvet looks darker. If the pile is ironed, the fabric looks lighter.
How to cut and mark velvet
There are no hard and fast rules on how to cut fabric. Usually velvet is cut in the direction of the pile, but if you prefer a richer and dark color, cut against the pile. On the other hand, velvet wears better and looks less matte when cut with the pile facing down. It is important to be consistent and cut all the details of the product, placing their pile in the same direction. Use chalk or a piece of soap to mark this direction on the wrong side of the fabric.
Lay the fabric, wrong side up, in a single layer on the cutting table and place your patterns on the fabric. If you place patterns on the pile side, they will slide and shift, which will make it difficult to fix them on the fabric and cut them.

Use chalk or a tailor's pencil to mark the patterns on the back of the fabric. The best way Mark the velvet using hand basting. To do this, thread a silk thread through a very thin and sharp hand sewing needle. Silk threads are less damaging to fabric than chalk pressure and can be easily removed. Avoid using a toothed wheel or tracing paper. To mark darts and similar details, make a small cut in the seam allowance, or several cuts as needed.
Stitching
Another tool that saves time and stress is a temporary adhesive spray. Now, instead of painfully pinning, baiting, and hoping for the best, just apply a little spray along the seam line to the right side of the fabric. Then place the right side of the matching piece along the seam line and glue the seams. You don't even need pins. If you don't get the seams to fit properly the first time, tear the pieces apart and glue them together again. There is no need to apply glue again, it will retain its adhesive properties.

You can also use this spray when stitching velvet pieces with other types of material, such as lining fabric or any other smooth fabric. The most amazing thing is that the glue disappears without a trace. But disappears from the fabric, not from the table, floor or surrounding surfaces, so always cover workplace to protect it from the spray. Glue manufacturers also produce products for removing glue from hard surfaces.
Joining two pieces of velvet can be tricky; traditional sewing methods simply don't work. No amount of pins or basting will stop the fabric from sliding and shifting in both directions as you sew. Some classic tips for sewing velvet:
- Hand baste in one of three ways: double stitch, reverse stitch or diagonal stitch.
- Loosen the thread tension on the sewing machine.
- Keep the fabric taut as you sew.
- Use a walking, Teflon or round foot.
- Place tissue paper between layers of fabric or between the fabric and the bottom rail of the sewing machine.
When sewing velvet, use 70/10H or 80/12H all-purpose or sharp machine needles and 100% cotton or silk thread. Always sew in the direction of the pile. To remove thickness at the seams, trim and press the seam allowances and back folds of the darts slightly.


For easy sewing, try using a walking presser foot on your machine. It has teeth to move the fabric evenly and prevents it from slipping. First test the foot on a sample of fabric to make sure it doesn't leave marks on the pile.
Ironing velvet
Ironing velvet is always a delicate job. The pile is easily damaged, so use only steam and never touch the fabric with the iron. There are several types of ironing boards with different surfaces on which you can safely iron velvet with the nap facing down while steaming the underside of the fabric.
It is best to cover the surface of the board with a thick, piled fabric such as heavy corduroy, mohair upholstery fabric, frieze, or even thick terry towel. If your hands are sensitive to high temperature, use a special mitten.
Hem processing
- Before hemming the item, let it hang for at least a day to unwind. Then measure the length again and trim the hem if necessary.
- The hem may not need finishing at the edge. Simply fold it over and hem it by hand using a goat stitch, or machine stitch it with a blind stitch. In any case, be sure to steam the hem, but do not iron it.
- For more long products With linings such as coats and raincoats, use adhesive tape to stiffen the hem.
Velvet is a very beautiful, but no less difficult fabric to process.
Working with velvet is considered the most expensive work of all fabrics.
What is this difficulty?
And it lies in the fact that velvet has lint.
It can be of different lengths, thicknesses and even directions.
And that’s exactly what gets in the way when sewing :)
If there is a problem, then you need to overcome it somehow! 😉
But about the problems - that’s some other time, but now I want to talk about Processing the bottom of a velvet dress.
There is more than one treatment, but I want to talk about one of the simplest.
To put it in a nutshell, then it consists in processing the cut of the allowance along the bottom with bias tape.
And if you are interested in details, then read on 😉
2. After we have dealt with cutting and measuring the length of the bias tape, we begin to connect it.
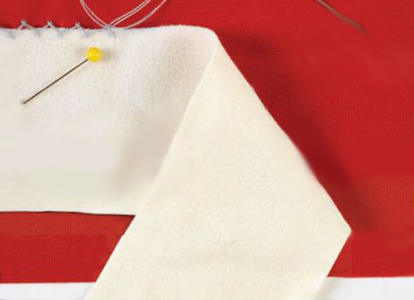
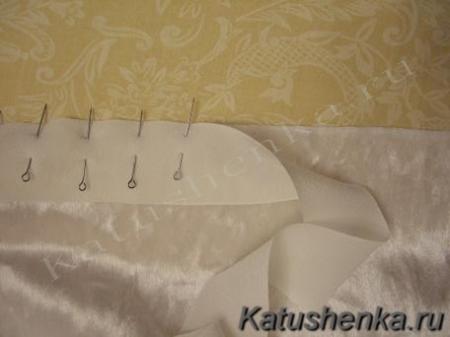
We pin it to the bottom edge of the dress, matching the edges. Moreover, it is much more convenient to stick pins across the future stitch - the pile on the fabric will not shift the layers relative to each other.
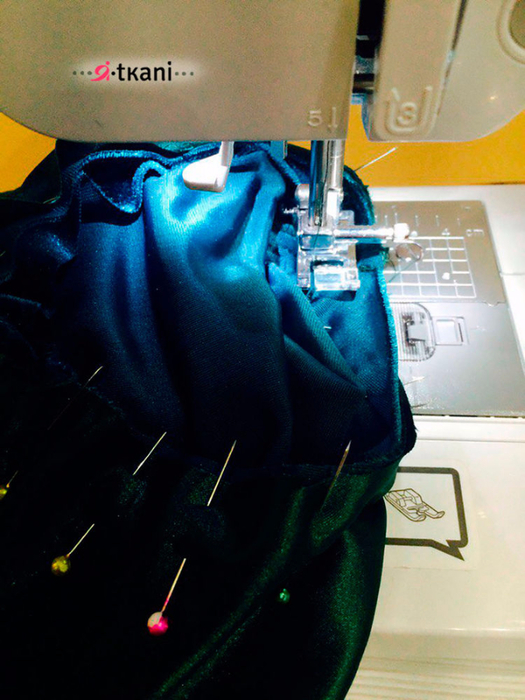
3. Stitch and then remove the pins. We make sure that it is even and neat.

4. Fold the bias tape to the wrong side, baste it and sew a stitch.


Well, hemming velvet is very simple. Because front side covered with pile, then no punctures from the filing are noticeable on it.
In this regard, the material is very good :)
Do you know how else you can process the bottom of a velvet dress if it is not sewn in a box? 😉
I'm really looking forward to your options!!!


