We turn a digital video camera into a web camera. Convenient online software store for Windows
The editors have received many letters from readers who want to use it as a web camera. digital video camera. Many users have video cameras gathering dust on their shelves most of the time, so it would be quite nice to assemble a web camera from them. And the quality of video conferencing programs, such as Yahoo Messenger or MSN Messenger, can also be improved. A simple software solution will turn your digital video camera into a high-end webcam.
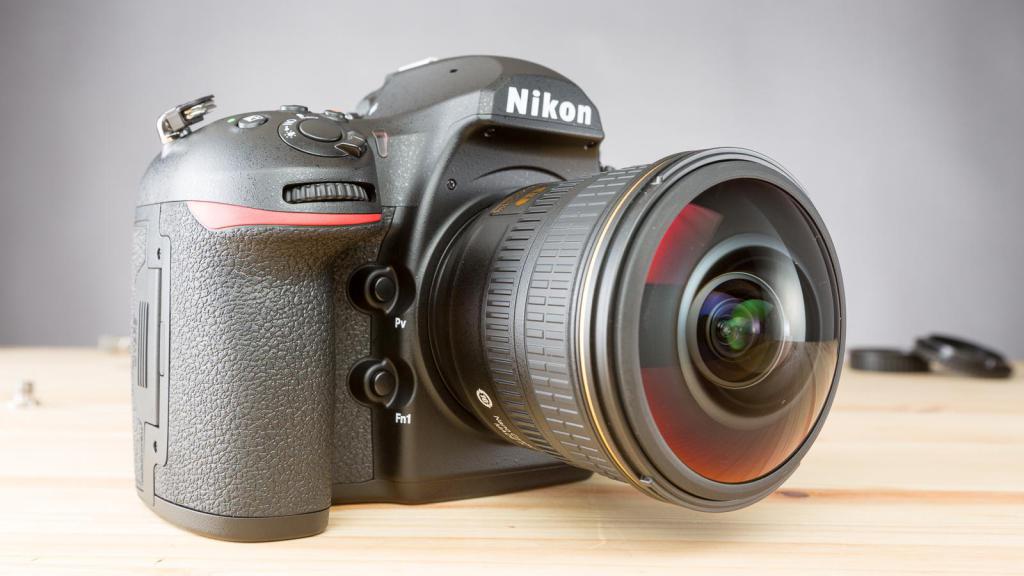
For our article we used a Panasonic GS70 video camera. This is a discontinued MiniDV format model using three CCD sensors. At the same time, everything said in the article is suitable for any digital camera with a USB or FireWire connection.
Advantages of a digital video camera
Some people might find it odd to use a several hundred dollar digital video camera as a webcam, but we're killing a few birds with one stone here. The optics in a digital video camera are much superior to web models. Modern MiniDV cameras allow you to shoot video with a resolution of 720x480 and a frequency of 30 frames per second. In addition, the camera lens provides accurate color reproduction. Webcams, on the other hand, only boast 640x480 and 15 frames per second.
Using a video camera instead of a web camera also allows you to save money - of course, if it is collecting dust on your shelf. Instead of paying $50-$200 for a decent webcam, you can use free drivers to USB connections or spend $20 on OrangeWare WebcamDV, turning your device into a high-quality webcam.
Restrictions
However, this method has several limitations. Firstly, a video camera consumes more power than a web camera. You will have to connect the power supply if you plan to use the camcorder for an extended period of time.
Almost all video cameras today are equipped with a demo mode, which displays various special effects. It allows you to attract the buyer when choosing a camera. Make sure you turn this mode off - you don't want all sorts of crazy effects during a video conference?
Most video cameras have an automatic shutdown feature. It turns off the camera if you leave the tape in the compartment and are not recording anything. This feature prevents unnecessary battery drain and component wear. However, automatic shutdown will be inconvenient for us, so do not leave the tape inside the camcorder.
Webcams weigh much less than video cameras because they don't have a complicated cassette mechanism or retractable LCD screen. While it hardly makes sense for home users to worry about weight, this solution is not suitable for mobile use.
USB interface: free
Our first method of turning a video camera into a webcam is free. Some cameras, like our trusted Panasonic GS70, are equipped with a USB connector for webcam mode. Thus, connecting a video camera to a USB port will turn it into a web camera.
To do this, you need to install the USB driver that came with the camera. If you have lost the CD, you will have to look for the driver on the manufacturer's website. After installation, you need to switch the video camera to web camera mode. The process differs from one model to another and is described in the user manual.
Our Panasonic webcam was recognized as "Panasonic DVC Web Camera" in video conferencing programs like Active Webcam
Unfortunately, the picture quality was quite poor, reminiscent of Creative Webcam Live! in our previous review.
OrangeWare WebcamDV

OrangeWare releases WebcamDV, a program that turns a video camera into a web camera. The program, in essence, “deceives” Windows into believing that this is a full-fledged web camera. WITH company website You can download a trial version and then register it for $20.
How is this program different from free drivers webcams used by some models? WebcamDV transmits the video stream over the FireWire interface, which provides a very high-quality picture. You can judge the quality for yourself at the end of the article.
Installation is quick and easy. Then you simply plug your camcorder into the FireWire port and launch your favorite video conferencing program. As you can see below, Yahoo Messenger recognized the Panasonic camcorder without any problems. In any video conferencing program, the camera will be visible as "WebcamDV Capture".

Quality comparison
For our quality tests we used the same conditions as in webcam review. In good lighting, two blocks of lamps provided light daylight, which simulated office conditions. In poor lighting, the lights were turned off, and the only sources were the laptop screen and 17" LCD monitor.
We captured footage using the program DV Rack from Serious Magic, which allowed us to obtain maximum quality. We then compared footage obtained using a free USB driver and WebcamDV.
You can easily see that the USB driver produces a terrible picture compared to the WebcamDV program. Additionally, the USB driver's maximum resolution is 352x244, while WebcamDV provides up to 640x480.
The only visible difference between pure frame capture and using WebcamDV is the resolution. When capturing frames it is 720x480 (MiniDV format), and in WebcamDV it is 640x480. We do not show the results in low light because the picture turned out to be black - the Panasonic GS70 could not cope with such conditions. The situation may be better with other video cameras.
Click on the picture to get a larger version.
Conclusion
Using a suitable software you can turn your video camera into a high-quality web camera. The OrangeWare WebcamDV program allows you to “deceive” the operating system and use a video camera connected via FireWire as a web camera. As you can see, the quality of WebcamDV is excellent.
At the same time, the free USB driver gives terrible quality. So we think WebcamDV is the best solution. At $20, WebcamDV is a great opportunity to get a webcam.
Today the popularity of the Internet is difficult to overestimate. If previously the World Wide Web was used to search for information, now users from all over the world can communicate with each other via video, record videos for posting on thematic portals and conduct live broadcasts. All this is achieved using a webcam.
Video cameras for computers in last years have become as necessary an accessory as a keyboard and mouse. It is difficult to find an Internet user who does not use Skype, watch videos or record their own.
The most popular areas of use of a computer video camera:
- communication on Skype;
- recording videos for YouTube;
- online broadcasts (streaming).
Modern PC models have compact dimensions and convenient fastenings, both for placing the accessory on the table and directly on the monitor. Initially, the web video camera was created specifically for Skype and other programs for video calls on the Internet. In recent years, there has been a fashion for blogging on YouTube or streaming various events, for example, computer games, led to cameras being used for slightly different purposes. However, the main task is recording and broadcasting video.
Majority modern models– These are USB video cameras with a microphone. Such devices are very easy to configure and do not require any special characteristics from the computer. Even the simplest PC can work with this accessory. The webcam itself must have good resolution video, at least HD (that is, 1280*720 pixels) and a good microphone with noise reduction.

It is worth noting that vloggers prefer separate microphones, as their sensitivity and ability to suppress background noise is much better.
Connecting a web camera
This accessory is designed in such a way that users do not have any problems setting it up. Usually, There is no need to configure the camera on a laptop, since it is initially built into the case, and if the device has an operating system, then the webcam almost always has drivers. Just launch the program and you can use it.

On a stationary device you will have to connect the video camera to the computer, which usually does not cause any particular difficulties. The accessory must be connected via a USB connector; in most cases, drivers are installed automatically. The user can only configure the camera in Skype.
If the camera is not automatically detected on your computer, you will need to install drivers for it. This can be done from a disk that may be supplied with the device itself, or you can download the necessary software from the manufacturer’s official website.
After installing the drivers, you can use the camera, but you will need special programs. The most common way to make video calls around the world is Skype. But first you need to configure it for use. When you first install the program, it will automatically ask you to check your video camera and microphone. All the user needs to do is agree to the requirements of the program.

If the program was installed previously, then the setup is carried out as follows. An example is given for Skype on Windows 7, but there will be no significant differences from newer versions in the setup.
- You should log in to Skype.
- On the toolbar at the top, select “Tools” - “Settings”.
- Video settings. After activating the item, a window with a video shown by the camera automatically opens.
- In this menu, you can click the “Webcam Settings” button and get access to fine settings, however, for simple communication all these parameters are completely unnecessary.
Connection problems
Sometimes it happens that the computer does not see the video camera via USB, or the user has other problems using the device. The reasons why the device may not be visible to the computer are as follows.

Advice! If all of the above reasons are not confirmed, then you should turn off the video camera and check it on another PC to make sure that the device itself is working.
How can you replace a webcam?
Sometimes situations arise when you urgently need to shoot a video for broadcast on the Internet or conduct a stream, but there is no camera at hand. In this case, a regular or action camera will come to the rescue. It is quite possible to use your camcorder as a webcam, but you should first make sure that it supports this function. This information usually specified in the instructions.

In general, connecting the video camera is carried out in a fairly standard way. The connection between it and the computer is carried out via USB cable. The video recording device switches to shooting mode. You will need to install drivers for it; they are usually on the disk that comes with the device. But you can also download them from the manufacturer’s website.
Advice! To start using it, for example, for a video blog, you will need to make sure that the computer sees the device as a video recording device, and not a storage medium (if there is a built-in HDD). To do this, you need to go to “Control Panel” - “Image Processing Devices” and see if there is a connected technician there.
Next stage - installing blogging or video recording software. To broadcast online, you can use Skype, and it allows you to select the device from which the broadcast will be carried out. The selection of the appropriate option is carried out in the camera settings along the path “Tools” - “Settings” - “Webcam Settings”. Using multiple cameras, you can change the scene during the broadcast.

If a digital camera does not support web display mode, but can transmit video via cable, then it can also be configured as web using video capture devices and special programs. Video capture can be carried out by a TV tuner, a video card itself, or a special receiver. SplitCam, ManyCam and similar programs are suitable as software. In this case, the connection is made via a “Tulip” cable.

Similarly, you can make an action camera into a webcam. The principle is the same: connect the action camera, install drivers for it, and turn on the device for recording. Most modern action cameras have a built-in web mode.
Using regular and action cameras is a very convenient option for bloggers, because quite often the image quality from these devices is better. In addition, you can simultaneously connect a regular camera and an action camera, and install a web device. This will allow for alternating display from three different points.
An important point: all cameras must be connected to the electrical network so that they do not discharge during operation.
Time moves forward, and technology becomes more advanced every year. Manufacturers are trying to create devices not only High Quality, and also convenient to use. This gives rise to a variety of ways to connect devices. And if earlier, in the question of how to connect a camera to a computer, there were few options for the process itself, now it is possible to choose from the proposed methods.
For what?
Why do you need to know how to connect a camera to a computer? When taking pictures, every photographer or just a person who wants to capture interesting points, understands that the memory on a flash card is not infinite. Sooner or later you will have to make room for new photos.
Photographers also transfer pictures to a PC for editing, because photographing a model is half the battle. A lot also depends on the processing.
If the user wants to print finished images, they must also transfer the files to the computer in order to transfer them to a flash drive and take them to a photo studio.
In addition, some camera owners prefer to use them as video surveillance or webcams. In the latter case, in addition to figuring out how to connect the camera to a computer, you will need to find the necessary software.
The easiest way
It’s easy to figure out how to connect a camera to a computer. In this case, there is always an instruction that will tell the owner what to do with the device and how to establish a connection between it and the PC.

The most in a simple way is the connection via the appropriate cable:
- We take the cord out of the box. Usually it has a USB connector on one side and a MicroUSB connector on the other. But everything will depend on the device model.
- We connect the cable to the camera and computer. In this case, you can select the PC connection mode. It may already be selected by default.
- If you are using a tablet computer to connect, you may need an adapter, since no tablets have a USB connector. Therefore, you will have to look for an adapter from USB to mini- or microUSB in the store.
- Next, the computer begins to respond to the connected device. If you have not installed any software before, the system will begin an independent search for drivers and software. In some cases automatic download does not help, so you need to use the driver disk that comes with the kit.
- After installing the necessary files, the system asks to restart the PC.
- Typically, if one of the latest operating systems is installed, after rebooting the computer will immediately detect the camera connected to it and begin working with it.
- A notification will appear on the screen. The system will ask you to perform one of the suggested actions. Here you can simply open a folder with files or launch a program that will allow you to immediately view the photo.
Wireless connection
Thanks to the developers who complicated the question of how to connect a camera camera to a computer. Although in reality, wireless connection only seems complicated. Everything can be done quickly, it is important to understand the principle of operation.
Most modern devices are equipped with a module wireless network, therefore allowing you to exchange files, just as a smartphone paired with a PC would. In this case, the user does not need any wires. You may not even need drivers.

How to connect a camera to a computer via Wi-Fi? First, you need to make sure that you have a router or that your device supports a wireless network. The wireless connection in the camera is controlled by the same function. You just need to find it and turn it on.
It usually works on the same principle as in smartphones. But in some cases you will have to configure it. To do this, go to the camera settings and find the inclusion of the wireless module.
Next, you need to go to the Wi-Fi menu and specify the name of the camera. This will make it easier to find it in the list of devices. Next, we can find the device we want to connect to. Best to use local network.
Special card
Sometimes in order to connect Canon camera to the computer, you need to get a special card. It's called Eye-Fi. This device should be placed in the compartment where the SD is usually located. This will make it easy to connect your equipment and start transferring data wirelessly.

Such a card is a kind of microcomputer that can not only store data, but also run on a processor and act as a wireless module. No card needed separate meals, a battery or batteries from the camera are sufficient.
Connecting your camera as a webcam
If you figure out how to connect a Canon camera to a computer, you can use it as a webcam. Of course, there is no point in purposefully purchasing an expensive DSLR for this purpose. But if you already have a camera, then why not use it for Skype conversations.
Connecting the camera will allow the user to use it in a dimly lit room, since it has high light sensitivity. The picture quality will also improve thanks to dynamic range and white balance.
By the way, manufacturers are also talking about using a DSLR as a webcam. Some have equipped their models with this feature and use it as a marketing ploy. In this case, when connecting the camera, just select the appropriate mode.

Health Determination
But whatever one may say, not all models are capable of working in webcam mode. Therefore, before you figure out the connection, you need to understand whether the device is capable of working as a video camera.
Many people use a cable for this that has a USB port on one end and a “tulip” on the other. By connecting it to a TV, you can determine whether it works with the camera. Images from the camera should appear on the screen.
Connecting the camera
In this case, it is enough to understand how to connect the camera to a computer via USB. Sometimes it will be enough to simply connect the device to the PC, and sometimes you may need software. For example, for the camera to work as a webcam, you need to download the Active WebCam or SplitCam program.
You need to install cable “tulips” into connectors that are not on motherboard, and on the interface panel of the video card. After this, you need to select composite mode, and then turn on the camera. Before this, the entire process must be carried out with the device turned off.
Using a camera as a web camera
Many people are interested in the question: Is it possible to use a webcam instead of a webcam for video communication on the Internet? digital camera?For example, in a well-known program? The answer is definitely possible!
I was prompted to solve this problem by dissatisfaction with the quality of my web camera, which I purchased thoughtlessly, without first understanding its characteristics. As a result, I received a low-quality video broadcast, which did not bring pleasure to my interlocutors when communicating. Having a decent, high-quality camera, the thought came to mind: should I use it instead of a web camera? As a result, a method was developed to solve this problem. This method is suitable for digital cameras that do not have the function of using the device as a web camera, but have the ability to connect to a TV via an AV (audio/video) cable.
To successfully implement this idea, several elements are needed:
- a program that uses video telephony - Skype;
- a TV tuner built into the computer, for example, from AverMedia, and the AverTV program;
- video stream distribution program - .
Having installed the above software on your computer, you need to make sure that it is working properly by running each of the programs in turn. In order for Skype to be able to recognize the video broadcast from your digital camera, perform the following steps:
We connect the camera via the AV (audio/video) cable that comes with the kit to the composite input of the TV tuner. As a rule, he yellow color, like the cable tulip respectively. Connecting via a USB connector in this case will not give the desired result, since the Windows operating system will perceive the digital camera as a flash media;
- launch the AverTV program. In the settings, select the video source as composite input;
- turn on the digital camera. On the screen of the AverTV player we will see the picture coming from the digital camera. That is, the image will be broadcast directly from the camera;
- close the AverTV program, launch the Splitcam program. In its settings (File – Video Source) select AverMedia AverTV WDM Video Capture as the video source. Video from a digital device will also be broadcast on the program screen. You can also set the desired frame rate in the settings (File frame rate) (normally 25-30 frames per second);
- launch Skype. Important - the Splitcam program must work simultaneously with Skype! Go to Tools - Settings - General - Video Settings. From the “Select webcam” list, select Splitcam capture. A broadcast from the camera will appear in the window (which is below). Click Save.
In parallel, using the same Splitcam, you can turn on the video capture program and record conversations using the program VoiceSpy. That's all, the whole labor-intensive process is over and now you can normally use your digital camera as a web camera; the quality of the video will depend on the characteristics of your camera. Have a nice chat!
Programs that may interest you
NeoSpy- computer monitoring program.
— Checking the fidelity of spouses;
— Control of children on the Internet;
— Calculation of careless employees at work.
NeoSpy intercepts and sends you all correspondence, screenshots, visited sites and passwords by email.
PasswordSpy- a program for recovering saved passwords from browsers and email programs.
— Recovering lost passwords;
— Support for more than 100 programs (ie, chrome, opera, firefox, outlook, the bat! and others);
— The portable version can be launched from a flash drive.
Browsers, mailers, instant message programs store information about the passwords you use and PasswordSpy can recover them.
There are two ways to use a digital camera as a webcam - using the built-in webcam mode or using the camera as a video capture device. Let's look at each of these options.
First, check your camera's manual to see if it can function as a webcam. Many digital cameras have this feature. You just need to install proprietary software to use as a webcam - most often it can be found on the camera manufacturer's website. Install the necessary software before connecting the camera.

Procedure:
- Connect your camera to your computer - connection is possible either via a USB cable or (if necessary) using audio/video cables that may be supplied with the camera.
- Go to "My Computer" (if using Windows 7, 8 or 8.1) and click on the USB video capture device icon. Most likely, the captured video from the camera will appear. If this does not happen, check whether the power supply is connected to the camera. Some cameras cannot function as webcams unless an external power source is connected. Webcam mode requires more power and the built-in battery or batteries are not sufficient.
- Use a separate microphone if your camera does not transmit sound.
- Find out focal length cameras. The minimum focal length of lenses determines the minimum distance to the object. Typically, the shorter the focal length, the closer the subject can be positioned.
- Make sure the cables are connected tightly to avoid breakage during broadcasting.
- You can select the required web camera in the program you will use (Skype, etc.)
In the second case, if the camera does not have a mode of operation as a webcam, but can broadcast an image via a video cable, you will need not only drivers, but also specialized software for redirecting the video signal to the Internet (for example, ManyCam, Active WebCam, SplitCam programs). Standard video capture programs can save video recorded by the camera to the hard drive, but they cannot broadcast this signal to the network - therefore, you need to take care of choosing the necessary program in advance.

To organize the camera to work as a webcam, you must have a video capture device on your computer (Capture Video). Such a device for capturing video can be a TV tuner, a video card, or a special adapter. The input usually uses a video input in the form of a cinch connector. The camera is connected through it.
The camera should be connected with it turned off. Using a video capture program, you should see video from the camera (make sure you have specified the correct video input - composite). You can then configure programs to use your video capture device (your camera) as a webcam.


