How to create a boot disk? Creating an installation disk or Windows installation flash drive.
Installing Windows is an inevitable occurrence for everyone personal computer. The most popular operating system from Microsoft is Windows 7. This version has a simple interface and support for almost all devices and programs.
Typically, Windows installation occurs either with DVD disc or from a flash drive. The Flash drive allows installation on computers that do not have a DVD drive. But if the user formats the flash drive sooner or later, the DVD will most likely always be stored, allowing you to reinstall the operating system at any time.
What is a boot disk
A boot disk is a medium that contains bootable operating system files. Simply put, this is a disk or USB drive with a Windows installer. A boot disk allows you to install an OS without having an operating system on the hard drive itself. That is, even in the most critical situations, you can reinstall your Windows.
What you need to create a bootable disk
To create a boot disk you will need:
- Windows image. For ease of recording, it is recommended to download operating room images in ISO format. At the moment, there are a huge number of different builds of Windows 7. It is strongly recommended to download images that are as close as possible to a licensed copy of Windows. This option provides the highest operating system stability. You can download a Windows image from numerous torrent trackers.
- DVD disc. Both DVD-R and DVD-RW can be used.
- program for recording an image. At the moment, there are many different programs that provide the ability to burn Windows 7 images to disks and flash drives. The programs include applications both provided directly by Microsoft and from third-party developers.
Disc recording methods
The methods for writing boot images to disk differ only in the program that is used. The principle of operation in most programs remains the same: the program writes files, creating a boot file that will allow you to start installing Windows even without an operating system on the computer.
Video: How to make a Windows 7 installation boot disk
Burning an ISO image to a DVD disc
You can use many programs to burn a bootable disk; we will look at just a few of them. How to create a bootable Windows 7 disk using Nero? How to correctly create an ISO image in Nero?
To burn a disc, you must perform the following operations:

How to create a bootable disk using Ultraiso for windows 7?
To create a bootable Windows disk 7 using the UltraISO program you must perform the following operations:

Creating a disc by copying
In addition to writing operating system installation files to disk, the user also has the ability to create backup copies of the current operating system with the possibility of further restoration. It is recommended to perform a backup immediately after installing Windows and all drivers. There are many programs for creating backups, one of the most popular is Acronis.
How to create a bootable Windows 7 disk using Acronis?
Acronis can create backup copies of your current operating system for later recovery. In order to restore a backup, you must also create an Acronis boot disk that will boot without the Windows operating system if your system stops booting. You can save a backup copy of your system either on your hard drive or on a flash drive.
Creating an Acronis boot disk

Creating a Backup
To create a backup copy of your disk from your current operating system for later recovery, you must follow these steps:

Restoring Windows from a backup
Restoring from a previously created backup copy of your disk from the operating system can be performed in two ways: from the Windows environment or from the bootable media that you created in the previous paragraph. Recovery from bootable media is performed if your operating system does not boot.
To restore a copy of a partition hard drive From your computer (Windows) you should run:
- open Acronis True Image program;
- select the “My backups” section;
- click on the “Restore” button next to your copy;
- in the next window, select what you are going to restore;
- To start execution, click “Restore Now”. After the reboot, the recovery process will begin.
To restore a copy of a hard drive partition from bootable media, you must do the following:

How to Create a Windows 7 Boot Disk Using Daemon Tools
To create a boot disk using Daemon Tools, you must do the following:

Create an installation disk using alternative programs
In addition to the proposed programs, there is also an official application for recording Windows 7 installation files from Microsoft - Windows 7 USB/DVD Download Tool.
DTo create a boot disk using this program you must:

At the moment, there are many different programs that allow you to create a bootable disk or bootable USB flash drive for Windows 7. Using these instructions, you can create several different versions of bootable media with operating system installation files.
Most important point is the choice of the operating system image itself. We strongly recommend that you do not download various assemblies that include a set of programs. Copies of Windows that are as close as possible to the licensed version will provide the most high level stability during operation.
To install Windows, you need a boot disk or bootable USB flash drive. In this article, I will talk about the simplest and most reliable ways to create bootable media that works with any version of Windows (XP, 7, 8, 10).
If you are reinstalling Windows on an old computer, I recommend running. Prepare in advance.
If you purchased Windows on a DVD and your computer or laptop has a DVD drive, then you do not need this article, go to the next article “”.
2. Selecting boot media
If you have a Windows installation disk, but your computer or laptop does not have a DVD drive, then you will need a computer with a DVD drive to create a bootable USB flash drive from the installation disk. Go to the "" section.
Sandisk Cruzer
If you received Windows as an image file, you need to create a boot disk or flash drive. If your computer or laptop has a DVD drive, it is easier and more reliable to use a DVD. Prepare 2-3 blank DVD-R 16x discs and proceed to the "" section.
If your computer or laptop does not have a DVD drive or you are too lazy to go to the store to buy discs, then take a flash drive with a capacity of 4 GB or more and go to the “” section.
3. Create a disk image
We use the Daemon Tools program to create an image file from the Windows installation disk, which will later be needed to create a bootable USB flash drive. You can download it at the end of the article in the “” section.
3.1. Installing Daemon Tools
3.2. Creating an image in Daemon Tools
Insert the Windows installation disc into your DVD drive and close the AutoPlay window if it appears. Find the “DAEMON Tools Lite” shortcut on your desktop or START menu and launch the program. Click on the floppy disk icon “Create a disk image.”

Make sure that the drive you inserted the Windows installation disc into is selected. The drive letter in Windows Explorer and in the program window must match.

Uncheck the “Add to Image Catalog” option and click on the button with three dots “…” to select a folder to save the image file. Please note that it can take up to 3.5 GB.

I recommend saving the image file on a separate disk partition (for example, “D”). In the “File name” column, enter, for example, “Windows_7” so that you can later understand what kind of file it is. I recommend not using Russian letters and spaces in the title. In the “File type” column, be sure to select “Standard ISO images (*.iso)” and click “Save”.

Check that everything is correct and click “Start”.

The image creation process takes only 3-5 minutes. At the end the message “Image creation completed” should appear. Click the “Close” button and exit the main program by clicking on the cross.

If an error message appears or the process is stuck in place, either the installation disc or the DVD drive is damaged. Try wiping the drive with a dry, soft cloth and try again, or use another computer.
4. Create a boot disk
We need the Astroburn program to burn an image file to a DVD. You can download it below in the “” section. If you plan to use a USB flash drive to install Windows, skip this section.
4.1. Installing Astroburn
Installing the program is quite simple. Run the installation file and click Next several times.
4.2. Burning a disc in Astroburn
Insert a blank disc into your DVD drive and close the AutoPlay window if it appears. Find the Astroburn Lite shortcut on your desktop or START menu and launch the program. Switch to the “Image” tab and click on the icon to the right of the “Path to image file” field.

Find where the Windows image file is located on your disk, select it with the left mouse button and click “Open”. For example, all my disk images are located on drive “D” in the “ISO” folder.

Double-check that you have selected the correct file and that the “Check” checkbox next to the DVD drive name is selected. This will ensure that the disc was recorded without errors and that the Windows installation process will not be interrupted unexpectedly. I also recommend setting the recording speed to 8.0x, this is optimal for 16x DVD-R discs. Click "Start Recording".

The process of burning a disc along with checking takes up to 10 minutes. When you finish recording, close the program. If an error message appears or the process is frozen, it means either you got a bad disk or the DVD drive is worn out.

Try recording again on a new disc, if it doesn’t work, then use another computer.
5. Creating a bootable USB flash drive
5.1. Methods for creating bootable flash drives
There are many ways and programs for creating bootable flash drives, from manually writing commands on the command line to using Linux boot loaders. The disadvantage of the command line is that it is difficult for beginners and prone to errors. The disadvantage of Linux bootloaders is that such flash drives do not boot on all computers.
There is also an official program from Microsoft for creating bootable flash drives “Windows USB/DVD Download Tool”. It is very easy to use and flash drives recorded with it can be loaded on most computers. But this program has a number of limitations. For example, to use it in Windows XP, you need to additionally install several more cumbersome add-ons (.NET Framework 2.0 and Image Mastering API v2), and in order to create a bootable USB flash drive for installing Windows 7 x64 in Windows 7 x32, you need to copy it to the folder with the program additional file or fiddling with the command line. There are other problems with the program.
Therefore, I decided to give you just one, but simple and reliable way to create bootable flash drives that are suitable for any operating systems and computers, using the Rufus program.
5.2. Using Rufus
The Rufus program is designed to create bootable flash drives for installing various operating systems, including Windows XP, 7, 8, 8.1, 10. It does not require installation and can be run on any operating system from Windows XP to Windows 10, regardless of bitness .
You can download this program in the "" section. Next, you will need any computer with Windows installed and a flash drive with a capacity of at least 4 GB.
Transcend JetFlash 790 8Gb
Insert the flash drive into your computer and if there are valuable files on it, copy them to your hard drive. Immediately after creating a bootable USB flash drive or when you have finished installing Windows, you can return them back.
It is not necessary to clean and format the flash drive, just run the Rufus program and make sure that the flash drive is selected in the “Device” field.


Find where the Windows image file is located on your disk, select it with the left mouse button and click “Open”. For example, my previously created image is located on drive “D”.

Now you need to select the type of boot partition (MBR or GPT) and firmware motherboard computer (BIOS or UEFI) on which Windows will be installed. It's not as difficult as it sounds

MBR is a simpler and more reliable type of boot partition, but does not support hard drives larger than 2 TB. If you don't have a 3TB or larger drive, I recommend using this type of partition to avoid some possible problems in the future.
GPT is a more advanced type of boot partition that supports very large disks. If you have a hard drive with a capacity of 3 TB or more, then use this type of partition, otherwise the computer will only see about 2.3 TB. In other cases, I do not recommend GPT markup, as there are various problems with it.
The motherboard firmware can be BIOS or UEFI. This can be found in the manual or on the website of the motherboard or laptop manufacturer, as well as visually when entering the Setup boot program. To do this, you need to hold down the “Delete”, “F2”, “F10” or “Esc” button immediately after turning on the computer. You can read which button to press in the messages that appear immediately after turning on the computer.
In text form.

In graphical form.

If the Setup program looks like the picture below, then this is a classic BIOS.

If it’s like in the next picture, then it’s UEFI.

So, if you have a classic BIOS, then select “MBR for computers with BIOS or UEFI” in the “Partition scheme and system interface type” field. This is the most universal option and the flash drive can be used for installation on different computers, both with BIOS and UEFI.
If you have determined for sure that you have UEFI and the disk size does not exceed 2 TB, then select “MBR for computers with a UEFI interface.” If you have UEFI and a disk of 3 TB or more, then select “GPT for computers with a UEFI interface.”
Next you need to select “File system”. If in the previous step you selected “MBR for computers with BIOS or UEFI,” then select NTFS. If the second or third item is with UEFI, then select FAT32, since UEFI does not work with NTFS.

We leave the cluster size at default, and in the “Volume Label” field you can write, for example, “Windows7 x32” (or x64) so that you can later determine what’s on this flash drive.

Double-check all settings and the correct image selection. The selected disk image is displayed at the very bottom of the program. Instead of the name of the flash drive, it may be written “CD_ROM”; the drive letter must match the flash drive.

Click on the “Start” button and confirm the destruction of your flash drive along with your computer

Wait for the recording to finish, this can take from 3 to 20 minutes depending on the size of the image and the speed of the flash drive and should end with the green bar completely filling and the word “Ready” at the bottom of the program.

After that, you can add any files to the bootable flash drive and use it like a regular flash drive. If it is working properly, this will not affect its operation as an installation disk. But perform a safe removal of the flash drive using the system tray icon.
5.3. Possible problems and solutions
Problems can arise due to a bad flash drive, a bad USB extension cable, a damaged or incompletely downloaded image file from the Internet, or the computer itself on which the recording takes place.
Possible solutions:
- formatting and checking the flash drive for bad blocks
(there is a checkmark in the Rufus program) - inserting a flash drive into the rear USB port of the computer
- Windows image checksum verification
(for example, the Hash Calculator program) - burning a flash drive on another computer
- replacing a flash drive with another one
As for checking the checksum of an image, usually the site where you download the image has its checksum (or hash). The checksum also needs to be calculated for the downloaded file using special program Hash Calculator, which you can download below in the “” section. If the calculated checksum matches the one indicated on the website, then the file was downloaded without damage. If the hashes do not match, then the file is damaged and must be downloaded again. Otherwise, errors may occur during the disc burning or Windows installation process.
6. Links
That's all, in the next article we will talk about booting from an installation disk or flash drive.
Sandisk Cruzer
Transcend JetFlash 790 8Gb
Sandisk Cruzer
The need to install or reinstall an operating system on a computer may arise at any time. In this case, having a bootable flash drive or disk on hand will be very helpful. The site already has an article on how to create a bootable USB flash drive. But you need to keep in mind that you may need to reformat it to record other data, or you will simply lose it.
If your computer or laptop has a DWD-RW drive, then it would be an excellent option to have a boot disk with the required operating system at home, just in case. In this article, we will look at how to create a bootable Windows disk using various programs.
To create it, you will need a computer with a working operating system, the blank itself, the volume of which should be larger than the files you have that you are going to copy. You will also need a recording utility and an image of the operating system you want to record. A suitable program can be downloaded from the Internet, preferably from official websites. The system image can be downloaded via torrent, most likely it will be a file with the extension .iso.
Using the Astroburn Lite utility
So let's make a bootable Windows disk using Astroburn Lite. You can read about the Astroburn Lite program and its installation on your computer by clicking on the link. Insert the disc into the drive and launch Astroburn Lite by clicking on the corresponding shortcut on the desktop.
In the main window, go to the “Image” tab and opposite the “Image” field, click on the “Browse” magnifying glass.
Through Explorer, find the folder on your computer in which you have the appropriate ISO file stored, click on it and click “Open”.

In the Speed field, select the recording speed. Here it is better to choose the most minimum value from the list.
I don't have an empty disk, so the window below looks like this. It will look a little different for you. Check the "Check" box. In this case, immediately after recording, the program will check for errors.
Click "Start Recording" and wait for the process to complete.

This is how we burned a bootable Windows disc from an ISO image using the Astroburn Lite utility.
Using UltraISO
Now let's make a bootable disk using UltraISO. Download and install it on your computer.
After launching UltraISO, the following window will appear. Click on the button there "Trial period".

Go to the "File" tab and select "Open" from the menu.

Locate the ISO file of the operating system you want to burn on your computer and click Open.

In the menu at the top, click "Burn CD image".

Check that the drive and file for recording are selected correctly, select the minimum recording speed. There is no need to change anything in the “Record Method” field. Click "Burn".
Wait a little and everything will be ready.

I will end here. I think now you understand how to make a bootable disk from an ISO image with the Windows operating system using one of the programs described in the article.
Rate this article: (3
ratings, average: 5,00
out of 5)
Webmaster. Higher education with a degree in Information Security. Author of most articles and computer literacy lessons
- Downloaded system image.
- A program for creating bootable disks or flash drives.
- to change parameters (formatting) of an already used hard drive or when partitioning a newly purchased one;
- to install the Operating System;
- in case of failure of the Operating System (up to refusal to boot at all);
- when restoring the System from an image (for example, Norton Ghost);
- to try to recover a “forgotten” Administrator password;
- as well as in many other cases.
- have several boot options from one CD;
- have a boot image larger than one standard 1440 KB floppy disk.
Before installing the operating system, you need create a boot disk with Windows 7, from which the installation will be carried out. You can find and download many different versions of Windows 7 on the Internet. However, I repeat that it is best to install original versions of operating systems, not assemblies. We will assume that you already have an image of the operating system on your local disk. As a rule, this is a file with the extension “ISO” - for example, “Windows7.iso”. This is what we need to burn onto a DVD in a certain way.
Why on DVD? Will explain. The average size of an operating system image is about 3 Gigabytes, so regular CDs simply cannot accommodate a file of this size. Both DVD-R and DVD-RW discs can be used. The only difference between them is that “RW” (ReWritable) has the property of rewriting. That is, such a disc can be erased and recorded many times. And the “R” (Recordable) disc can only be recorded once. To create a bootable DVD, you will also need a Windows 7 disc burning program.
Currently, there are many different programs, but I recommend “Nero Burning ROM”, which has long proven itself as professional program for recording all types of discs. One of the most stable versions of this program for the Windows XP operating system is “Nero Burning ROM 6.6.0.16”. Nero will be more than enough for you. For the 64-bit Windows 7 operating system, it is better to install a version no lower than 10, and better yet 12. For example, "Nero Burning ROM 12.0.20000". At the end of the article I will post a link to this program so that you can download it to your local disk and then install it. Using this particular version of the program as an example, I will show you how to create a bootable Windows 7 disk.
Having launched the “Nero Burning ROM” program, the following window should appear in front of you, in which you need to left-click on the “Open” button.
Next, in the window that appears, you need to select the image itself that you want to burn to disk. To do this, you must know where exactly this file is located on your hard drive. Click on the required file twice with the left mouse button or once with the left mouse button, first on the file and then on the “Open” button. It will look approximately as shown in the picture.

The disc burning settings window will appear. Make sure DVD is selected in the top left corner. Also check if the “Record”, “Finalize disc” and “Check recorded data” checkboxes are checked. “Record” means recording a disc, everything is clear here. “Finalize a disc” means to “close” the disc after writing so that subsequent writes to it are impossible. “Check recorded data” - after recording, all recorded files are checked for readability. Choose the recording speed at your discretion. Can choose maximum speed. But I personally have had cases where, after recording at maximum speed, some files from the disk simply refused to be read. Perhaps they were just low-quality discs. But I still always choose the “golden” mean. And I don’t always set the maximum speed. So, click the “Burn” button.

A window like this should appear, where the following main indicators are located: write speed, loading of the read-executive buffer, and a write progress indicator.

After the recording is completed, checking the recorded data will automatically begin - “Data Verification”, upon completion of which, if everything went well, the window shown below in the picture will appear, and the tray of your drive with the still warm disc will open. Click the “OK” button and close the program. The disk is ready for installation.

If during “Data Verification” (disk check) messages such as those shown in the picture below appear, it means that the data was recorded incorrectly. In this case, reading occurs with errors. It is not recommended to install the Windows operating system from such a disk. Click the “Cancel” button, and in the window that appears next, the “OK” button.

If you burned an image of Windows 7 onto a DVD-R disc, then it is better to take a new blank disc and do all the above operations to create a bootable Windows 7 disc again. If you used a DVD-RW disc, erase it by clicking on the “Erase rewritable disc” button in the “Recorder” menu tab, as shown in the picture below.

In the window that appears, leave all the settings unchanged, that is, Erase method – Quickly erase RW disk, Erase speed – Maximum. And click the "Erase" button.

After this, a window will appear showing the progress of the erase operation.

Once the disc is erased, this small window will disappear and the drive tray will open with a now blank disc. You will need to follow all the steps described above to create a bootable Windows 7 disk. And you will need to start with the “Open” button, where in the window that appears you select the desired image with the Windows 7 operating system.

If no errors are found after checking the disk, the creation of the Windows 7 boot disk has been completed successfully. The disk is now ready to install the operating system. I wish you success!
Often, when we buy a ready-made computer with a pre-installed operating system, we do not receive a distribution disk. In order to be able to restore, reinstall or deploy the system on another computer, we will need bootable media.
The entire process of creating a bootable XP disk comes down to writing the finished operating system image onto a blank CD. The image most often has an ISO extension and already contains all the necessary files for downloading and installation.
Boot disks are created not only to install or reinstall the system, but also to check the HDD for viruses, work with the file system, and reset the account password. There are multiboot media for this. We will also talk about them below.
Method 1: disk from image
We will create a disk from a Windows XP image downloaded online using a program. On the question of where to get the image. Since official support for XP has ended, the system can only be downloaded from third-party sites or torrents. When choosing, you need to pay attention to the fact that the image is original (MSDN), since various assemblies may not work correctly and contain a lot of unnecessary, most often outdated, updates and programs.


The disk is ready, now you can boot from it and use all the functions.
Method 2: disk of files
If for some reason you have only a folder with files instead of a disk image, then you can also write them to a disc and make it bootable. Also this method will work if a duplicate installation disk is created. Please note that you can use another option to copy a disc - create an image from it and burn it to CD-R.
In order to be able to boot from the created disk, we will need a boot file for Windows XP. Unfortunately, it cannot be obtained from official sources for the same reason that support has ceased, so again you will have to use a search engine. The file may have a name xpboot.bin specifically for XP or nt5boot.bin for all NT systems (universal). The search query should look like this: "xpboot.bin download" without quotes.

Multiboot disk
Multiboot disks differ from regular ones in that, in addition to the installation image of the operating system, they can contain various utilities for working with Windows without starting it. Let's look at an example with Kaspersky Rescue Disk from the laboratory
Hello, dear readers, today we will figure out how to create a boot disk for Windows 7 and Windows 8 using programs. I would immediately like to note the advantages of using boot disks over flash drives: firstly, the CD-ROM driver is always functional, even if you do not have any operating system on your computer. This means that you can always boot from the disk (if it is safe and sound) and install Windows without any problems. But we cannot give a 100% guarantee about the functionality of the USB driver under Windows: in my practice, there have been cases when I had already created a bootable flash drive, but as soon as I inserted it into the computer, it immediately stopped seeing it: there was no corresponding driver. But there are situations when Wundows need to be changed here and now. At least for these reasons, you need to be able to create bootable disks. Okay, let's begin.
In order to make a boot disk, we need:
In this article we will look at one of the most quick ways creating a boot disk with the system we need. We will use the program we have long loved, UltraIso. Yes, the most important thing is that the principle of creating bootable disks is almost no different from creating bootable flash drives. Although there are some nuances. You can read more about creating bootable flash drives.
UltraIso program
First, download the program by following the link. Download the free version.

We download the program based on where you live. For example, I live in Ukraine.

After the program has been downloaded, install it on your computer. Installation should not cause you any difficulties. After installation, launch the program and select "Trial period".

Immediately after opening, you will see an area of the main window that looks like this.

Go to the tab "Burn CD Image", as shown in the figure below.

Then select the drive (if you have one drive, it will be selected automatically). In point "Recording speed" It is best to choose the minimum speed, since at a high speed, recording errors may occur, which will render your system image and disk unusable, and the disk is not a flash drive, it will not be possible to format it (if it is not RW). But, as practice shows, even if you re-format the RW disk, the errors will be repeated again and again, although this does not happen in all cases. In the “Image file” item, specify the path to the folder where the image is located. Then click “Record”.

After this, the recording process begins, at the end of which you will have your own boot disk ready. Go ahead and happily install a brand new Windows on your computer!
Let's summarize: Today, dear readers, we figured out how to create a boot disk for Windows 7 and Windows 8 using the old and long-loved UltraIso. As you can see, there is nothing complicated about this. The main thing is attention and endurance.
Don't forget to comment on articles on our site. Your opinion is important to us!
| Authors of the article: Gvindzhiliya Grigory and Pashchenko Sergey |


Good day, dear readers of my blog. I remember the times when we downloaded all programs, games and other software from the Internet, then inserted the disc and started the installation process. Then we learned that we can create a virtual drive. Surprisingly, all these skills are still useful today.
I'll tell you about simple ways to burn a bootable disc from an ISO image using four of the most popular programs.
There are different cases, for example, the need Windows reinstallation or saving important programs in in electronic format. The skill cannot be called useless.
I still think that it is very important for any beginner to understand the terminology, so first I would like to talk a little about what we actually have to face today, what ISO is and why it is preferable to work with it. Computer literacy has never harmed anyone.

So, you are probably familiar with this situation. You insert a CD into the drive or insert a flash drive into a USB port, immediately after which the installation window automatically opens. This process is called multiboot.
In order to run this operation, we need an external device or virtual drive. I already wrote about this process on my blog and described the work in the best, in my opinion, .
Programs such as Ultraiso, Nero, Alcohol or Daemon Tools can create the illusion that a CD is on your computer, and today we will talk about them again.
Any program needs an image, an ISO file. It saves users from many difficulties. You don't have to search for any files, collect them from different parts computer and download manually. You can create your own boot disks from any set of documents for a game or program. Roughly speaking, a single archive.

I haven’t written about this process on my blog yet, and if you are interested, subscribe to the newsletter and be the first to know about the release of a new publication. In the meantime, you can download ready-made images from the Internet.
2. Daemon Tools
I really like the Daemon Tools program; I always use it to work with images. You can go to the official website www.daemon-tools.cc/rus and download a free trial. It can hack write protection if you need to copy a finished disc. Creates up to 36 additional drives, edits and converts.

If you want to burn images to a flash drive, then you will need the Ultra program. If CD/DVD is enough, then you can get by with the PRO version.
The Lite program is not completely free additional features and does not know how to write images, but only emulates them on a virtual disk drive.
Personally, I use the Ultra version and by the way, very soon you will understand its advantage. Frankly speaking, I myself had no idea about it.

In the top panel, open “Tools” and select “Burn to disk”. First, insert a blank CD or DVD into the drive.

Unfortunately, I don’t have this now, but I’ve done it a thousand times and I know that all you have to do is click on “Start” and drink tea until the download is complete. This takes at least three to five minutes.

If you want to make a bootable disk on a flash drive, then in the same place, in “Tools”, select “Create bootable USB”.

Here comes an unexpected discovery. A Micro SD card was inserted into my laptop. Well, you know, like on the phone. Daemon Tools prompts me to create a boot disk directly from it. In my opinion, this is an excellent solution. No massive flash drives.

This discovery made me climb my favorite Ali. You can buy here micro card 128 GB . This is a little girl with a rich inner world.

3. Nero
Another great utility for burning discs is Nero. You've probably heard of her. You may even already have it installed. If not, you can download it from the official website ( www.nero.com ).

It is also designed for burning, and some versions can even burn HD DVD and Blu-Ray. Highest quality graphics. Ideal for movies or games. Another interesting option in my opinion that the utility has is the layout of covers.
You can learn how to burn bootable discs in this program from the training video below.
4. Alcohol 120%
When it comes to the ISO format, one cannot help but mention such a popular program as Alcohol 120%. This is what her official website looks like ( www.alcohol-soft.com ).

There is a free version of Alcohol 52%, but it is not capable of recording images, it only edits them. But you can download Trial.
It also supports cool, high-quality formats like Blu-Ray. Capable of adding 31 virtual drives or copying from one drive to another directly.
From this training video you can learn how to use the program. It's very simple.
5.UltraISO
Well, another popular program that you might like is ultra ISO ( www.ultraiso-ezb.ru ).
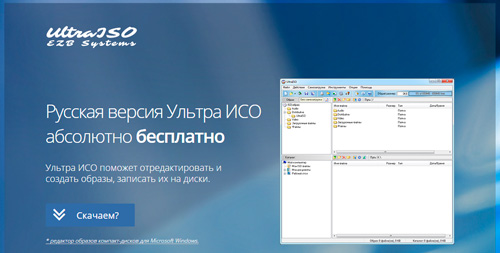
The free version is not capable of burning discs, so you should not completely trust the advertising. But despite this, the software is quite interesting. It can work not only with flash drives, but also with hard drives. Write images on them.
Thanks to it, you can optimize the structure to save disk space, create bootable flash drives with two modes (USB-zip and HDD) and much more.
You can learn how to use the program from this training video.
All that remains is to make a choice. If you found this article helpful, subscribe to the newsletter and learn more about how to make complex things easier. Have you ever thought about a career as a web designer? Read the publication about. Or perhaps you might be interested. You can move in this direction even if you don't know anything yet.
Subscribe to VKontakte group and everything will definitely work out for you. Until next time.


