What is a polarizing filter (CPL) and what is it used for? How to choose a filter? Protective, polarizing and gradient filters
The essence of a polarizing filter is very simple - such a filter is capable of trap reflected polarized light. For example, it is possible to block reflected light from water, glass, etc., thereby making the water and glass transparent. But the filter’s capabilities are not limited to this.
The polarizing filter itself consists of two parts - movable and fixed. The fixed part of the filter is screwed into the thread of the lens filter. The moving part can rotate freely 360 degrees. By using front rotation polarization filter, the filter is adjusted to a certain type of polarized light, and at the same time it is delayed by such a filter. Due to the fact that the filter operates by rotating the front part, this filter is best used on lenses with an internal focusing system. If the front lens of the lens rotates along with the frame, this causes inconvenience when working with a polarizing filter.
The polarizing filter can be screwed on. You can put a lens cap on the polarizing filter, or you can add another filter. The only thing is that the more filters are screwed into each other, the greater the likelihood of getting images in the corners. Some polarizing filters may not have a thread on the front.
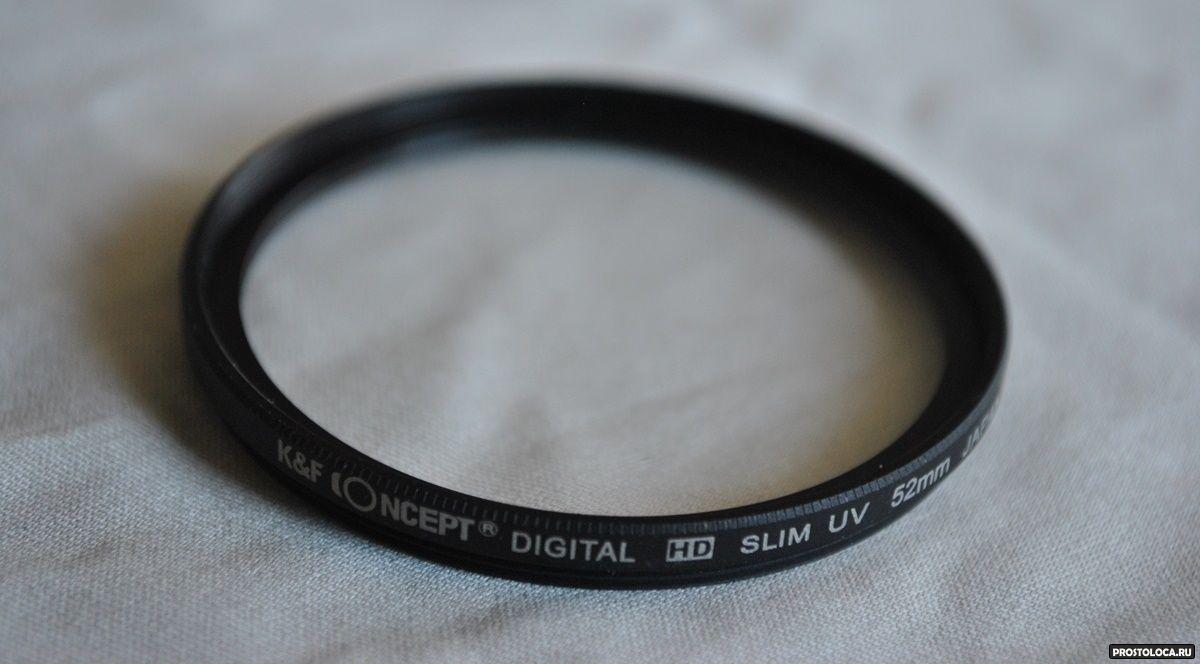
To choose a polarizing filter for your lens, you need to know the diameter of the lens thread for the filter. For example, a standard lens for a Nikon central lens has a diameter of 52mm, and it requires a polarizing filter with a diameter of 52mm. This may seem funny, but many people cannot choose a filter precisely because they do not know whether it will fit their lens. The effect of a polarizing filter can be seen on any lens.
Some features:
- A polarizing filter blocks reflected polarized light. This is the main property of the filter; it can be used in large quantities situations. For example, using a polarizing filter, you can remove water glare (light reflected from water) and photograph the bottom.

- The filter also removes blue sky reflections from the ground, grass, and leaves. The sky adds extra cold tones (blue, cyan) to the photo. When using a polarizing filter, everything becomes warmer and natural color. Lung color changes can be seen in other examples.

- When using a polarizing filter for subject photography, you can reduce glare on your subjects.
- This filter allows you to achieve a pleasant blue sky with white clouds. Due to small particles in the air, the sky's light is partly polarized. IN general case the effect appears more rich colors.

The sky when using a polarizing filter. The filter allows you to even out the luminosity of the sky and provides a slightly different rendering of the green color.
- In general, a polarizing filter works like a neutral density filter, allowing less light to pass through. For example, with a polarizing filter you can easily shoot on a bright day, using F/1.4, a shutter speed of 1/4000 s and ISO 100 will be enough for correct exposure without overexposure. Many people miss the fact that in any case, a polarizing filter reduces the light output. In low light conditions, I recommend removing the polarizer so that the lens can receive more light. A combination of ND and PL filters is very interesting to use.

The polarizing filter is abbreviated as 'PL filter' or simply 'polarizer'. A good polarizer is not a cheap thing. As usual, the more expensive the filter, the better it is. True, inexpensive polar lenses are also suitable for amateur photography. For example, I use Hoya 58mm PL-CIR Made in Japan. My colleagues say that very high-quality polarizers are B+W and Rodenstock, but very often it is very difficult to feel the difference between the cheaper Hoya, Marumi, Kenko.
Conclusions:
A polarizing filter is an interesting and useful device to achieve unique effects in photographs. Such a filter - irreplaceable thing for landscape photography, outdoor work in sunlight, etc.
Please note that on Radozhiva comments do not require any registration at all; any reader can add a comment. I'll be very happy, if in the comments you express your opinion, describe your experience or supplement the material with useful information.
To select photographic equipment, I recommend using useful links for large catalogs of various photographic equipment, such as E-catalog or Magazilla. Lots of little things for photos can be found on Aliexpress.
Not long ago, I had a desire to slightly improve my Nikon D3000 and order a corresponding lens hood with a diameter of 52 mm for it. the main task This lens cover is designed to effectively cut off light; in addition, this thing indirectly serves to protect the lens from impacts and scratches. It so happened that I made the purchase remotely via the Internet, and buying the hood separately was not as profitable as ordering it whole set: three filters per lens, four attachment lenses, hood and protective cap.
Two weeks later my package arrived, but the fact is that before this purchase I had not used light filters, and my knowledge of what they were needed for was purely theoretical. Today I invite you to look with me at what actually happens when shooting with various filters, and together figure out why they are needed.
Popular lens filters
Polarizing filter
The first filter I would like to talk about is polarizing. You can see it in the photo below.
Polarizing filters are used in digital photography most often. These filters are abbreviated PL (CPL, LPL) and their main task is to reduce the amount of reflected light hitting the camera sensor. Polarizing filters reduce the brightness of photos and increase their saturation.

There are two types of polarizing filters: circular (CPL) and linear (LPL). Linear polarizing filters are less effective at reducing polarizing light than circular ones, but they can be placed at any angle, while circular polarizing filters must be placed at right angles to the optical axis.

A circular filter is a system of two mandrels: a mandrel with glass + a mandrel. The glass mandrel rotates freely, and by turning it at a certain angle, we are able to achieve the desired effect.

However, the polarizer should be used with care and skill. Do not use it as a protective filter for the lens or wear it without taking it off. A polarizing filter can have Negative influence on the photo, as it steals light greatly - the risk of blurry photos increases when shooting without a tripod.
FLD filter (fluorescent light filter)
The second filter that came with the kit was an FLD filter. It is characterized by a bright purple hue.

What is it for? It reduces or completely eliminates the unpleasant greenish tint that appears in photos containing fluorescent lamps.

You can use it when shooting city landscapes at night. FLD filters were originally created for shooting with film cameras and are not needed for digital photography, especially in RAW format. So I'm unlikely to use this filter.
UV filter
The third and last filter included in the kit is a UV filter.
The UV filter is most often used today as a protective filter. The UV filter does not have any effect on the image (ideally) and can be used during any type of shooting. On film cameras, a UV filter increases contrast and reduces haze, but in the era of digital photography, almost no one shoots with such cameras.
It is very important that the UV filter is good quality and kept clean, as it can significantly degrade image quality and add much-needed glare.
Should I use a UV filter? If you are the owner of an expensive lens, it is advisable to have such a protective filter, because it is easier to replace it than to repair the lens. If your camera is an amateur one, then it’s worth thinking about the advisability of using it.
To summarize: of the three filters included in the kit, the most necessary is the polarizing filter, the most frequently used is the protective UV filter, and the useless is the FLD filter.
It is one of the most important filters in a landscape photographer's arsenal: it allows you to cut off excess polarized light, increasing the color saturation of the scene and suppressing unwanted reflections, and its effect cannot be reproduced in digital photo processing.
In order not to delve into the jungle of the physics of light, let’s first take it on faith that light is polarized when reflected from non-metallic surfaces. The most obvious examples of such reflected light are glare and reflections on the surface of water and glass. A circular polarizing filter (we won’t talk about linear ones, they are used quite rarely in photography) allows you to filter out direct reflections of sunlight at certain angles. The filtration angle is controlled by the rotation of its front element (the rear element is screwed onto the filter thread on the lens), and the strength of the effect is controlled by the position of the camera relative to the sun.

This way, a polarizing filter suppresses glare and reflections, allowing you to naturally enhance the color saturation in your photo. This effect is most pronounced in the sky - it becomes more saturated, and clouds are much more visible on it.
To see which direction to shoot to achieve maximum effect you can apply the “rule of thumb”: point your index finger at the sun, sticking out your thumb; To achieve maximum effect, shoot in any direction the camera is pointing. thumb, if you rotate the brush around the axis formed index finger. Ultimately, it turns out that a polarizing filter becomes most effective when the sun is on the side of the camera.

There are a number of benefits to using polarizing filters, but they come at a price.
- Color saturation increases as a result of a decrease in the number of direct light reflections. This effect is the first thing that catches your eye. Saturation, however, does not always increase evenly throughout the image. The magnitude of the effect depends on the position of the subject relative to the sun, as well as its reflectivity - the higher it is, the more the color saturation will increase. In addition, the effect of a polarizing filter is more noticeable in clear sunny weather than in cloudy weather. There may also be problems with uniformity of effect when used with ultra-wide-angle lenses with focal length less than 28 mm and when shooting panoramas;
- A polarizing filter is an essential tool for suppressing reflections. It allows you to outline wet objects or those that are under water much more clearly. This ability also makes it useful when photographing objects behind glass - in shop windows, behind windows, etc.


- It makes it easier to shoot scenes with wide dynamic range, allowing you to more or less balance, for example, a bright sky and dark foliage;
- When used particularly on long lenses, it is good option to combat haze and increase the contrast of the image. However, if the subject itself is highly reflective, its contrast is very likely to decrease.
- A high-quality filter will allow you to display your landscape photography on new level and really add depth to your photos. On the other hand, cheap, low-quality filters will most likely further reduce the contrast and sharpness of the image and catch sun glare. Also, with wide-angle lenses you will most likely have to use polarizing filters with thin frames to avoid vignetting;


- The polarizing filter cuts off unnecessary reflections, which means a loss in light, and quite significant - a little over two stops on average. This makes polarizing filters useless when shooting in low light conditions, working on sporting events. At the same time, a polarizing filter is a good replacement for a low-density neutral gray filter if circumstances require it. In addition, they can be used in combination with neutral density filters if necessary.
- The market now offers a wide range of circular polarizing filters of varying quality, available in a very wide price range - prices vary depending on the lens thread diameter and manufacturer. There are decent quality solutions for affordable price, For example .
Obviously, a circular polarizing filter is a win-win, if you want to improve the quality of your landscapes. However, this is one of the most expensive types of filters you will find on the market, and for good reason. This is one of those “pieces of glass” that obeys the principle of choosing a lens - it’s better to invest in a good product from the very beginning and enjoy using it for years, or even decades, with proper care. There is, however, a saving option: one filter large diameter with a set of adapter rings there will be enough for use with all your lenses - there is no special need to spend money on a filter for each lens.


It mentioned polarizing filters, but I did not describe them, promising to return to them later.
It's summer, which means it's time to talk about these interesting devices.
Despite the fact that there is a lot of information about polarizing filters, when I look around at people taking photographs, I rarely notice how a polarizing filter is used.Meanwhile, the proper use of a polarizing filter in many cases will improve photographs and add zest to them.
Pictures for commercial use often, if not most of the time, done by professionals through polarizing filters.
A little theory.
It is not necessary to understand the theory. For example, I know her very superficially. If you just need the result, then you can skip the theory and replace it with practice, guided by a few tips that I give below.
But still, a little theory.
Light polarization is the separation of rays from natural light with a certain orientation of the plane of wave oscillation.
The light of the sun has no polarization, i.e. Light waves vibrate in all planes at once. However, sunlight, being reflected from some surfaces, acquires polarization, i.e. the wave of reflected light oscillates only in one plane.
Reflected light is light reflections on various smooth surfaces, reflection on water, glass, etc.Scattered light from the sky and air haze are also, in many ways, a consequence of multiple reflections of the sun's rays from water or other dust in the air.
So, sunlight is not polarized, but its reflections are often polarized.
How does a polarizing filter work?
The human eye does not distinguish between polarized and unpolarized light. Light and light.
 The polarizing filter has unique property- the ability to transmit light only polarized in one specific plane. The picture shows this effect.
Light passing through such a filter becomes polarized.Using a polarizing filter, you can let light that oscillates only in one specific plane pass into the lens.
In practice, in photography, this filter ability is used precisely to cut off some waves and prevent them from entering the lens.
Reflections are polarized light and therefore can be cut off by turning the filter to a certain angle, which blocks the exact plane in which the reflection light oscillates.
At the same time, sunlight will still pass through the filter, because Again, sunlight is not polarized in any one plane.
Of course, not all sunlight will pass through the filter. That part of it that oscillates in the same plane as the light being cut off will also not be overcome by the filter.
Therefore, a polarizing filter always works at the same time as a neutral filter, darkening the picture by 2-3 steps.
We're done with the theory.
In photography, a polarizing filter, in particular, allows you to:
1. Remove the whitish haze from the sky and show the sky in rich darkness blue color. The clouds remain bright white, contrasting and expressive. Very beautiful.
2. Remove airy haze from the landscape and show the landscape in brighter, richer colors. Visually, contrast increases and there is a feeling of increased sharpness and clarity.
3. Remove from the surface of the water ( window glass) reflections and show what is under water (behind the glass).
A polarizing filter is visually similar to a neutral density filter. It screws onto the front of the camera lens. But there is a difference.
 The filter frame consists of 2 interlocking rings that can be rotated relative to each other around the optical axis.
After the filter is screwed to the lens, it is possible to arbitrarily rotate the filter glass itself around the optical axis. So, in fact, the filter is adjusted to cut off a specific plane of vibration of light waves.
The effect of a polarizing filter depends on two factors:
1) correct orientation of the camera in relation to the surrounding reality;
2) the angle of rotation of the filter in the frame.We look at the subject through the viewfinder from different directions and rotate the filter frame. The effect of the filter on the picture is clearly visible visually. All the main patterns will immediately become clear.
There are a few things to consider when using a polarizing filter:
1. There are two types of polarizing filters: Linear and circular (circular).
Linear ones appeared much earlier and for photo purposes they are most likely no longer produced.
 Polarizing filters were also produced in the USSR. For example, in the photo PF-49. PF is, of course, a “Polarizing Filter”, and the number 49 is the thread diameter. All Soviet polarizing filters are linear.
Linear filters are not very convenient to use with modern cameras. From the point of view eliminating glare, reflections, haze, etc. - the filter will work as it should. But in a modern device, exposure metering and autofocus will most likely lie.
A linear filter polarizes light, and the device's sensors are sensitive to polarization.The natural conclusion is that if you use manual lenses on a modern device and know how to enter exposure compensation into the device, you can safely use a linear filter, for example, a Soviet one on a digital SLR. Everything will work out as it should.
A Soviet polarizing filter would look quite appropriate on a Soviet lens.
 The range of these filters is shown in the figure. For example, the most common lens of the Helios-44X-X series has a filter thread M52×0.75.
Circular filters are more modern. They are released just so that exposure metering and autofocus work correctly on modern devices. The circular filter has 2 layers. The first layer is a regular linear filter. It cuts off all waves except the selected ones and polarizes the light.
The second layer allows linear polarization to be converted to circular. Those. It is as if no longer polarized light reaches the automation of the device.
According to the final effect on the image circular filters are no different from linear ones.To confidently distinguish a linear filter from a circular one, there is a very clear and simple test that I found on the “About Photo” resource.
Even if there are no inscriptions on the filter, this is very easy to do. Go to the mirror, turn on the light, although it’s better to negative sequence, it's cheaper. Look through the filter like you would through a monocle. The outer side is from the eye, the inner side is from the mirror. If the filter is opaque in reflection and turns into a black circle, then it is a circularly polarized filter. If the filter is transparent in reflection, then either you turned it the wrong way, or it is a linear filter.
Even if you know for sure that your filter is circular, try to do it as written. Fascinating.
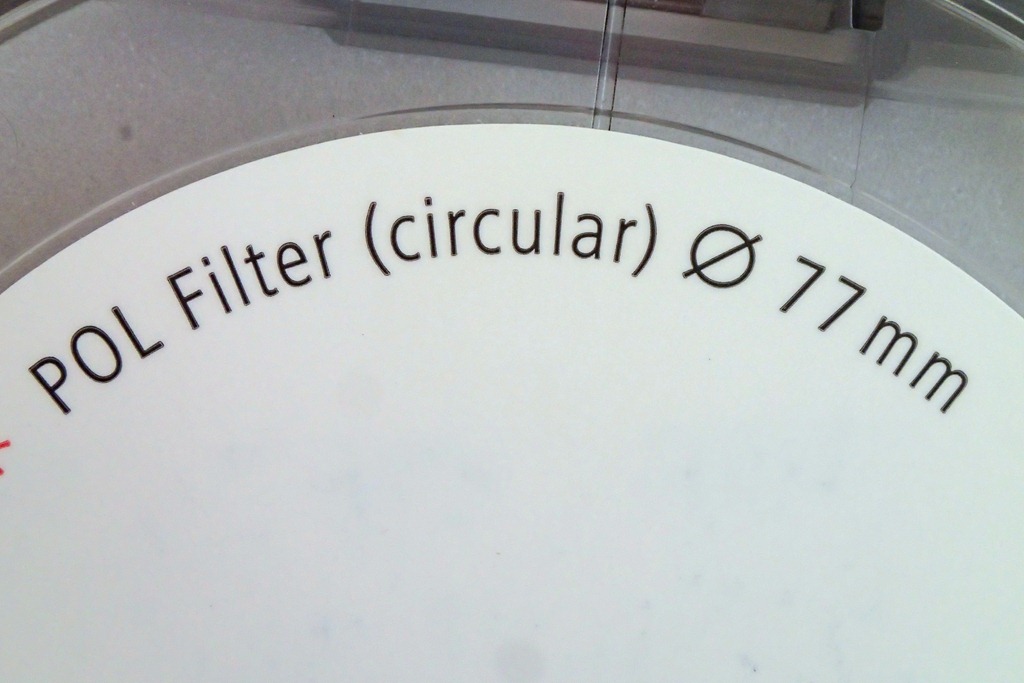 If you buy a new filter, then its type can be understood by the markings.
Circular polarizers are marked with the words CIRCULAR, CIR, or simply the letter C (for example, CIR-PL or C-PL).
You can clearly see the operation of a filter, any one, linear or circular. in a simple way. The light produced by computer monitors is polarized. If you look through a filter at the monitor image and rotate the filter around the optical axis, you can select an angle at which the monitor image is completely invisible. The filter appears opaque.

This way you can roughly check the quality of the film in the filter (and in polarized sunglasses, by the way). A bad film will not produce uniform complete darkness, but patches of light and dark areas.


Here I present several funny pictures in which the filter completely darkens the image from the monitor, but through it you can see various objects, or my hand.2. If you are going to photograph blue skies, then consider the following:
When the sun is close to the horizon (at sunrise and sunset), the most polarized are the areas of the blue sky overhead (at the zenith) and perpendicular to the direction of the sun's rays. In this case, the optical axis of the lens should be located along the north-south line.
At midday, when the sun is at its zenith, the sky is polarized in all directions at an angle of 45° to the horizon. As you go up, the polarization of the sky decreases.
The most polarized are those parts of the sky that fall into the image field when the object is illuminated by lateral sunlight, i.e., when the direction of the sun's rays and the shooting direction (the optical axis of the lens) form a right angle.
In this case, the filter darkens the sky to the greatest extent. The polarization of parts of the sky decreases as you approach the sun.
Parts of the sky lying in the directions towards the sun, above and below the sun, as well as in the direction opposite to the sun, are not polarized or almost not polarized. These areas fall into the image field when shooting against the sun (backlighting) or when the sun is behind the camera (front lighting).
In cloudy weather, a polarizing filter will not work with the sky.
The left (first in the pair) pictures were taken without a filter, the right (second in the pair) - with a filter. The uneven coloring is intentional for example.


3. If you are going to shoot clear water:
To eliminate reflections on the water, you need to turn the filter to a different angle than the one that darkens the sky. This means that it is impossible to simultaneously achieve the effect of transparent water and blue sky.
I do not consider the option of using several polarizing filters at a time as completely exotic.
There should be no large waves on the water, because... waves reflect light at different angles, which means it will not be possible to eliminate all reflections with one filter position.
Personally, I like the effect of water transparency the most.
4. If you are using a wide angle lens:
In the paragraph about the sky there are recommendations for shooting directions depending on the position of the sun. When shooting water, there is also a similar dependence on the angle of the lens to the surface of the water to maximize the effect. Everything is less critical there, so I won’t go into detail.And I’m saying all this here because when you film wide angle lens, then a very large area of space falls into your frame.
And if the center of this area even 100% corresponds to the recommendations for the angle of the optical axis to sun rays When shooting the sky or at angles to the surface of the water, the peripheral area will receive light from a completely different part of the space.
And in this area the angles will not be optimal.
Therefore, your sky may darken unevenly. One side is stronger than the other. Or there will be a darker area of the sky in the center of the frame.
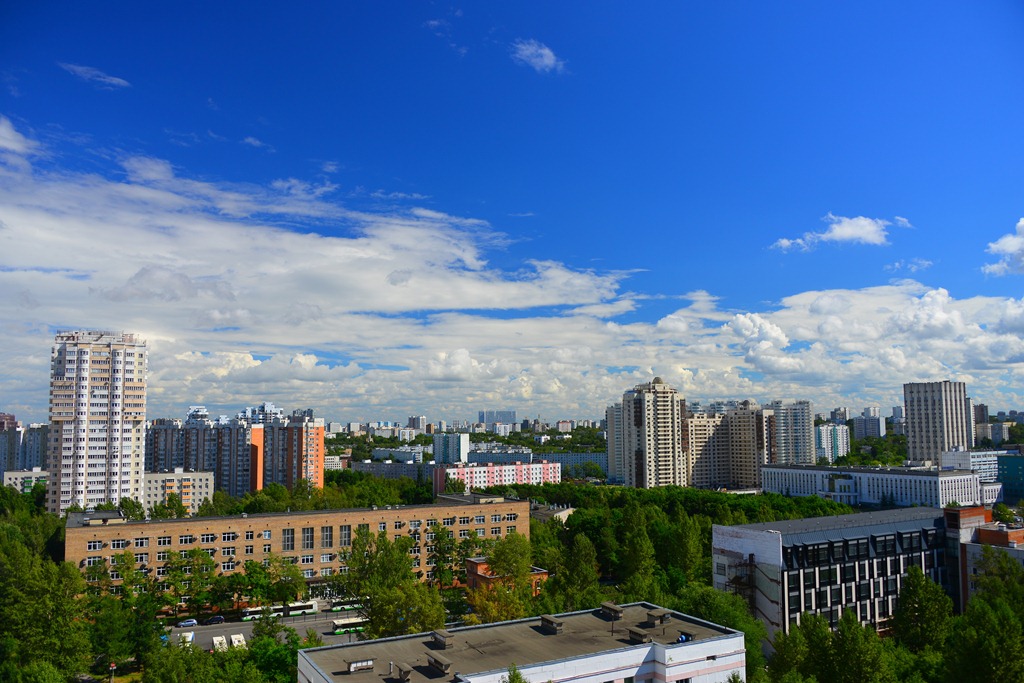
In my photos of houses you can see that the left side of the sky is darker than the right. In order for the sky to be colored evenly, it was necessary to move the frame to the left. But it's an ugly house. So choose.
Same with water. The reflection will disappear in the central area, and gradually appear towards the edges.
All this is visible in the viewfinder and you just need to pay attention to this feature. In some cases, you can zoom in towards increasing the FR. In some cases, turn the filter a little and reduce the strength of the effect.
Well, or fit this feature into the plot.
More about wide-angle lenses.
A wide-angle requires a filter with a narrow frame. Otherwise, the frame will fall into the frame and cause vignetting.
This seems obvious, but the filter design involves two movable rings and making them completely thin is not very easy.
Suitable filters are labeled “slim” and cost a little more.
5. The polarizing filter works like a neutral filter with a significant multiplicity.
IN bright days this provides a number of advantages, but if you are shooting in the shadows, difficulties may arise.
The filter reduces the amount of light entering the lens by 2-3 stops. I previously shot with a wide-angle Tokina 17-35 f/4. The lens is not very fast, but quite affordable.
So, with such aperture, and with a polarizing filter on, the camera simply did not want to focus automatically in some situations in shaded scenes. Manual focus helped, and the wide-angle is sensitive to focus errors, but still, keep it in mind.
Such filters are not expensive. Don't chase the coolest and most expensive brand. Difference in end result imperceptible.
Don't bother with theory. Just try it. Masterpieces are not guaranteed. Not everything can always be shot with maximum and ideal effect. But interesting photos guaranteed.
Happy shooting!


Dear readers!
IN in social networks Business card pages have been created for the USSR Photographic Equipment website.
If you are interested in my resource, I invite you to support the project and become a member of any of the communities. Share your experience, express your thoughts, ask questions, participate in discussions! Commenting on the site does not require registration. Just leave the fields blank.
I pay special attention to the new Instagram page.I think that many have more than once seen very bright and contrasting photographs in which the sky has a thick dark blue tint or photographs where what is clearly visible in the depths of the glass display case, but there are no reflections on its surface. Both effects are achieved using a polarizing filter. Basically, it is used just to remove glare and reflections on water or glass, and enhancing the contrast of colors in the sun is rather a by-product, which, nevertheless, is very successfully used by many photographers.
In addition, the filter can be used to increase shutter speed, for example, to make the flow of water smoother. Of course he gives less pronounced effect than neutral gray filters, but one stop can be gained.
Operating principle of a polarizing filter
A polarizing filter looks like a regular gray filter, but has a noticeable difference - it consists of two parts. It is very simple to use: after screwing it onto the lens, the outer part remains movable and can be moved. The photographer can only choose a position where the unnecessary part of the polarized rays will be cut off. Checking the filter is very simple, just point it at a working monitor and twist it, at some point the image on the screen will disappear.

When choosing a filter, you should pay attention to the fact that cheap options often distort the white balance and restoring natural colors in photographs taken with their help can be very difficult. Therefore, before purchasing, it is advisable to check the interaction of the selected model and the camera.
Using a filter
As I wrote above, the main purpose of polarizing filters is to remove glare and reflections from various surfaces.

On the left is a photo without a filter, on the right with a polarizer.
The filter works well with water and glass, but its use has virtually no effect on glare from metal objects and structures. Based on the mechanism of action, such a filter is indispensable when you need to remove reflections from glass surfaces, such as a display case or window.
The second interesting effect of using a polarizer is the enhancement of contrast and color saturation in a photograph taken in bright sun.

No special techniques were used in the processing of this photograph, and all colors are due to the use of a polarizing filter.
Side effects from using a light filter
 Since part of the light flux does not pass through the filter, the overall illumination of the scene being photographed decreases, which leads to an increase in shutter speed, sometimes quite significant. In bright sunlight this is not so critical, but under other shooting conditions it can make it impossible to work without a tripod.
The same effect can also play a positive role if you want to increase the shutter speed, for example, to soften the flow of water when photographing fountains.
Another negative effect from the use may be heterogeneity of colors when. This is due to the fact that by moving the camera we change the plane of polarization and, as a result, the colors change. Unfortunately, it is almost impossible to bypass this effect.
In general, all described side effects, do not prevent the polarizing filter from being one of the easiest to use and most popular light filters and using it to obtain interesting results in photography.


