Is it possible to dye fur? How to dye fur at home
Any fur item looks very beautiful and expensive on any girl, and you can wear it for many years. However, such things have a huge drawback - after long wear, the fibers begin to fade and lose their original appearance. From this article you will learn how to dye arctic fox fur at home, so that you can continue to enjoy showing off in a warm, beautiful thing.
Preliminary preparation
Before you start painting a fur product, you need to prepare it, namely, get rid of all dust and dirt on the fibers. Otherwise, after the painting procedure, unpleasant stains and stains may form on the product, causing it to lose its former attractiveness even more.
So, for the cleaning procedure of a fur garment, you need to prepare an alkaline solution. For a liter of water, the following proportion must be observed:
- 1 tsp. dishwasher or laundry detergent;
- 5 g of ammonia;
- 12 g table salt;
- 10 g soda.
Important! If you don’t have ammonia and soda at home, prepare a solution that requires other ingredients in equal proportions:
- Alcohol.
- Vinegar.
The cleaning process is as follows:
- Mix all ingredients.
- Apply the resulting liquid mixture to the entire area of the fur product using a brush.
- Rinse the product with clean water.
Important! To avoid drying out, lubricate inner side products with some kind of greasy hand cream.
Let's move on to painting
Although any fur is a delicate material, you can dye arctic fox fur at home, and even different ways. Now we will talk about them.
Universal method
Since animal fur is very similar in structure to human hair, it is better to use good hair dyes to dye fur at home. This method Suitable for coloring the fur of arctic fox, mink and rabbit.
Important! Don't forget to pay attention to the structure of the villi. For example, mink fur and arctic fox fur have stiffer hairs, which cannot be said about rabbit or silver fox. For this reason, two packages of dye may be needed.
The first step is to make sure that the desired shade is selected. For this reason, before starting to dye the entire garment, test the effectiveness of the substance on an inconspicuous area of the garment. Further:
- Apply paint using a brush.
- Spread the mixture over the surface with your own hands.
Important! For this it is better to use gloves.
- Leave the substance on the product for as long as it is written on the packaging.
- Rinse the item thoroughly clean warm water.
- Leave it to dry.
Important! When drying, it is better not to use fans or hair dryers - this will only harm the pile.
- After the product has dried, you need to place it in a solution of warm water and vinegar - this will help fix the paint on the pile and extend the wear period.
Important! To add extra shine to mink, rabbit or arctic fox fur, you can use hair conditioner. To do this, apply a solution of water and balm to the fur, leave for several minutes and rinse it off.
It is better to dye fur at home with hair dye in natural, basic colors. Otherwise, the fur may not behave as you wish. Eg:
- Mink fur from being dyed light color, may turn yellow and lose its expensive appearance forever.
- On the contrary, you can experiment with white rabbit fur, giving it different shades, however, it is strictly forbidden to lighten it.
Important! If you doubt your abilities and are afraid to carry out the dyeing procedure yourself, it is better to take the fur product to a special workshop where professionals will undertake this procedure.
Painting a mink
A mink fur coat is distinguished by its expensive appearance and durability to wear. In order to dye mink fur at home, you need to stock up on the following materials:
- Color-matching hair dye.
- Spray.
- Comb with frequent teeth.
- Shampoo and hair conditioner.
- Fat cream.
To paint mink coat or a header, you must follow the given algorithm:
- Pre-clean the item from grease and dust.
- Treat the inside with rich hand cream.
- Prepare hair dye according to the instructions on the package.
- Lightly moisten the fur surface using the prepared spray bottle.
- Now you can move on to the main procedure - start dyeing a mink coat at home. To do this, you need to apply the dye using the same spray bottle. The distance should be approximately 55 cm.
- Even out the tone by going over the surface with a comb.
- Wash off the dye with warm water and shampoo, rinse the product with a solution of water and hair balm.
- Apply cream or glycerin to the flesh again.
- Place the product on a flat surface and wait for it to dry.
- Comb the pile in the direction of its growth.
Dyeing an arctic fox fur coat
The arctic fox coat lends itself best to coloring artificially. In order to paint it in the desired color, you need to prepare the following materials:
- Hair dye that matches the shade of the fur product.
- Glycerin or fatty cream.
- Balm.
- Gloves.
- Brush for applying paint.
- Vinegar.
To carry out artificial coloring of fur at home, you must follow the given algorithm:
- Lubricate the inside with fatty cream or glycerin.
- Stretch the material on a flat horizontal surface.
- Wear protective gloves and begin applying the coloring composition, simultaneously smoothing out the lint with your hand.
- Wait for the time indicated on the paint packaging.
- Rinse the product in warm water.
- Wash it in vinegar solution.
- Treat your fur coat or hat with balm diluted in water, rinse off the solution after a couple of minutes.
- Lubricate the inside with fatty cream a second time, stretch it and let it dry on its own.
Often a favorite fur coat or vest loses its appearance with still quite excellent other characteristics. The fibers fade, become dull and give the product a very worn look. If you want to enjoy the warmth and comfort of your favorite thing, then you can shade it a little. But not everyone knows how to dye arctic fox fur at home.
You don’t have to bother with painting it yourself, but rather take the product to a special workshop, where everything will be done quickly and professionally. But the cost of such a service is often prohibitively high. It will be much cheaper to learn how to paint natural fur at home, and do this work yourself.
Important: Please note that if the product is still new, it is strictly not recommended to dye it simply to change the color, since any dyeing of fur shortens its service life.
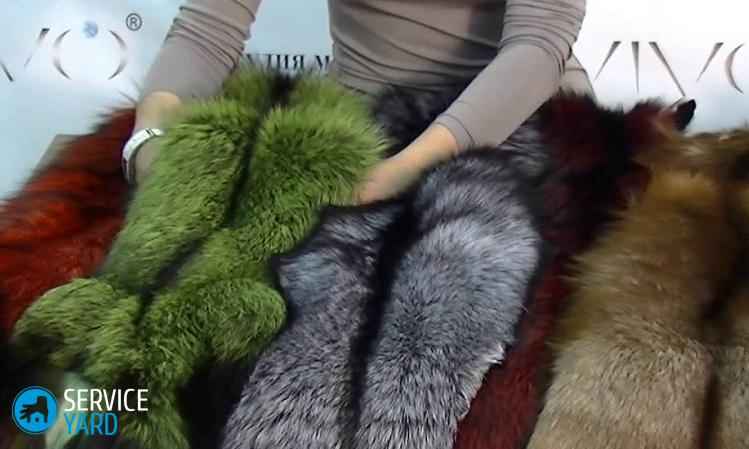
Each type of fur is beautiful and original in its own way. The painting of each of them also has its own characteristics:
- White rabbit, chinchilla or mink fur is the easiest and simplest to dye, because it does not require pre-lightening. You can use any color that can cover the yellowness that appears.
Tip: Keep in mind that rabbit fur is very sensitive to chemicals, so it must be dyed with extreme caution.

Preparation
In order for you to get a very good effect, the fur product must be prepared for painting. Then the paint will apply much more evenly and there will be no bald spots. The most important thing is to thoroughly clean your fur coat or vest. To do this, you need to prepare a mixture of the following substances:
- 2 tbsp. l. salt;
- 1 tbsp. l. ammonia;
- 2 tbsp. l. soda;
- 1 tbsp. l. washing powder;
- 2 liters of warm (not hot) water.
All components must be mixed and the resulting mixture carefully applied to the fur. Lightly brush the bristles so that not only the top, but also the bottom part is cleaned. Then moisten a clean cloth with water and wipe the fur from the composition.
After such cleaning, the fur must be dried naturally, without using heaters or a hair dryer. It is also not recommended to leave the product exposed to direct sunlight.
How to paint?
How can you dye fur? This is a completely natural question that arises among many people who are puzzled by the question of how to dye mink, rabbit or arctic fox fur at home. Of course, there are several very realistic home dyeing technologies.

Professional product
You can use special paint for fur, which is sold in hardware stores. It lies very naturally on the fibers, as it is designed taking into account the characteristics of animal fur.
Hair dye
A more affordable option is hair dye. This is also the most popular coloring method, because you can choose any color from a huge palette.
Important: Keep in mind that fur should always be dyed more dark shade. With time fiery red color will turn into “rusty” or red, and black will fade to dirty brown.
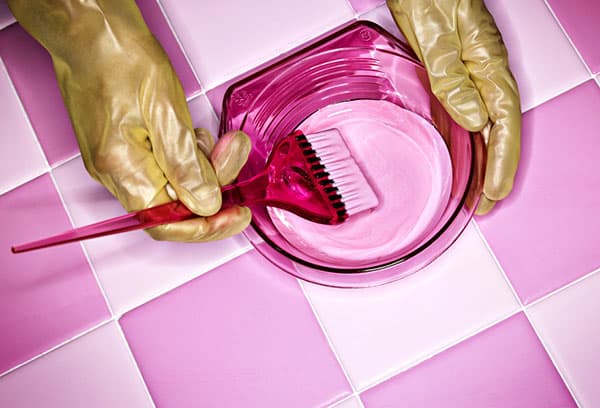
So, how to dye fur at home using hair dye:
- mix all paint components according to instructions.
- put on gloves.
- treat the inner skin (skin) with baby cream, glycerin or petroleum jelly to prevent it from drying out;
- wet the fur so that the paint is distributed more evenly;
- apply paint with a brush to the entire fur surface;
- remember the fur a little with your hands;
- wait 35-45 minutes;
- wash off the paint with water;
- lay the item on a horizontal plane, squeeze out excess moisture with your hands, and leave to dry;
- After drying, comb the fur.
You can not dye the entire fur, but only the tips of the fibers. Typically, they are lightened to give the product a richer appearance.
Suede paint
You can treat the faded tips of the fibers with suede paint, which is sold in aerosol cans. To do this, place the spray can at a distance of at least 0.5 meters from the item and evenly paint the entire surface. Leave the fur to dry for a while and then rinse it thoroughly. After this, prepare a fixing solution: 5 tbsp. l. vinegar per 2 liters of water. Wipe the pile with this liquid and leave it to dry.
If a fur item is already dark, but you would like to dye it a bright and rich shade, then you can bleach the fur. Hydrogen peroxide tablets or hair lightener will help with this.
Peroxide is diluted with water in a ratio of 1:3. If you use clarifier, dilute it as written in the instructions. Different manufacturers may make different concentrations of clarifiers. Apply the prepared mixture to the fur and leave for 10-15 minutes. You cannot keep the composition on the pile longer, as the hairs can become brittle. After treatment, rinse the fur with water and dry naturally. It can be painted only after it has completely dried.
When deciding to lighten and dye fur, carefully select the color, because it will be undesirable to carry out these procedures again. Not a single piece of fur, even the highest quality, can withstand repeated dyeing.
When dyeing fur, it is important to know some nuances:
- The fur you decide to dye should not be too shabby.
- Only clean fur will dye well, so it must be cleaned first.
- The yellowed white fur of the Arctic fox can be simply lightened.
- Before using any dye, be sure to test it on an inconspicuous area of fur.
- When painting, you can hide some flaws and defects.
- Instead of full-fledged paints, sometimes you can use small folk tricks. For example: the fur of a red or steppe fox can be quickly and painlessly renewed using a strong solution of potassium permanganate. In this case, use a small sponge. It needs to be dipped into the solution and passed over the villi, being careful not to touch the core.
- After dyeing and drying, the fur must be combed so that it becomes fluffy again.
- Using tinting shampoo, you can create a unique decor on your fur product. You just need to show a little imagination.
Now you know whether it is possible to dye the fur of the Arctic fox and other fur-bearing animals, and you can also imagine the technology of this process. The main thing is to strictly follow all instructions. And your favorite and cozy fur coat will delight you with its warmth and impeccable appearance for some time to come. If you do not dare to take such an important step as dyeing fur, then contact specialists at a dry cleaner or workshop for repairing fur products.
Alas, over time, the fur on our favorite fur coats loses its original appearance, changing in color and shape. But you don't have to run out for a new product. The first reason is that it is far from cheap, and the second is that we will tell you how to dye fur at home. Of course, it should be rightly noted that not everyone decides to paint at home. Most are simply afraid of ruining the fur and prefer to entrust the product to professionals. This, of course, has its own meaning. But with our recommendations, you will not only not spoil the product, but also breathe into it new life. The fur will regain its shape, the fibers will become soft, and most importantly, the color of the product will be like new again. It needs to be cleaned before painting. Without this procedure, painting may result in unpainted areas, which will only worsen the situation.
Cleaning the fur
For cleaning we need:
- water – 1 l;
- salt – 20 g;
- ammonia - (25%) -3 g;
- detergent – 1 g;
- soda – 2 g.
Mix and soak the product in the resulting solution for at least an hour. Next, squeeze and rinse well under running water. It must be completely dry before painting.

How to dye natural fur at home
For painting we will need:
- paint for fur: in relation to the original color, you need to choose a darker shade;
- fatty cream (glycerin will also work);
- vinegar.
Fur dyeing at home
- After we have cleaned the pile with the solution, we need to stretch it on the board and secure it. This will prevent the fur from shrinking.
- In order to avoid drying out the product, it reverse side it is necessary to coat with fatty cream or glycerin.
- We wet the pile a little and paint it.
- Mix warm water and vinegar.
- We place the fur coat after dyeing.
- The product should be dried without using a hair dryer.
As we can see, dyeing fur at home is not very difficult. You just need to follow the rules: before painting, be sure to clean the product with a solution, check in a small area how the pile reacts to the paint and coat the core with glycerin.

How to dye arctic fox fur at home
Painting the Arctic fox is carried out according to the same principles. It is necessary to clean it with a solution. If there are stains on the product, they can be removed with a solution of one teaspoon of ammonia and three tablespoons of salt dissolved in one liter of water.
Must be painted on damp pile. After the paint has settled, wash it off in the shower. This type of fur can be dried with a hairdryer.
How to dye fur at home with hair dye
It would seem that there is another way to dye fur at home. It turns out that regular hair dye is great for this. The advantages of this method are that it produces rich color and ease of painting. The downside is that such a rich color does not last that long, about six months.
- In order to radically change the color, the fur coat should be lightened using an oxidizing agent.
- Paint evenly with a special brush.
If you like experiments, try dyeing your fur coat in tonic. It will give a temporary shade, and you will definitely understand your preferences.
We figured out what and how to dye fur at home. After painting, special care is required. You can apply hair balm dissolved in water and rinse it off the product. The fur will get a special color and the product will last much longer. We wish you good luck!

Over time, the fur wears out, may fade in places, and lose color saturation. But this is not a reason to send things to the trash bin. After painting, they have a good chance of starting a new life. Ateliers and dry cleaners may convince you that old products will not withstand such exposure, or they may demand a considerable amount for the procedure. We will tell you how to easily and inexpensively dye fur at home.
Where to dye a fur product?
There are several options for resolving the issue of where to send fur for dyeing. They differ in price and range of services offered. Before you decide, check which ones are available in your city.
- If you have problems with clothes, it is customary to contact the atelier. Fur items are no exception: there are special fur studios that you can contact with questions about repairing and dyeing.
- Some dry cleaners not only wash clothes, but also dye fabrics and fur.
- In factories, fur is dyed without fail, but on an industrial scale. Not all factories can be contacted to ask about painting a particular product.
- It is absolutely easy to dye your fur yourself at home.

How can you dye fur?
Manufacturers claim that coloring occurs according to complex technology using dyes and oxidizing agents. In fact, this technique is almost no different from dyeing at a hairdresser. It turns out that fur can be successfully updated with regular hair dye. After all, the structure of animal hair is very similar to human hair. The described method is safe for strong inner skin (skin from the underside of the pile), reliable and easy to perform. It is suitable for any type of natural pile.
It is important to know that you cannot work with finished products (hats, fur coats, collars) without first stretching them. This is necessary in order to have access to the flesh.
Before you begin, you need to check the condition of the flesh. You need to moisten it with water and try to stretch it. If it does not stretch or tear, you can use paint. Otherwise, it's not worth the risk. You can tint the color with a tint hair balm, following the instructions. The bright and fresh shade lasts as long as paint. In this way, you can dye artificial hair, since it is not as durable as real hair, as well as silver fox, arctic fox, rabbit, and mink.
Instructions for dyeing fur at home
Since the fur is thick and long, you may need 2 packs of paint. This is especially true for the Arctic fox and mink. It is better not to buy the first coloring product you come across, but to prefer proven brands. Having prepared workplace, you can start painting using a two-step method.
Stage 1 - preparation
Necessary for removing grease and dust for high-quality and uniform painting.
- Prepare a cleaning solution: soda, salt, washing powder, a teaspoon per liter of water.
- Clean the lint with a brush.
- Rinse under warm running water.
- Leave until dry.
Stage 2 - painting
- Wear protective plastic or rubber gloves on your hands.
- Prepare the coloring mixture according to the instructions.
- Before you start staining, you need to treat the skin with glycerin (you can replace it with any fatty cream). This will prevent the skin from drying out.
- Apply the mixture as quickly as possible, combing the pile in the direction of natural growth.
- Roll up and place in a plastic bag.
- The paint must be kept on for as long as indicated in the instructions. Compliance with the recommendations is mandatory, otherwise you risk spoiling the material.
- Rinse in warm water with any shampoo.
- Treat with any hair balm for shine and silkiness.
- Rinse off all products with warm running water.
- Rinse in warm water with vinegar added: 1 tablespoon per liter of water. You can use any table vinegar.
- Dry gently with a towel.
- Lubricate the inside again with a thin layer of glycerin. Gently knead it.
The drying process must take place in natural conditions– at room temperature, without the use of heaters, hair dryers and air conditioners. Drying time can be up to 3 days depending on the length and thickness of the fur. Speeding up the process can lead to damage to the fibers.
After drying, the product may shrink. To avoid this, pin it to any hard surface with the inside down. For example, push pins or sewing pins to a wooden board.
Blonde and red shades are difficult to cover with any hair dye, no matter how much it costs. Therefore, you can repeat the procedure 2-3 times, especially if you want to get a rich black color.
It’s easiest when you just want to enhance the tone or make it darker. In order to properly dye the fur of an arctic fox, which is white or another light color, at home, you need to very carefully paint the pile down to the very roots and the core itself. This can be done with a regular toothbrush and then combed in different directions with a comb. It is worth keeping in mind that chemical exposure to the skin does not go unnoticed. To change its color with minimal risk, use a regular marker.
When dyeing dark items in lighter colors, you need to be prepared for an unexpected result. Of course, like hair, fur with dark pigment must first be bleached. To avoid surprises, cut a small piece of material and work on it. You can experiment by mixing colors in different proportions to achieve the desired result.
You should not try to change the color of an entire fur coat or other large items on your own. Such a surface cannot be painted by hand evenly and quickly. The described methods are suitable for relatively small items, for example, a fur collar on a sheepskin coat or jacket.
You don't have to worry about the color fading. Dyed hair retains its color even with regular contact with water and detergents for many weeks on end, and clothes get wet much less often. Results are guaranteed for 7-8 months. After this, the staining procedure can be repeated. The most durable color is red.

What to do if you can't use paint?
The described technique is not suitable for artificial fur, since its structure is not as strong as that of natural fur. Also, if you are afraid of damaging or staining the product, your skin is weak, unreliable, or there are any other reasons to avoid chemicals for hair, you can get by with shoe paint for suede, velor and nubuck in cans. This method will cope well with masking burnt areas. According to the instructions, you need to shake the can and apply the substance from a distance of 20 cm. To ensure that the color is evenly distributed over the entire surface, after application the paint can be “smeared” with a napkin.
If you are no longer going to wear clothes with fur and don’t know what to do with it, consider decorating your handbag, headphones and other accessories with stylish, bright and colorful fur inserts.
If you are still not sure whether to paint your product and how exactly to do it, contact a workshop and consult with specialists.
After proper dyeing in compliance with all the rules and instructions, the fur will become as soft and thick as before, and will look completely new!
During prolonged wear, a fur product may lose its attractiveness only because the fur has faded either from the sun or from exposure to precipitation. In this case, there are two ways of restoration. Specialized enterprises that provide dry cleaning and painting services know how to do this efficiently. But you can give a “second life” to your favorite thing at home. By following the instructions and applying some of your own imagination, you will be able to create a unique work of art.
If the age of a fur product is indicated by its color, then you can update the appearance by painting.
For gray astrakhan, use only black or Brown color. Mink is dyed in its native colors in order to restore faded shades. Black or brown pigment is suitable for mouton products. Fur items in beige tones are dyed in all shades of brown to enhance the intensity of the native color. Choose a paint one or two shades darker for the job.
The main condition for high-quality and uniform coloring is. The best remedy An alkaline solution proved to be suitable for cleaning; its composition is as follows:
- soda (dessert spoon);
- salt (dessert spoon);
- ammonia (teaspoon);
- about 15 drops of detergent
- 1 liter of water.
Lightening yellowed white fur is an additional element of color restoration. To do this, use a solution with hydrogen peroxide (a teaspoon) and ammonia (10 drops). This product can remove yellowness from the fur of a silver fox. When processing with this composition, deep soaking should be avoided. First, make a test on an inconspicuous area of the product. 15 minutes is enough for lightening. We must remember that a longer process will make the ends brittle.
Chalk and starch help remove yellowness from the fur of a gray rabbit for a while. The powder is rubbed evenly and with little effort over the top of the pile and shaken off. This method will not harm the product, so it can be used often. Gray rabbit fur is dyed with hair pigment. There is also an absolutely safe method, in which you carefully apply it to the entire surface of the product with a brush. water solution blues. The composition should be light blue.
To enhance faded raccoon fur, use hair dye with a lightening effect, as a result of which the product will look gold-plated or silver-plated.
You can renew fox fur with thick potassium permanganate. Treat it carefully with a sponge, not allowing things to get wet.
The faded ends of the fur are painted with suede spray paint. Spray the product slowly, keeping a distance of about 70 centimeters between the fur coat and the sprayer.
How to dye fur with hair dye?
Hair dyes are suitable for dyeing an arctic fox or a mink on your own. This method has been tested in practice and always gives positive results when painting not too old things. It is better to first test the effect of even high-quality products on a small, inconspicuous area of the product.
To dye fur at home, you will need to follow these steps:
- Straightening the strands of natural fur, apply a thin layer of fatty cream or glycerin to the flesh.
- Gently moisturize the entire fur surface.
- Apply the product as carefully as when coloring your hair.
- Leave it for a while. Duration of dyeing - according to the instructions on the packaging with the dye.
- To enhance the effect of the paint, apply a saline solution evenly over the entire surface.
- Wash off the paint under the flow of water from the shower.
- Remove excess with rags or blotting paper.
After drying, the fur is combed, observing the natural direction of the pile. This dye lasts on a fur item for up to six months, and this is often enough to make the item look renewed.
A simplified option for saturating the tone is to color it with a tinting shampoo (according to the instructions on the package).
Homemade stencils are used for painting with multi-colored paints. The spots are painted one at a time.
Faux fur is easier to dye. You can use tinting shampoo and hair dye. The sequence of actions is as follows:
- Before dyeing begins, the product is fixed.
- Apply the product in the direction of the fibers.
- Leave the paint to soak in. The time must match the instructions in the instructions.
- After the procedure, the fur is washed, dried and combed.
Experts do not recommend experimenting with coloring new things.
Home or professional dyeing extends the life of a fur product for a short time. After some time, the pigment comes off and the item becomes faded again.


